はじめに
This guide shows how to open up your Mac Pro to replace or install additional RAM modules. You can complete this procedure without using any tools.
Before you begin, be sure to purchase the correct RAM modules. The Mac Pro supports registered (R-DIMM) and Load-Reduced (LR-DIMM) RAM—but you cannot mix R-DIMMs and LR-DIMMs in a single computer. Apple installs R-DIMMs in Mac Pros configured with 192GB of RAM or less; setups with more than 192GB will have LR-DIMMs instead.
In addition, 8-core Mac Pros will come with 2666MHz (PC4-21300) RAM installed, while other models will have 2933 MHz (PC4-23400) RAM. You can install RAM modules with different clock ratings into the same Mac Pro. Click here for Apple’s RAM specifications.
Note: The Mac Pro only accepts RAM modules installed in specific amounts and configurations. For more details, check out Apple’s official guide.
必要な工具と部品
-
-
Shut down your Mac Pro.
-
Touch the metal housing with a bare hand to discharge any static electricity.
-
Unplug all cables from the Mac Pro, including the power cable.
-
-
-
Lift the top latch up from its recess.
-
Twist the latch counter-clockwise until it won't turn anymore—about a quarter-turn.
-
Slowly lift the housing up by the latch.
-
-
-
-
The Mac Pro contains two RAM banks, each covered with a plastic cover.
-
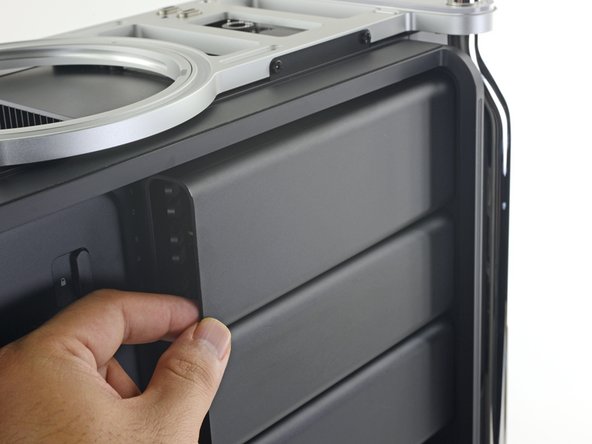
Use your finger to slide the RAM cover latch to the left to unlock the cover.
-
-
-
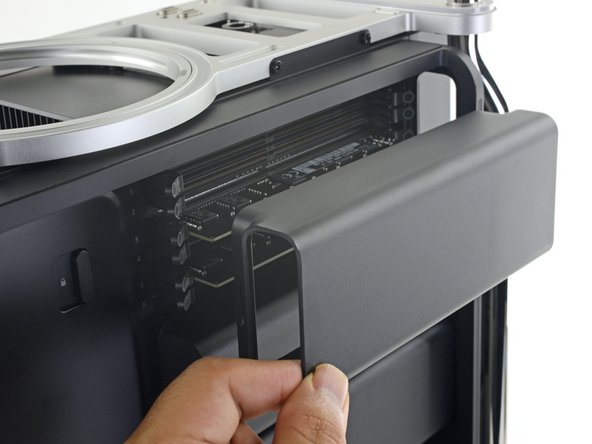
Swing the released edge back towards the computer slightly, then pull the cover straight out and away from the Mac Pro.
-
-
-
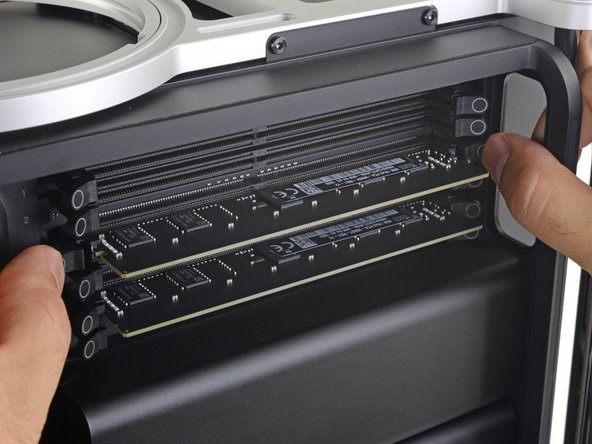
Use your fingers to push and spread the two lock tabs outwards, in order to unlock and eject the RAM module.
-
-
-
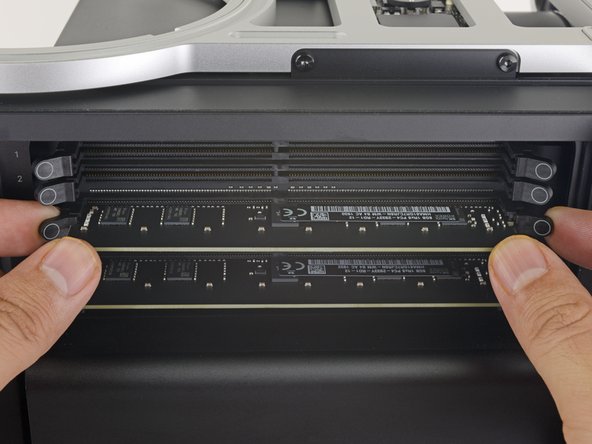
Grasp the RAM module by the edges and pull it straight out of the slot.
-
-
-
Gently slide the module into the slot.
-
Visually confirm that the notch between the module's gold contacts aligns with the receiving slot.
-
Firmly push both edges of the module to seat the RAM module into the slot.
-
Make sure that both locking tabs rest securely in the RAM module's indents.
-


To reassemble your Mac Pro, follow these instructions in reverse order.
If your Mac Pro won’t boot up after installing new RAM, check the status indicator light to help determine the problem.
Check out our Mac Pro Answers community for troubleshooting help.
Take your e-waste to an R2 or e-Stewards certified recycler.
5 の人々がこのガイドを完成させました。

