メインコンテンツにスキップ
リペアコミュニティに参加 - アカウントの作成

Logitech UE MegaBoom Power Button Replacement

必要な工具と部品

    1. Logitech UE MegaBoom Power Button Replacement, Outer Mesh: 手順 1、 3の画像 1 Logitech UE MegaBoom Power Button Replacement, Outer Mesh: 手順 1、 3の画像 2 Logitech UE MegaBoom Power Button Replacement, Outer Mesh: 手順 1、 3の画像 3
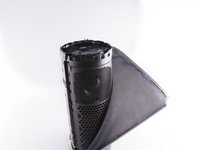
      • Locate the ends of the speaker.

      • Put a plastic opening tool in-between the rubber end and the mesh.

      • Apply a upward force in order to pry open the end.

      • Apply this procedure to the other side as well.

      • Will take force.

      • Using metal tools may permanently mar your device.

      FixBotに聞いてみる

      コメントを追加

    2. Logitech UE MegaBoom Power Button Replacement: 手順 2、 3の画像 1 Logitech UE MegaBoom Power Button Replacement: 手順 2、 3の画像 2 Logitech UE MegaBoom Power Button Replacement: 手順 2、 3の画像 3
      • Take the Jimmy and pry up the rubber strip that has the volume buttons on it.

      • You will hear clicks as it pries up, don't worry.

      • Remove all the rubber you pried off.

      FixBotに聞いてみる

      コメントを追加

    3. Logitech UE MegaBoom Power Button Replacement: 手順 3、 2の画像 1 Logitech UE MegaBoom Power Button Replacement: 手順 3、 2の画像 2
      この手順で使用する道具:
      Tweezers
      $4.99
      • Use tweezers to lift end of plastic retainer on edge of mesh out of its channel.

      • Work the plastic retainer out of the channel all the way around the speaker.

      • Be gentle, it is easy to damage the fabric.

      • Repeat for other side.

      FixBotに聞いてみる

      コメントを追加

    1. Logitech UE MegaBoom Power Button Replacement, Power Button: 手順 4、 2の画像 1 Logitech UE MegaBoom Power Button Replacement, Power Button: 手順 4、 2の画像 2
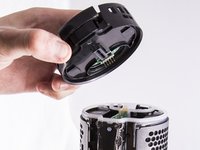
      • Locate the end of the speaker which contains the power button.

      • The circuit board which contains the power button should be visible.

      • Grasp the outer rim of this end cap and pull in an upward motion.

      • This might require some force.

      FixBotに聞いてみる

      コメントを追加

    2. Logitech UE MegaBoom Power Button Replacement: 手順 5、 1の画像 1
      • Insert a opening tool between the circuit board and one of the black clips which is holding the board in place.

      • Using the opening tool pry up on the clip allowing the board to be freed. Pry up on the second clip to fully release the board.

      • Using your fingers lift the board out of place.

      FixBotに聞いてみる

      コメントを追加

終わりに

To reassemble your device, follow these instructions in reverse order.

キャンセル: このガイドを終了できませんでした。

ある他の人がこのガイドを完成しました。

作成者

2人の作成者と共同で作成されました。

Oscar Ambriz

メンバー登録日: 09/27/17

978 ポイント

6のガイドは作成済み

チーム

Cal Poly, Team S9-G2, Banghart Fall 2017 Cal Poly, Team S9-G2, Banghart Fall 2017人のメンバー

CPSU-BANGHART-F17S9G2

4 メンバー

24のガイドは作成済み

3件のガイドコメント

Will it still be waterproof after repairing?

TechBrush - 返信 共有

that would be a negative unless you really know what you are doing and can waterproof it

Justin Doubikin - 返信 共有

nice piece. i was able to follow the guide and got it right taking out the board. please where can one purchase the power button board. thanks

tony - 返信 共有

コメントを追加

統計データ:

過去 24時間: 3

過去 7 日: 12

過去 30 日: 57

今までの合計 5,462