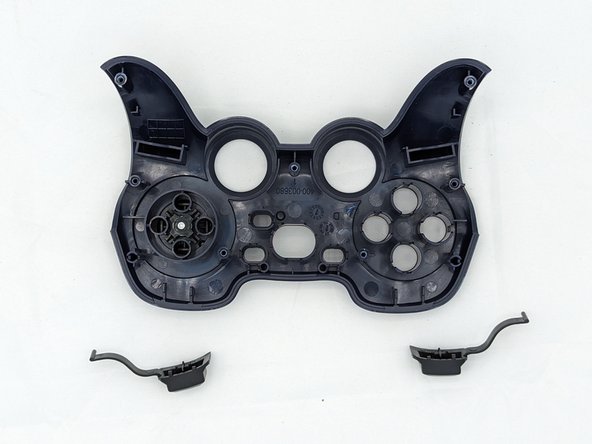
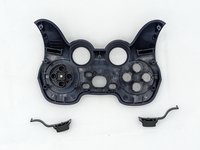
メインコンテンツにスキップ
リペアコミュニティに参加 - アカウントの作成

Logitech Gamepad F310 Bumpers Replacement

必要な工具と部品

  1. Logitech Gamepad F310 Bumpers Replacement, Case: 手順 1、 2の画像 1 Logitech Gamepad F310 Bumpers Replacement, Case: 手順 1、 2の画像 2
    • Use a Phillips #1 screwdriver to remove all seven 3 mm screws that secure the rear case.

  2. Logitech Gamepad F310 Bumpers Replacement: 手順 2、 2の画像 1 Logitech Gamepad F310 Bumpers Replacement: 手順 2、 2の画像 2
    • Press along the seams of the controller and gently pull the front and rear case apart.

    • If necessary, use an opening tool to help pry the front and rear case apart.

    • Make sure to open the controller with the front facing down so that the buttons do not fall out.

  3. Logitech Gamepad F310 Bumpers Replacement: 手順 3、 1の画像 1
    • Separate the front and rear case.

    • There are two side panels on the controller that come apart as well. When putting them back together, they slot into place on the sides of the controller.

  4. Logitech Gamepad F310 Bumpers Replacement, Bumpers: 手順 4、 2の画像 1 Logitech Gamepad F310 Bumpers Replacement, Bumpers: 手順 4、 2の画像 2
    • Grip the bumper and pull directly up to remove it.

    • Repeat for the other side if necessary.

終わりに

You're all finished! To reassemble your device, follow these instructions in reverse order.

ある他の人がこのガイドを完成しました。

作成者

3人の作成者と共同で作成されました。

Graydon

メンバー登録日: 02/05/24

187 ポイント

2のガイドは作成済み

チーム

University of North Texas, Team 2-6, Kilpatrick Spring 2024 University of North Texas, Team 2-6, Kilpatrick Spring 2024人のメンバー

UNT-KILPATRICK-S24S2G6

4 メンバー

6のガイドは作成済み

0件のガイドコメント

コメントを追加

統計データ:

過去 24時間: 0

過去 7 日: 9

過去 30 日: 59

今までの合計 942