メインコンテンツにスキップ

Lenovo Yoga 900-13ISK Webcam Replacement

必要な工具と部品

  1. Lenovo Yoga 900-13ISK Webcam Replacement, Back Cover: 手順 1、 2の画像 1 Lenovo Yoga 900-13ISK Webcam Replacement, Back Cover: 手順 1、 2の画像 2
    • Using a T5 Torx screwdriver, remove the ten 5.5 mm screws from the back case of the laptop.

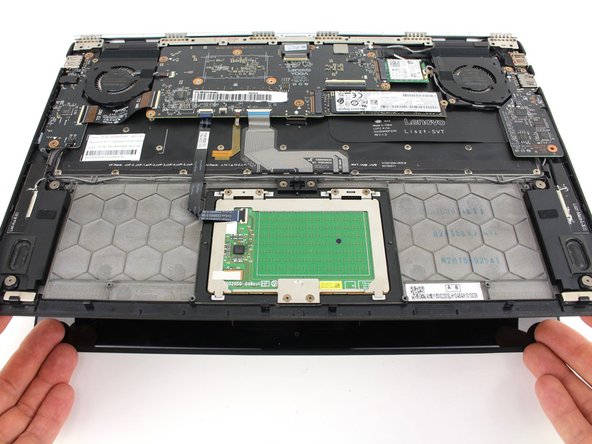
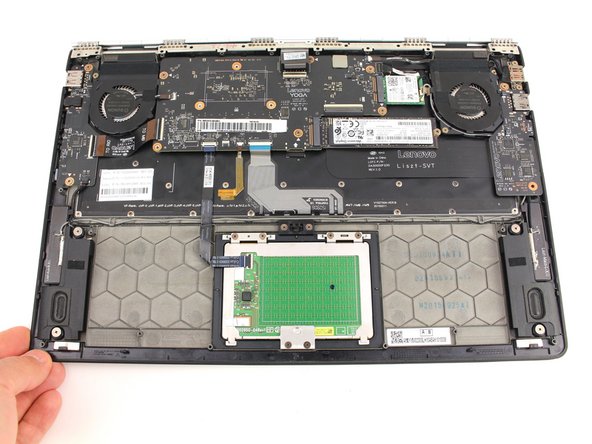
  2. Lenovo Yoga 900-13ISK Webcam Replacement: 手順 2、 3の画像 1 Lenovo Yoga 900-13ISK Webcam Replacement: 手順 2、 3の画像 2 Lenovo Yoga 900-13ISK Webcam Replacement: 手順 2、 3の画像 3
    • Use a spudger to pry open the back case at the hinges of the laptop.

    • There are plastic clips around the perimeter of the case holding down the back cover. These will need to be popped off as the cover is removed.

    • Use your fingers to completely pop off the back cover.

  3. Lenovo Yoga 900-13ISK Webcam Replacement, Battery: 手順 3、 3の画像 1 Lenovo Yoga 900-13ISK Webcam Replacement, Battery: 手順 3、 3の画像 2 Lenovo Yoga 900-13ISK Webcam Replacement, Battery: 手順 3、 3の画像 3
    • Remove the five 3.6 mm screws from the battery with a Phillips #00 screwdriver.

  4. Lenovo Yoga 900-13ISK Webcam Replacement: 手順 4、 3の画像 1 Lenovo Yoga 900-13ISK Webcam Replacement: 手順 4、 3の画像 2 Lenovo Yoga 900-13ISK Webcam Replacement: 手順 4、 3の画像 3
    • Grab the bottom corners of the battery and gently pull the battery until the cable disconnects from the connector on the motherboard.

    • While reassembling, use a plastic spudger to push the battery cable into the connector on the underside of the motherboard. This will be easier to do before the screws are replaced.

  5. Lenovo Yoga 900-13ISK Webcam Replacement, Display Assembly: 手順 5、 3の画像 1 Lenovo Yoga 900-13ISK Webcam Replacement, Display Assembly: 手順 5、 3の画像 2 Lenovo Yoga 900-13ISK Webcam Replacement, Display Assembly: 手順 5、 3の画像 3
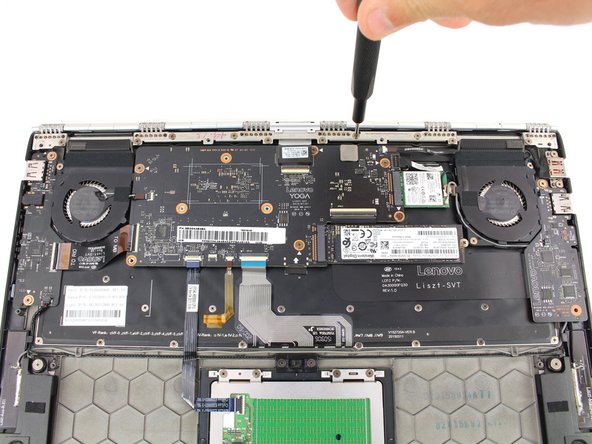
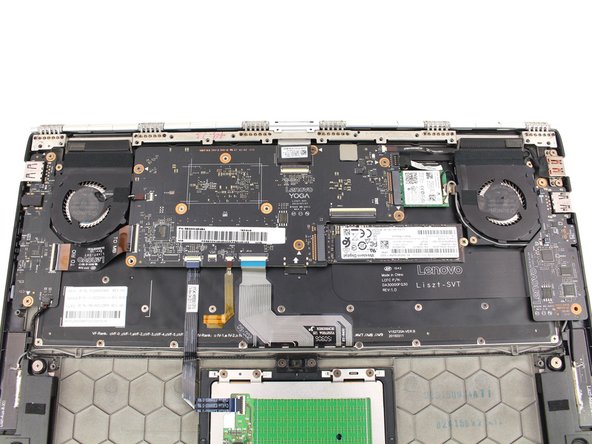
    • Remove the ten 3.6 mm screws from the hinge bracket with a Phillips #00 screwdriver.

  6. Lenovo Yoga 900-13ISK Webcam Replacement: 手順 6、 3の画像 1 Lenovo Yoga 900-13ISK Webcam Replacement: 手順 6、 3の画像 2 Lenovo Yoga 900-13ISK Webcam Replacement: 手順 6、 3の画像 3
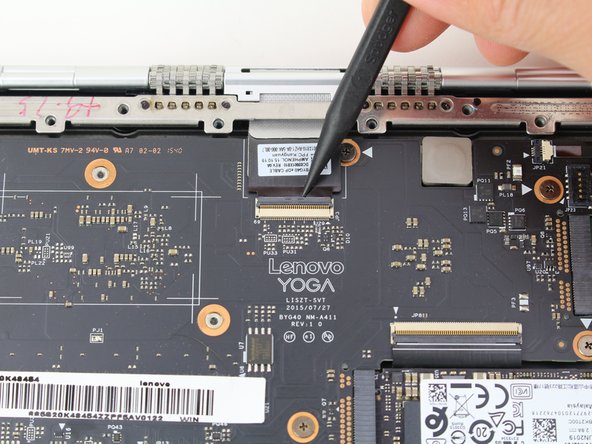
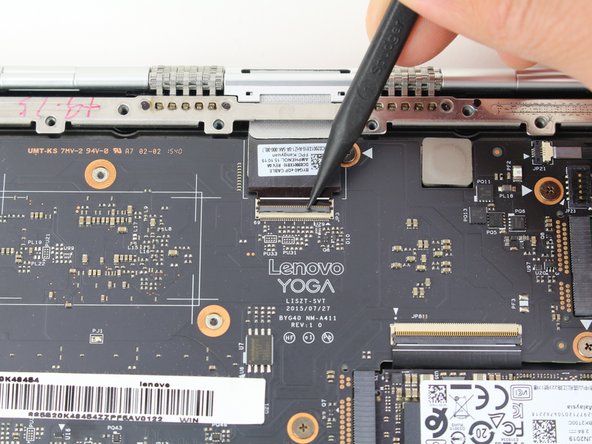
    • Use the pointed end of a spudger to lift the hinged locking flap of the display ZIF connector.

  7. Lenovo Yoga 900-13ISK Webcam Replacement: 手順 7、 2の画像 1 Lenovo Yoga 900-13ISK Webcam Replacement: 手順 7、 2の画像 2
    • Pull out the display cable with a pair of blunt nose tweezers.

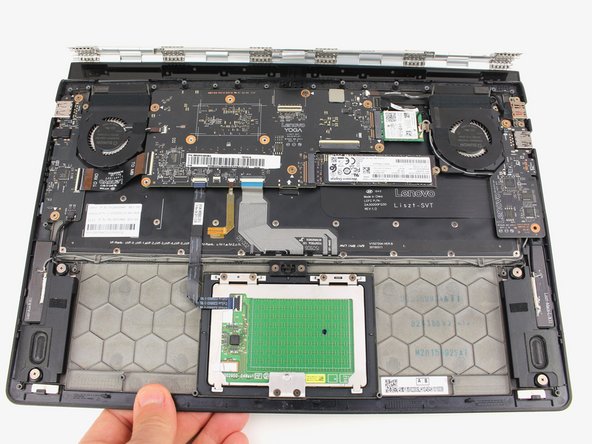
  8. Lenovo Yoga 900-13ISK Webcam Replacement: 手順 8、 3の画像 1 Lenovo Yoga 900-13ISK Webcam Replacement: 手順 8、 3の画像 2 Lenovo Yoga 900-13ISK Webcam Replacement: 手順 8、 3の画像 3
    • Open the laptop to a 45° angle, then close the laptop.

    • This raises the hinge, which will stay open as the bottom case is lowered.

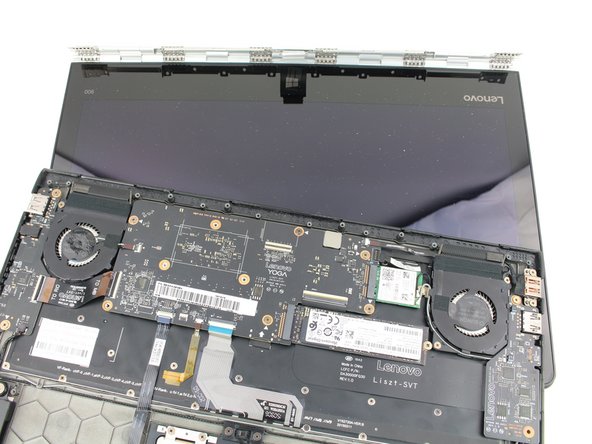
  9. Lenovo Yoga 900-13ISK Webcam Replacement: 手順 9、 3の画像 1 Lenovo Yoga 900-13ISK Webcam Replacement: 手順 9、 3の画像 2 Lenovo Yoga 900-13ISK Webcam Replacement: 手順 9、 3の画像 3
    • Slide the bottom case away from the hinge.

    • If the hinge is catching on the case, either go back to the previous step and open the case a bit more, or manually open the hinge with your fingers.

  10. 注意: 手順 10-16 は、作業進行中としてマークされている ガイド から引用されています。

    Lenovo Yoga 900-13ISK Webcam Replacement, Display Opening Prereq: 手順 10、 1の画像 1
    • Apply heat along the bottom and left edges of the screen, either with a heat gun or iOpener.

    • Check out our iOpener Instructions if you need help!

  11. Lenovo Yoga 900-13ISK Webcam Replacement: 手順 11、 2の画像 1 Lenovo Yoga 900-13ISK Webcam Replacement: 手順 11、 2の画像 2
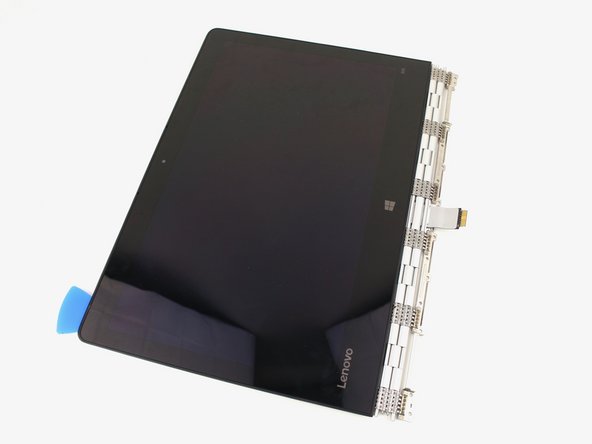
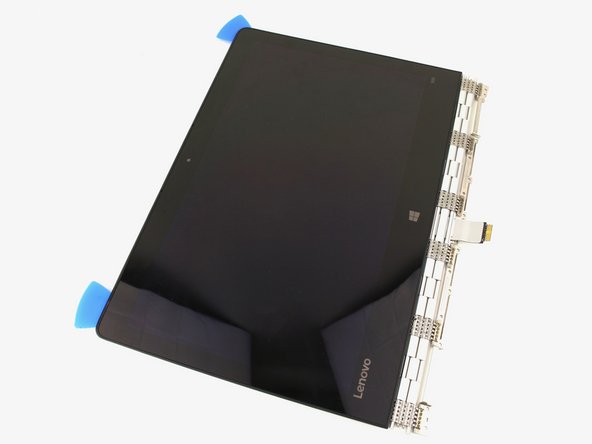
    • Insert an opening pick into the corner of the screen and slide it around slightly to create an opening.

  12. Lenovo Yoga 900-13ISK Webcam Replacement: 手順 12、 3の画像 1 Lenovo Yoga 900-13ISK Webcam Replacement: 手順 12、 3の画像 2 Lenovo Yoga 900-13ISK Webcam Replacement: 手順 12、 3の画像 3
    • Insert a second opening pick and slide it along the side of the display, cutting away the adhesive.

  13. Lenovo Yoga 900-13ISK Webcam Replacement: 手順 13、 1の画像 1
    • Use a heat gun or iOpener to apply heat to the top and side edge that have not yet been opened.

  14. Lenovo Yoga 900-13ISK Webcam Replacement: 手順 14、 3の画像 1 Lenovo Yoga 900-13ISK Webcam Replacement: 手順 14、 3の画像 2 Lenovo Yoga 900-13ISK Webcam Replacement: 手順 14、 3の画像 3
    • Continue cutting away the adhesive on the top and side edges of the display.

  15. Lenovo Yoga 900-13ISK Webcam Replacement: 手順 15、 3の画像 1 Lenovo Yoga 900-13ISK Webcam Replacement: 手順 15、 3の画像 2 Lenovo Yoga 900-13ISK Webcam Replacement: 手順 15、 3の画像 3
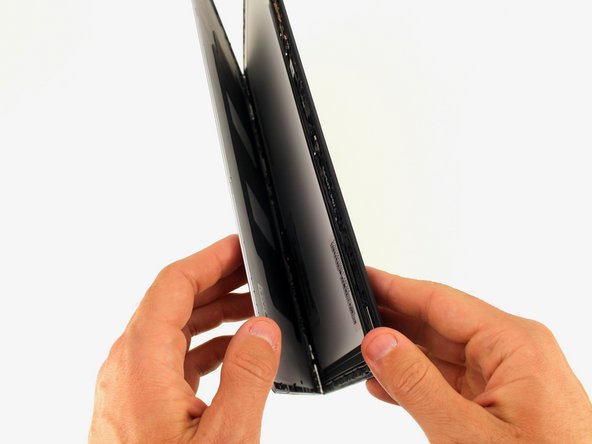
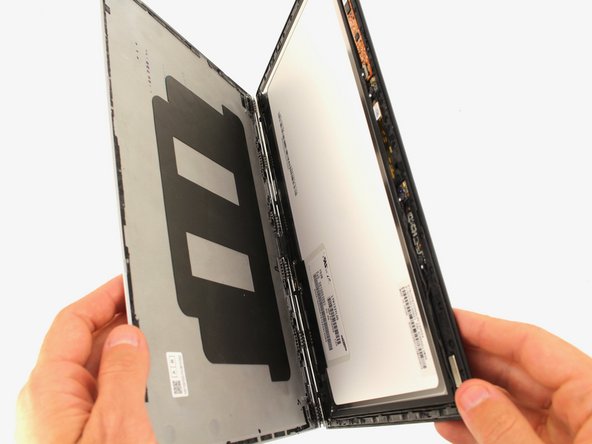
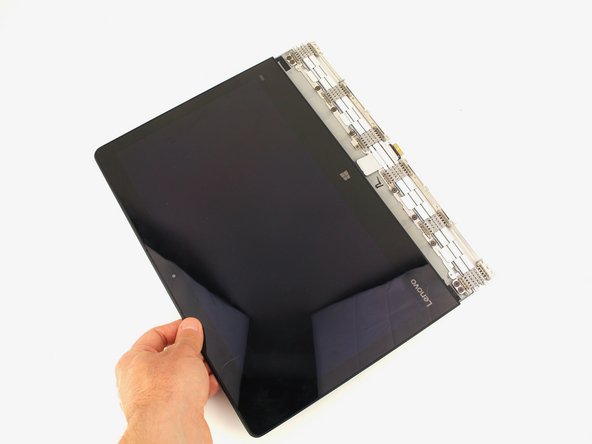
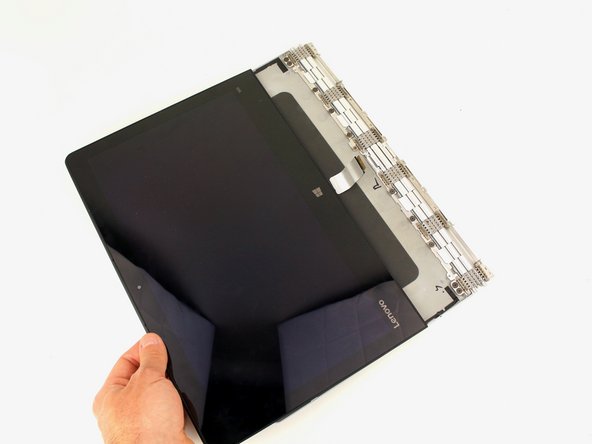
    • Open the display casing along the top edge.

  16. Lenovo Yoga 900-13ISK Webcam Replacement: 手順 16、 3の画像 1 Lenovo Yoga 900-13ISK Webcam Replacement: 手順 16、 3の画像 2 Lenovo Yoga 900-13ISK Webcam Replacement: 手順 16、 3の画像 3
    • Pull the display cable out from the hinge mechanism.

  17. Lenovo Yoga 900-13ISK Webcam Replacement, Webcam: 手順 17、 3の画像 1 Lenovo Yoga 900-13ISK Webcam Replacement, Webcam: 手順 17、 3の画像 2 Lenovo Yoga 900-13ISK Webcam Replacement, Webcam: 手順 17、 3の画像 3
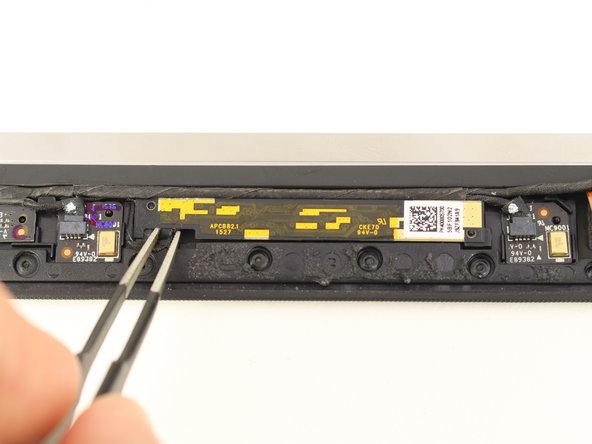
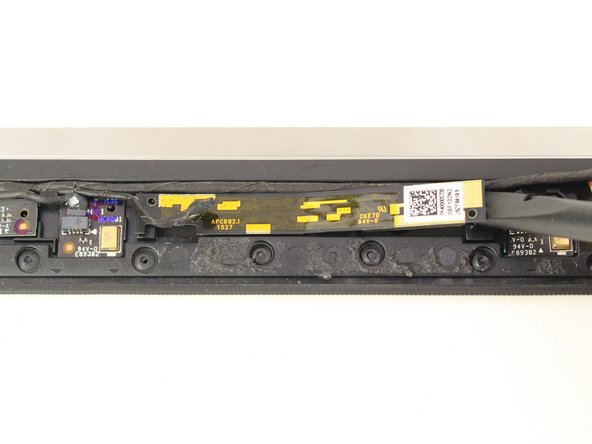
    • Gently remove the cable from the yellow-accented webcam board on the top of the display panel with a pair of blunt nose tweezers.

  18. Lenovo Yoga 900-13ISK Webcam Replacement: 手順 18、 3の画像 1 Lenovo Yoga 900-13ISK Webcam Replacement: 手順 18、 3の画像 2 Lenovo Yoga 900-13ISK Webcam Replacement: 手順 18、 3の画像 3
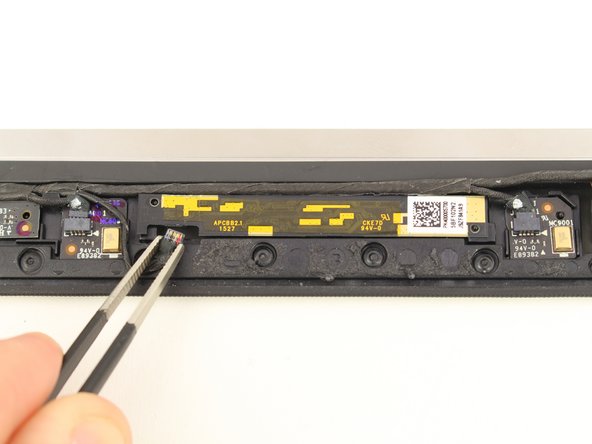
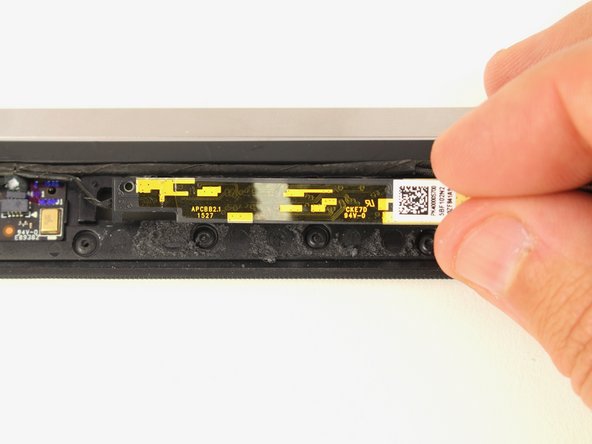
    • Gently lift up the webcam board with a spudger.

    • There will be strong adhesive holding the board in place, so be careful not to bend or break the delicate board.

終わりに

To reassemble your device, follow these instructions in reverse order.

Austin Blakely

メンバー登録日: 03/11/19

19,506 ポイント

53のガイドは作成済み

チーム

iFixit iFixit人のメンバー

Staff

135 メンバー

16,820のガイドは作成済み

0 件のコメント

コメントを追加

統計データ:

過去 24時間: 1

過去 7 日: 4

過去 30 日: 16

今までの合計 217