メインコンテンツにスキップ
リペアコミュニティに参加 - アカウントの作成

Lenovo Yoga 3 Pro Display Assembly Replacement

必要な工具と部品

  1. Lenovo Yoga 3 Pro Display Assembly Replacement, Battery: 手順 1、 1の画像 1
    • Before opening your laptop, make sure it is powered off.

    • Remove the ten 3.3 mm screws from the base cover using a T5 Torx screwdriver.

    FixBotに聞いてみる
  2. Lenovo Yoga 3 Pro Display Assembly Replacement: 手順 2、 1の画像 1
    • Slide the plastic opening tool between the base cover and the frame to pry open the computer.

    • Slowly go around the entire perimeter of the computer until all edges are loose.

    • Make sure the plastic opening tool doesn't go too far into the device.

    FixBotに聞いてみる
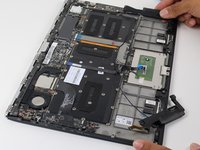
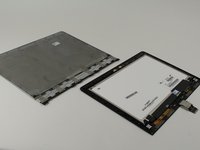
  3. Lenovo Yoga 3 Pro Display Assembly Replacement: 手順 3、 1の画像 1
    • Remove the panel and place it in a safe location.

    FixBotに聞いてみる
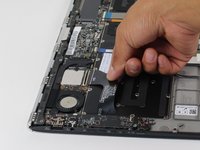
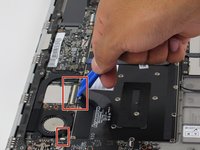
  4. Lenovo Yoga 3 Pro Display Assembly Replacement: 手順 4、 1の画像 1
    • Remove the six 3.5 mm screws surrounding the battery using a Phillips 00 screwdriver.

    FixBotに聞いてみる
  5. Lenovo Yoga 3 Pro Display Assembly Replacement: 手順 5、 1の画像 1
    この手順で使用する道具:
    Tweezers
    $4.99
    • Using either tweezers or your fingers, disconnect the black battery cable by pinching either side of the connector and pulling towards the battery.

    FixBotに聞いてみる
  6. Lenovo Yoga 3 Pro Display Assembly Replacement: 手順 6、 1の画像 1
    • Carefully lift and remove the battery.

    FixBotに聞いてみる
  7. Lenovo Yoga 3 Pro Display Assembly Replacement, Speakers: 手順 7、 1の画像 1
    • Remove the four 4 mm screws using the Phillips 00 screwdriver.

    FixBotに聞いてみる
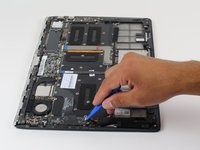
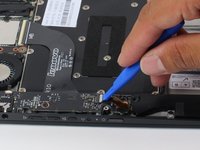
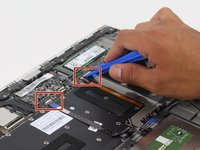
  8. Lenovo Yoga 3 Pro Display Assembly Replacement: 手順 8、 2の画像 1 Lenovo Yoga 3 Pro Display Assembly Replacement: 手順 8、 2の画像 2
    • Using the plastic opening tool, flip open tab as shown.

    FixBotに聞いてみる
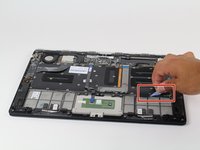
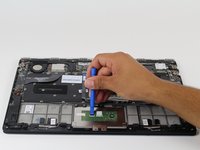
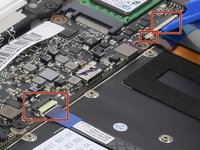
  9. Lenovo Yoga 3 Pro Display Assembly Replacement: 手順 9、 3の画像 1 Lenovo Yoga 3 Pro Display Assembly Replacement: 手順 9、 3の画像 2 Lenovo Yoga 3 Pro Display Assembly Replacement: 手順 9、 3の画像 3
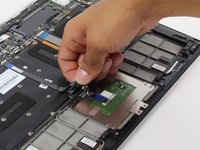
    • Remove the adhesive tape.

    • Flip open the ribbon connecting tab.

    • Carefully lift the ribbon connector from its adhesive.

    FixBotに聞いてみる
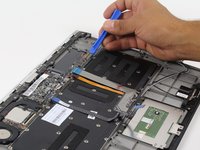
  10. Lenovo Yoga 3 Pro Display Assembly Replacement: 手順 10、 2の画像 1 Lenovo Yoga 3 Pro Display Assembly Replacement: 手順 10、 2の画像 2
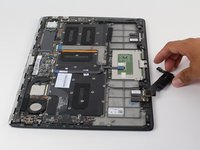
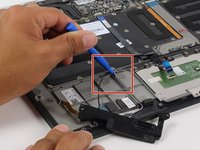
    • Remove the speaker and set it on the side.

    • Use the plastic opening tool to remove the cables.

    • Be careful of other cables.

    FixBotに聞いてみる
  11. Lenovo Yoga 3 Pro Display Assembly Replacement: 手順 11、 2の画像 1 Lenovo Yoga 3 Pro Display Assembly Replacement: 手順 11、 2の画像 2
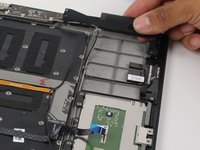
    • Removing the other speaker by unwinding cables.

    • Lift both speakers carefully.

    FixBotに聞いてみる
  12. Lenovo Yoga 3 Pro Display Assembly Replacement, USB Ports: 手順 12、 2の画像 1 Lenovo Yoga 3 Pro Display Assembly Replacement, USB Ports: 手順 12、 2の画像 2
    • Use the plastic opening tool to flip open the tab on each ribbon connector as shown.

    • Ribbon connectors can be fragile, so be gentle when disconnecting them.

    FixBotに聞いてみる
  13. Lenovo Yoga 3 Pro Display Assembly Replacement: 手順 13、 1の画像 1
    • Remove the three indicated 3.5 mm screws using the Philips 00 screwdriver.

    FixBotに聞いてみる
  14. Lenovo Yoga 3 Pro Display Assembly Replacement: 手順 14、 1の画像 1
    • Remove the USB assembly.

    • If this is the side that was not working, then follow the steps backwards from here to put it back together.

    FixBotに聞いてみる
  15. Lenovo Yoga 3 Pro Display Assembly Replacement: 手順 15、 1の画像 1
    • On the other side of the laptop, remove the two 3.5 mm screws using the Philips 00 screwdriver.

    FixBotに聞いてみる
  16. Lenovo Yoga 3 Pro Display Assembly Replacement: 手順 16、 1の画像 1
    • Remove the two 2.5 mm screws using the Philips 00 screwdriver.

    FixBotに聞いてみる
  17. Lenovo Yoga 3 Pro Display Assembly Replacement: 手順 17、 1の画像 1
    • Use the plastic opening tool to lift the metal cable holders.

    • Exercise caution. Cable holders will break if lifted too far.

    FixBotに聞いてみる
  18. Lenovo Yoga 3 Pro Display Assembly Replacement: 手順 18、 1の画像 1
    • Lift the USB port up and use the plastic opening tool to loop the wires around the USB port.

    FixBotに聞いてみる
  19. Lenovo Yoga 3 Pro Display Assembly Replacement: 手順 19、 1の画像 1
    • Remove the USB assembly using the plastic opening tool.

    FixBotに聞いてみる
  20. Lenovo Yoga 3 Pro Display Assembly Replacement: 手順 20、 1の画像 1
    • Disconnect the WiFi card from the USB assembly.

    • Be careful with the connectors on the WiFi card as they are fragile.

    FixBotに聞いてみる
  21. Lenovo Yoga 3 Pro Display Assembly Replacement: 手順 21、 1の画像 1
    • Pull the second USB hub off.

    • Be careful when pulling out the cable.

    FixBotに聞いてみる
  22. Lenovo Yoga 3 Pro Display Assembly Replacement, Display Assembly: 手順 22、 1の画像 1
    • Remove the four 2mm screws using the Philips 00 screwdriver.

    • Remove the 2.5mm screw using the Philips 00 screwdriver.

    FixBotに聞いてみる
  23. Lenovo Yoga 3 Pro Display Assembly Replacement: 手順 23、 2の画像 1 Lenovo Yoga 3 Pro Display Assembly Replacement: 手順 23、 2の画像 2
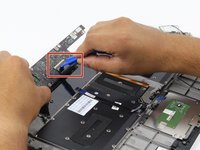
    • Open the three ribbon connecting tabs.

    FixBotに聞いてみる
  24. Lenovo Yoga 3 Pro Display Assembly Replacement: 手順 24、 2の画像 1 Lenovo Yoga 3 Pro Display Assembly Replacement: 手順 24、 2の画像 2
    • Lift the board with the plastic opening tool.

    • Be careful lifting the board.

    • Open the pin connector.

    • Do not lift the board completely so as not to pull the ribbon connector.

    FixBotに聞いてみる
  25. Lenovo Yoga 3 Pro Display Assembly Replacement: 手順 25、 2の画像 1 Lenovo Yoga 3 Pro Display Assembly Replacement: 手順 25、 2の画像 2
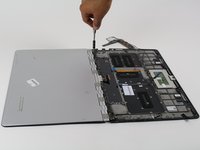
    • Remove the ten 3.5mm screws using the Philips 00 screwdriver.

    • Lay the laptop as shown.

    FixBotに聞いてみる
  26. Lenovo Yoga 3 Pro Display Assembly Replacement: 手順 26、 2の画像 1 Lenovo Yoga 3 Pro Display Assembly Replacement: 手順 26、 2の画像 2
    • Use a spudger to lift the screw cover.

    • Lift slowly and carefully. The cover is very fragile.

    FixBotに聞いてみる
  27. Lenovo Yoga 3 Pro Display Assembly Replacement: 手順 27、 1の画像 1
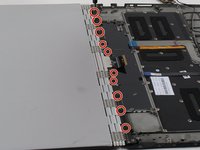
    • Remove the eight 2mm screws using the Philips 00 screw driver.

    FixBotに聞いてみる
  28. Lenovo Yoga 3 Pro Display Assembly Replacement: 手順 28、 2の画像 1 Lenovo Yoga 3 Pro Display Assembly Replacement: 手順 28、 2の画像 2
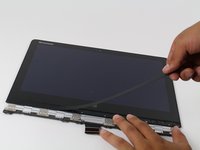
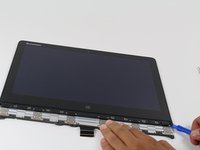
    • Use the plastic opening tool to lift the screen cover from the screen assembly.

    • Do not insert the plastic opener too far in.

    • Slowly go around the perimeter of the screen to loosen all fasteners.

    FixBotに聞いてみる
  29. Lenovo Yoga 3 Pro Display Assembly Replacement: 手順 29、 2の画像 1 Lenovo Yoga 3 Pro Display Assembly Replacement: 手順 29、 2の画像 2
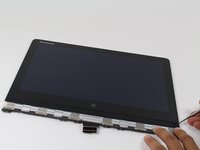
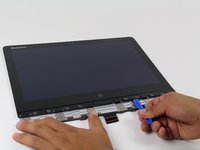
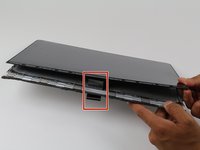
    • Unclip the display assembly by sliding the display down, towards the lower edge of the upper case component. The clips will disengage and you will be able to lift the assembly out easily.

    • Be careful pulling off the assembly as to not rip the ribbon connector shown.

    FixBotに聞いてみる
終わりに

To reassemble your device, follow these instructions in reverse order.

11 の人々がこのガイドを完成させました。

作成者

8人の作成者と共同で作成されました。

Federico LopezCasildo Jr

メンバー登録日: 10/08/15

1,355 ポイント

3のガイドは作成済み

チーム

Cal Poly, Team 12-17, Maness Fall 2015 Cal Poly, Team 12-17, Maness Fall 2015人のメンバー

CPSU-MANESS-F15S12G17

4 メンバー

15のガイドは作成済み

2件のガイドコメント

Thank you. Very useful.

SHINE K. RAJU - 返信 共有

Great guide, but I think you missed the part of removing the fan

302302302v - 返信 共有

コメントを追加

統計データ:

過去 24時間: 5

過去 7 日: 11

過去 30 日: 80

今までの合計 22,956