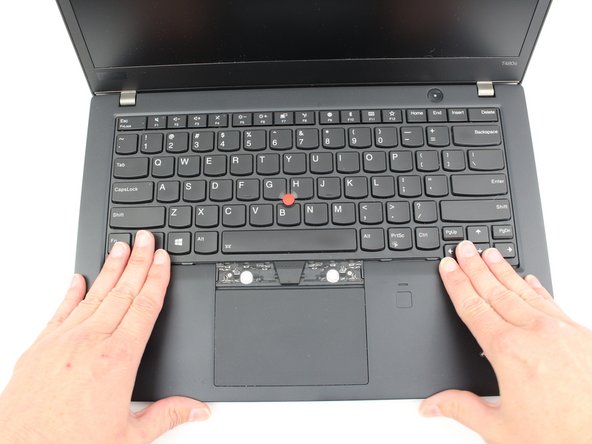
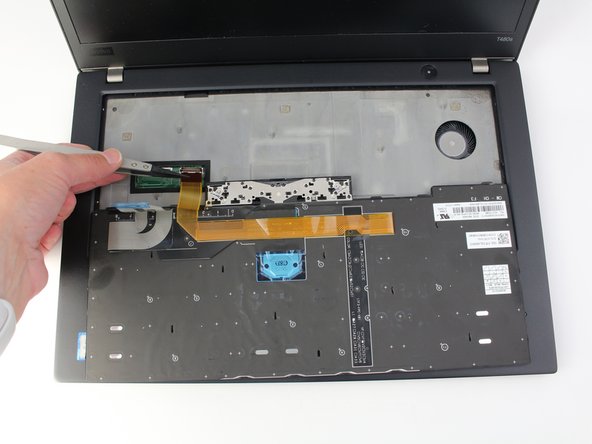
メインコンテンツにスキップ

Lenovo ThinkPad T480s Keyboard Replacement

必要な工具と部品

  1. Lenovo ThinkPad T480s Keyboard Replacement, Keyboard: 手順 1、 3の画像 1 Lenovo ThinkPad T480s Keyboard Replacement, Keyboard: 手順 1、 3の画像 2 Lenovo ThinkPad T480s Keyboard Replacement, Keyboard: 手順 1、 3の画像 3
    • Disable the battery, power down, and unplug your device before you begin.

    • Pry the left and right trackpad buttons up with a spudger.

  2. Lenovo ThinkPad T480s Keyboard Replacement: 手順 2、 2の画像 1 Lenovo ThinkPad T480s Keyboard Replacement: 手順 2、 2の画像 2
    • With a Phillips #0 screwdriver, loosen the two captive screws underneath the left and right trackpad buttons.

  3. Lenovo ThinkPad T480s Keyboard Replacement: 手順 3、 3の画像 1 Lenovo ThinkPad T480s Keyboard Replacement: 手順 3、 3の画像 2 Lenovo ThinkPad T480s Keyboard Replacement: 手順 3、 3の画像 3
    • Wedge the spudger under the front edge of the keyboard to push the keyboard toward the back of the system.

    • Lift the front edge of the keyboard up by a few millimeters.

  4. Lenovo ThinkPad T480s Keyboard Replacement: 手順 4、 2の画像 1 Lenovo ThinkPad T480s Keyboard Replacement: 手順 4、 2の画像 2
    • Gently, pull the keyboard out from the bezel and flip it over.

    • It is connected to to the keyboard and trackpad cables so be sure not to yank it over to avoid tearing them.

  5. Lenovo ThinkPad T480s Keyboard Replacement: 手順 5、 3の画像 1 Lenovo ThinkPad T480s Keyboard Replacement: 手順 5、 3の画像 2 Lenovo ThinkPad T480s Keyboard Replacement: 手順 5、 3の画像 3
    • Use the spudger to disconnect the trackpad cable from the system.

    • For more information on types of connectors, check out this guide.

  6. Lenovo ThinkPad T480s Keyboard Replacement: 手順 6、 3の画像 1 Lenovo ThinkPad T480s Keyboard Replacement: 手順 6、 3の画像 2 Lenovo ThinkPad T480s Keyboard Replacement: 手順 6、 3の画像 3
    • Use the spudger to disconnect the keyboard cable from the system.

  7. Lenovo ThinkPad T480s Keyboard Replacement: 手順 7、 2の画像 1 Lenovo ThinkPad T480s Keyboard Replacement: 手順 7、 2の画像 2
    • Lift the keyboard off of the palm rest.

終わりに

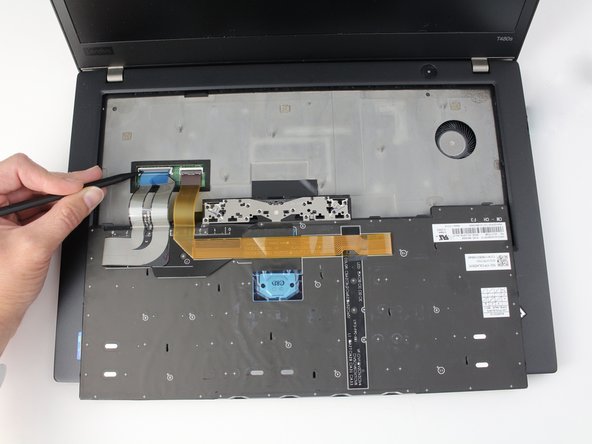
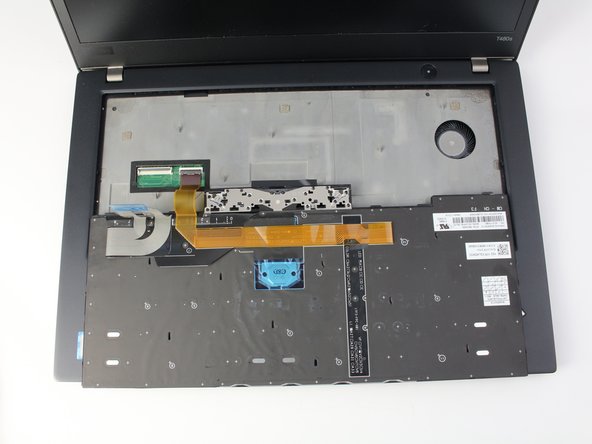
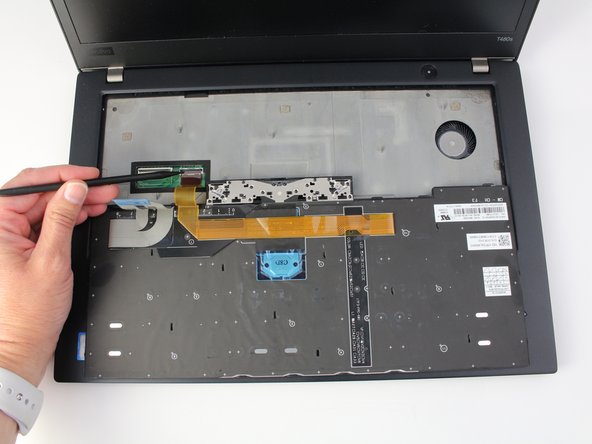
To reassemble your device, follow these instructions in reverse order.

Take your e-waste to an R2 or e-Stewards certified recycler.

Repair didn’t go as planned? Try some basic troubleshooting, or ask our Answers community for help.

2 の人々がこのガイドを完成させました。

作成者

1人の作成者と共同作成されました。

Sarah Westberg

メンバー登録日: 03/11/19

23,257 ポイント

70のガイドは作成済み

チーム

iFixit iFixit人のメンバー

Staff

135 メンバー

17,241のガイドは作成済み

0 件のコメント

コメントを追加

統計データ:

過去 24時間: 9

過去 7 日: 55

過去 30 日: 273

今までの合計 5,840