はじめに
Prepare to have at least ten minutes
必要な工具と部品
-
-
-
Remove battery
-
Locate the six surrounding screws located on the edge of the inner compartment, including the two screws on the metal piece where the battery was once placed.
-
-
-
-
Slide the phone open. Notice on the edges around the keyboard, there is a thick casing. Remove this casing, instructions below…
-
Placing two dominant fingers on the back plate where the battery was, use your thumb finger nail (or prying utensil) and place it on the edge of this thin casing. Firmly, push down with your finger nail (prying utensil) around the casing from left to right. Disconnect casing from keyboard section. Flip the phone over and remove it.
-
-
-
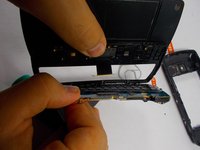
Using your prying tool, lift the green circuit board platform off the black casing and gently disconnect the connection point between the tether and the green circuit board.
-
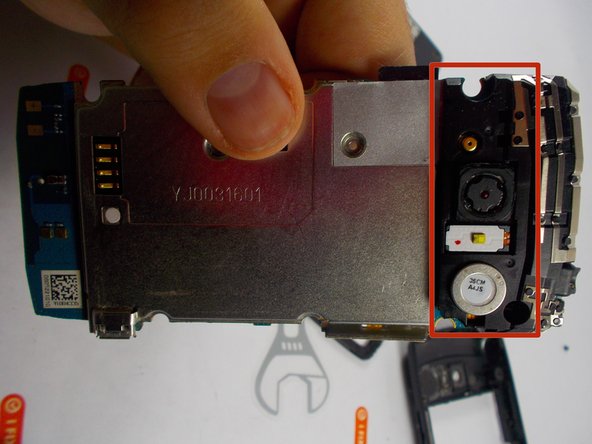
Flip phone over, and notice where the camera lies on the other side, there are three small clips connecting a black casing over the section of the phone. Gently using your hands or the prying tool, take these clips off.
-
-
-
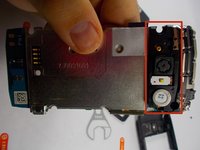
The white rectangle with the yellow square is the flash and it covers the tether section where the camera is. Gently lift up and disconnect flash module.
-
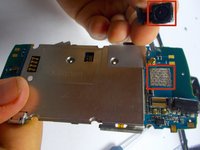
Now the camera connection point is clearly in view. With a calm pressure, pry the camera module off the board. Realign your new camera module and re-apply pressure to the original point it was disconnected from.
-
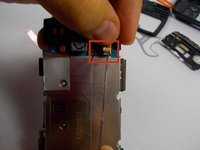
Once this is in place and in the square section it once was, align the connection point of the flash module you removed back to the connection hole, push it down firmly until it is snug in place. Follow the steps backwards to put phone back together.
-


To reassemble your device, follow these instructions in reverse order.
2 の人々がこのガイドを完成させました。