メインコンテンツにスキップ
リペアコミュニティに参加 - アカウントの作成

Kurio Xtreme Touch Screen Replacement

必要な工具と部品

    1. Kurio Xtreme Touch Screen Replacement, Back Panel: 手順 1、 1の画像 1
      • Remove the rubber case by beginning to peel from one of the top corners and continue peeling until the cover is completely removed.

      FixBotに聞いてみる

      コメントを追加

    2. Kurio Xtreme Touch Screen Replacement: 手順 2、 2の画像 1 Kurio Xtreme Touch Screen Replacement: 手順 2、 2の画像 2
      • Unscrew the four 4 mm black screws using a Phillips #000 screw driver.

      • There are two screws on each side of the device (four total).

      FixBotに聞いてみる

      コメントを追加

    3. Kurio Xtreme Touch Screen Replacement: 手順 3、 3の画像 1 Kurio Xtreme Touch Screen Replacement: 手順 3、 3の画像 2 Kurio Xtreme Touch Screen Replacement: 手順 3、 3の画像 3
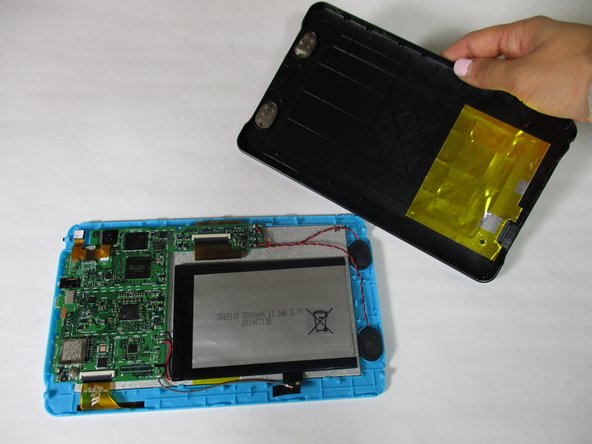
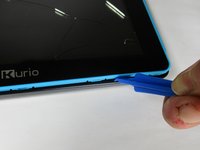
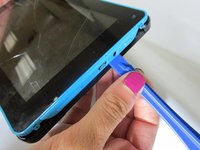
      • Insert the plastic opening tool in between the edges of the blue front casing and black back casing.

      • Slide the plastic opening tool around the perimeter of the device. This may require that you repeatedly run the opening tool up and down the edges of the device.

      • Be sure not to break any of the plastic clamps along the edges of the device when removing the back cover.

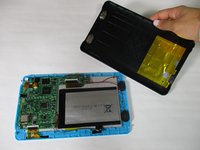
      • Carefully lift the back panel off of the rest of the device.

      FixBotに聞いてみる

      コメントを追加

    1. Kurio Xtreme Touch Screen Replacement, Touch Screen: 手順 4、 1の画像 1
      • Unscrew the three 4 mm screws with a Phillips #000 screwdriver.

      FixBotに聞いてみる

      コメントを追加

    2. Kurio Xtreme Touch Screen Replacement: 手順 5、 2の画像 1 Kurio Xtreme Touch Screen Replacement: 手順 5、 2の画像 2
      • Remove the orange data display ribbon wire above the battery by prying open the ZIF connector with the plastic opening tool.

      FixBotに聞いてみる

      コメントを追加

    3. Kurio Xtreme Touch Screen Replacement: 手順 6、 2の画像 1 Kurio Xtreme Touch Screen Replacement: 手順 6、 2の画像 2
      • Remove the orange data display ribbon wire to the left of the battery by prying open the ZIF connector with the plastic opening tool.

      FixBotに聞いてみる

      コメントを追加

    4. Kurio Xtreme Touch Screen Replacement: 手順 7、 2の画像 1 Kurio Xtreme Touch Screen Replacement: 手順 7、 2の画像 2
      この手順で使用する道具:
      Plastic Cards
      $2.99
      • Slide iFixit's Plastic Card tool or a credit card under the battery to remove the glue that is holding it in place.

      • Be patient and gentle. The glue is strong and may take up to 30 seconds to remove.

      • Carefully lift the battery out of the device and set it aside.

      • Be careful not to disconnect the black and red wires from the motherboard when setting the battery aside.

      FixBotに聞いてみる

      コメントを追加

    5. Kurio Xtreme Touch Screen Replacement: 手順 8、 1の画像 1
      • Carefully remove the speakers out of the plastic molds by lifting up the black and red wires. Set the speakers aside.

      • Be careful not to disconnect the black and red wires from the motherboard when setting the speakers aside.

      FixBotに聞いてみる

      コメントを追加

    6. Kurio Xtreme Touch Screen Replacement: 手順 9、 2の画像 1 Kurio Xtreme Touch Screen Replacement: 手順 9、 2の画像 2
      • Remove the motherboard by lifting it out of the casing and set it aside along with the battery and speakers.

      • The motherboard will still be connected to the battery, speakers, and the gray ground wire.

      FixBotに聞いてみる

      コメントを追加

    7. Kurio Xtreme Touch Screen Replacement: 手順 10、 1の画像 1
      • Carefully peel the ground wire tape off of the blue front screen panel.

      • It is not necessary to peel the tape off of the back of the silver LCD screen.

      FixBotに聞いてみる

      コメントを追加

    8. Kurio Xtreme Touch Screen Replacement: 手順 11、 2の画像 1 Kurio Xtreme Touch Screen Replacement: 手順 11、 2の画像 2
      • Pry open all 7 of the blue clamps by wedging the plastic opening tool under them and bending them backward.

      • The clamps will not "snap" open. This step requires you to actually bend the plastic back.

      FixBotに聞いてみる

      コメントを追加

    9. Kurio Xtreme Touch Screen Replacement: 手順 12、 2の画像 1 Kurio Xtreme Touch Screen Replacement: 手順 12、 2の画像 2
      • Remove the LCD display from the blue touch screen casing by gently shaking them apart in the palm of your hand.

      • This could be stuck on, so you need heat to loosen the glue.

      • Be careful when prying the digitzer from the plastic, if you bend it too much it can break the frame!

      FixBotに聞いてみる

      コメントを追加

終わりに

To reassemble your device, follow these instructions in reverse order.

キャンセル: このガイドを終了できませんでした。

3 の人々がこのガイドを完成させました。

作成者

6人の作成者と共同で作成されました。

Mallory Myers

メンバー登録日: 09/22/15

1,190 ポイント

7のガイドは作成済み

チーム

Baylor, Team 6-10, Williams Fall 2015 Baylor, Team 6-10, Williams Fall 2015人のメンバー

BU-WILLIAMS-F15S6G10

3 メンバー

14のガイドは作成済み

2件のガイドコメント

Thanks - very good guide! For the investment of an iFixit toolset and less than 10 GBP for a replacement digitizer, I was able to restore my little boy's treasure!

Patrick Niessen - 返信 共有

Thank you so much for the Guide!! Helped save Christmas!!! The steps were easy to follow and my kids tablets are back to new.

tdd82 - 返信 共有

コメントを追加

統計データ:

過去 24時間: 1

過去 7 日: 9

過去 30 日: 39

今までの合計 3,999