はじめに
This is an easier part to replace than many others on the Kurio 7. Most require soldering, but this one does not. However, you must exercise extreme care when taking the device apart so that none of the soldered connections are broken. In the event that they are broken, look to our other guides for repair tips.
必要な工具と部品
-
-
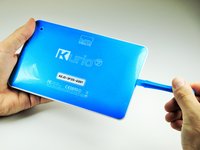
Insert the plastic opening tool in the gap between the front cover and the back cover of the device.
-
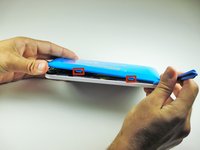
Slide the plastic opening tool around the edge of the device. Gently pry apart the tabs that hold the front cover and the back cover together.
-
-
-
-
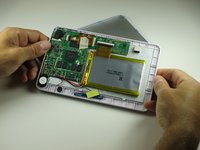
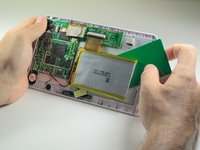
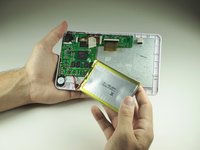
Use a plastic credit card, or other thin object, to separate the battery from the screen.
-
Carefully set the battery aside.
-
-
-
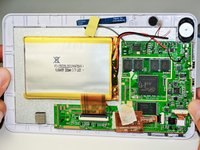
Use a Phillips #00 screwdriver to remove the eight 40mm screws holding the motherboard in place.
-
-
-
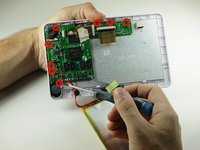
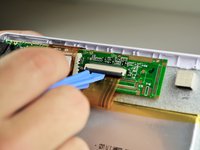
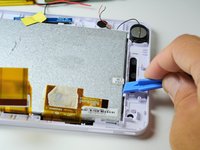
Place the plastic opening tool on the base of the black ribbon clip and pull up, like a lever, to release the mount. This should release the clip holding the ribbon to the mount.
-
Pull the ribbon out of the mount.
-
-
-
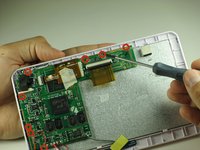
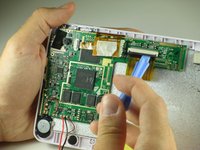
There should be masking tape on the yellow ribbon. Pull the tape off of the motherboard and wrap it around the yellow ribbon.
-
To remove the ribbon from the mount, follow the same steps in Step 3.
-
-
-
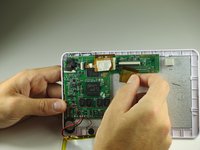
Pull back the ribbons and put the battery near the bottom of the Kurio.
-
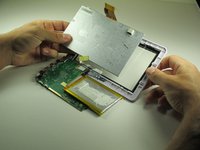
The motherboard is now removed so that other components can be worked on.
-
-
-
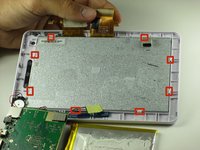
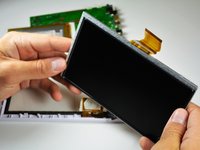
This is tricky, and an extra pair of hands may help. Use the opening tool to pry the screen out from underneath the tabs holding it in place.
-
Once you have created some space between the screen and the cover, slide the opening tool under the screen.
-
Slide the opening tool around the outside of the screen, releasing the tabs as you go along.
-


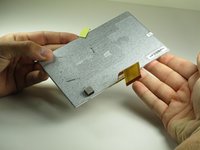
Replace with new screen. Reassemble by completing the steps in reverse order.
14 の人々がこのガイドを完成させました。
チーム

Cal Poly, Team 12-36, Maness Spring 2014 Cal Poly, Team 12-36, Maness Spring 2014人のメンバー
CPSU-MANESS-S14S12G36
4 メンバー
14のガイドは作成済み
4件のガイドコメント
Hey Eric.
Nice guide with Pro-tricks.
Maybe you can tell me, where to buy new LCD-screen for Kurio 7S C13000
I've been Googled all places, but haven't found anything.
Hope to hear from you.
Please send a mail at us.oerbaek@gmail.com
Thanks a lot.
Mr. Skott, Denmark
Ulrich Juul - 返信 共有
Hi can you fix the kurio watch? My son got one for Christmas and broke it already. He has cracked the screen top half won't work but the bottom still works you can see everything still on the screen.
If anyone has any help could you email me please nchambers1@hotmail.co.uk
Hello, I’m Jeremy. I have a Kurio 7s that screen has cracked. It used to wor, but progressively got worse. I used to not be able to get past the home screen. Now, it doesnt turn on and even if charged it always says low battery. If you can fix this, my email is germookd@gmail.com