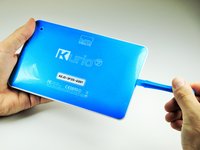
メインコンテンツにスキップ

Kurio 7 Back Panel Replacement

必要な工具と部品

  1. Kurio 7 Back Panel Replacement, Back Panel: 手順 1、 3の画像 1 Kurio 7 Back Panel Replacement, Back Panel: 手順 1、 3の画像 2 Kurio 7 Back Panel Replacement, Back Panel: 手順 1、 3の画像 3
    • Begin by removing the rubber cover from the Kurio 7.

  2. Kurio 7 Back Panel Replacement: 手順 2、 2の画像 1 Kurio 7 Back Panel Replacement: 手順 2、 2の画像 2
    • Remove the four 30 mm Phillips #00 screws from the outer case.

  3. Kurio 7 Back Panel Replacement: 手順 3、 2の画像 1 Kurio 7 Back Panel Replacement: 手順 3、 2の画像 2
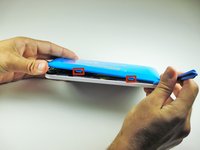
    • Insert the plastic opening tool in the gap between the front cover and the back cover of the device.

    • Slide the plastic opening tool around the edge of the device. Gently pry apart the tabs that hold the front cover and the back cover together.

    • Be careful not to break off the tabs that hold the front cover and the back cover together.

  4. Kurio 7 Back Panel Replacement: 手順 4、 2の画像 1 Kurio 7 Back Panel Replacement: 手順 4、 2の画像 2
    • Once all of the tabs are removed, the back cover should come off easily.

    • Gently remove the back cover. There are wires inside that may get caught on the cover while removing it. These wires are soldered to their components and are difficult to reattach.

終わりに

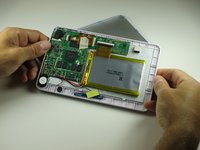
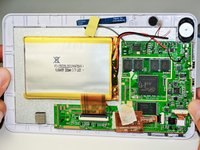
Replace with a new back panel. To reassemble your device, follow these instructions in reverse order.

2 の人々がこのガイドを完成させました。

作成者

10人の作成者と共同で作成されました。

Eric Rice

メンバー登録日: 04/14/14

913 ポイント

3のガイドは作成済み

チーム

Cal Poly, Team 12-36, Maness Spring 2014 Cal Poly, Team 12-36, Maness Spring 2014人のメンバー

CPSU-MANESS-S14S12G36

4 メンバー

14のガイドは作成済み

0 件のコメント

コメントを追加

統計データ:

過去 24時間: 0

過去 7 日: 4

過去 30 日: 15

今までの合計 2,570