メインコンテンツにスキップ
リペアコミュニティに参加 - アカウントの作成

Kodak EasyShare M381 Screen Replacement

必要な工具と部品

  1. Kodak EasyShare M381 Screen Replacement, Battery: 手順 1、 2の画像 1 Kodak EasyShare M381 Screen Replacement, Battery: 手順 1、 2の画像 2
    • First, press in and slide forward the battery latch as indicated by the arrow.

    FixBotに聞いてみる

    コメントを追加

  2. Kodak EasyShare M381 Screen Replacement: 手順 2、 1の画像 1
    • Press down on battery until you hear a click and release it. Battery should easily slide out.

    FixBotに聞いてみる

    コメントを追加

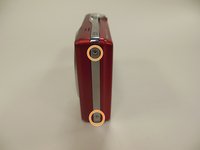
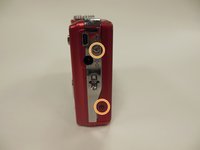
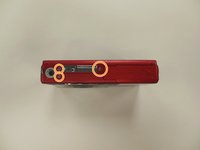
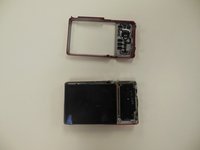
  3. Kodak EasyShare M381 Screen Replacement, Back Panel Frame: 手順 3、 3の画像 1 Kodak EasyShare M381 Screen Replacement, Back Panel Frame: 手順 3、 3の画像 2 Kodak EasyShare M381 Screen Replacement, Back Panel Frame: 手順 3、 3の画像 3
    • Remove the 3.9 mm frame screws using a Phillips #00 screwdriver.

    • Using a magnetized surface to keep from losing screws may be very helpful.

    FixBotに聞いてみる

    コメントを追加

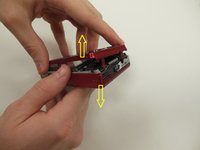
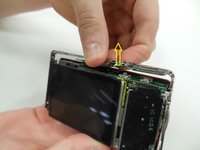
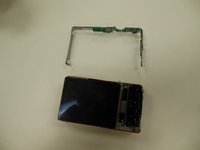
  4. Kodak EasyShare M381 Screen Replacement: 手順 4、 2の画像 1 Kodak EasyShare M381 Screen Replacement: 手順 4、 2の画像 2
    • Using both hands, carefully pull the frame apart from the camera.

    FixBotに聞いてみる

    コメントを追加

  5. Kodak EasyShare M381 Screen Replacement, Screen: 手順 5、 1の画像 1
    • Remove the two 3.85 mm screws on the bottom right of the camera, as indicated.

    FixBotに聞いてみる

    コメントを追加

  6. Kodak EasyShare M381 Screen Replacement: 手順 6、 1の画像 1
    • Remove dial button located on top of camera, by gently pulling up.

    FixBotに聞いてみる

    コメントを追加

  7. Kodak EasyShare M381 Screen Replacement: 手順 7、 2の画像 1 Kodak EasyShare M381 Screen Replacement: 手順 7、 2の画像 2
    • Starting at one side, carefully work the chrome frame off of the camera itself.

    • Be careful not to disturb the shutter or flash buttons on top of the camera.

    FixBotに聞いてみる

    コメントを追加

  8. Kodak EasyShare M381 Screen Replacement: 手順 8、 1の画像 1
    • On the right side of the camera, locate and remove the two 3.25 mm screws as highlighted.

    FixBotに聞いてみる

    コメントを追加

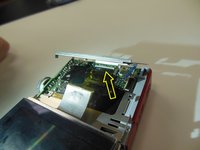
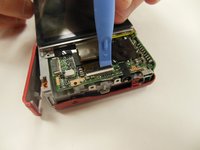
  9. Kodak EasyShare M381 Screen Replacement: 手順 9、 3の画像 1 Kodak EasyShare M381 Screen Replacement: 手順 9、 3の画像 2 Kodak EasyShare M381 Screen Replacement: 手順 9、 3の画像 3
    • Carefully lift the motherboard panel up, pulling towards the left. Make sure you do not rip the blue ribbon.

    • Using a plastic opening tool, gently lift up on the ribbon fastener until it is in an upright position.

    • Slide panel away from camera.

    FixBotに聞いてみる

    コメントを追加

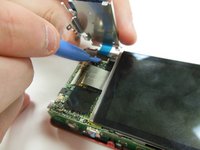
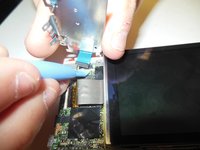
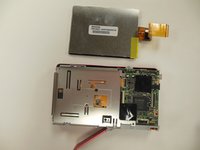
  10. Kodak EasyShare M381 Screen Replacement: 手順 10、 2の画像 1 Kodak EasyShare M381 Screen Replacement: 手順 10、 2の画像 2
    • Using a plastic opening tool, gently lift ribbon clamp as indicated to remove the screen ribbon from the motherboard.

    • Screen should now be detached. Gently lift it away from the base of the camera.

    FixBotに聞いてみる

    コメントを追加

終わりに

To reassemble your device, follow these instructions in reverse order.

キャンセル: このガイドを終了できませんでした。

作成者

4人の作成者と共同で作成されました。

Christina Hamby

メンバー登録日: 01/30/15

449 ポイント

4のガイドは作成済み

チーム

University of Kentucky Louisville, Team 1-4, Rountree Winter 2015 University of Kentucky Louisville, Team 1-4, Rountree Winter 2015人のメンバー

LOUISVILLE-ROUNTREE-W15S1G4

4 メンバー

14のガイドは作成済み

0件のガイドコメント

コメントを追加

統計データ:

過去 24時間: 1

過去 7 日: 8

過去 30 日: 42

今までの合計 883