メインコンテンツにスキップ
リペアコミュニティに参加 - アカウントの作成

Kindle Paperwhite 2nd Generation Motherboard Replacement

必要な工具と部品

    1. Kindle Paperwhite 2nd Generation Motherboard Replacement, Battery: 手順 1、 2の画像 1 Kindle Paperwhite 2nd Generation Motherboard Replacement, Battery: 手順 1、 2の画像 2
      • Insert plastic opening tool into the corners of the Paperwhite and slide around the edge perimeter to remove bezel.

      • Be sure to begin prying along the outer edges , these are the optimal points for removing the bezel.

      • Be careful and do not slide prying tool deeper than 3-4 mm under the side bezel or you could peel off screen protector film.

      FixBotに聞いてみる

      コメントを追加

    2. Kindle Paperwhite 2nd Generation Motherboard Replacement: 手順 2、 2の画像 1 Kindle Paperwhite 2nd Generation Motherboard Replacement: 手順 2、 2の画像 2
      • Using a Screw Driver, Remove the eleven 3.2 mm Phillips 000 screws from corners of the mid-frame and from behind the black strip as shown.

      • Do not forget the screw in the middle of the black adhesive strip.

      FixBotに聞いてみる

      コメントを追加

    3. Kindle Paperwhite 2nd Generation Motherboard Replacement: 手順 3、 1の画像 1
      • Carefully remove the mid-frame from the back cover.

      FixBotに聞いてみる

      コメントを追加

    4. Kindle Paperwhite 2nd Generation Motherboard Replacement: 手順 4、 2の画像 1 Kindle Paperwhite 2nd Generation Motherboard Replacement: 手順 4、 2の画像 2
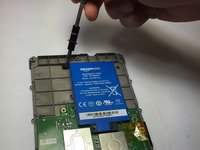
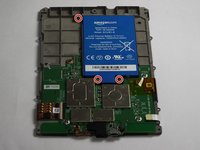
      • Use a screwdriver to remove the three 3.0 mm Phillips 000 screws that are holding the battery in place as shown.

      FixBotに聞いてみる

      コメントを追加

    5. Kindle Paperwhite 2nd Generation Motherboard Replacement: 手順 5、 1の画像 1
      • Carefully lift the battery and remove it from the device.

      FixBotに聞いてみる

      コメントを追加

    1. Kindle Paperwhite 2nd Generation Motherboard Replacement, Motherboard: 手順 6、 2の画像 1 Kindle Paperwhite 2nd Generation Motherboard Replacement, Motherboard: 手順 6、 2の画像 2
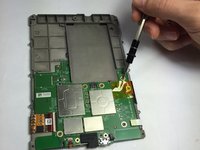
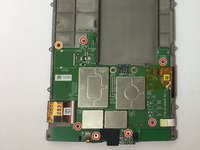
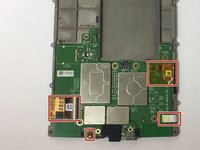
      • Use a screwdriver to remove the seven 3.0 mm Phillips 000 screws that are holding the motherboard in place as shown.

      • Don't lose the washer that is highlighted with an orange marker as shown. It is a necessary component to protect the screw.

      FixBotに聞いてみる

      コメントを追加

    2. Kindle Paperwhite 2nd Generation Motherboard Replacement: 手順 7、 2の画像 1 Kindle Paperwhite 2nd Generation Motherboard Replacement: 手順 7、 2の画像 2
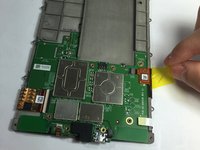
      • Gently disconnect the zif connectors.

      • Some of these connectors are very thin and fragile, handle with care!

      FixBotに聞いてみる

      コメントを追加

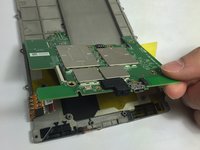
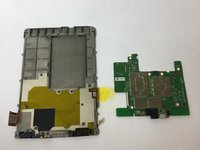
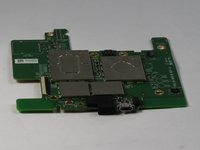
    3. Kindle Paperwhite 2nd Generation Motherboard Replacement: 手順 8、 3の画像 1 Kindle Paperwhite 2nd Generation Motherboard Replacement: 手順 8、 3の画像 2 Kindle Paperwhite 2nd Generation Motherboard Replacement: 手順 8、 3の画像 3
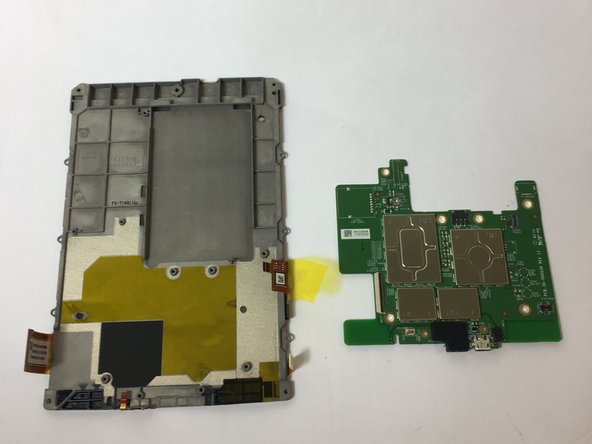
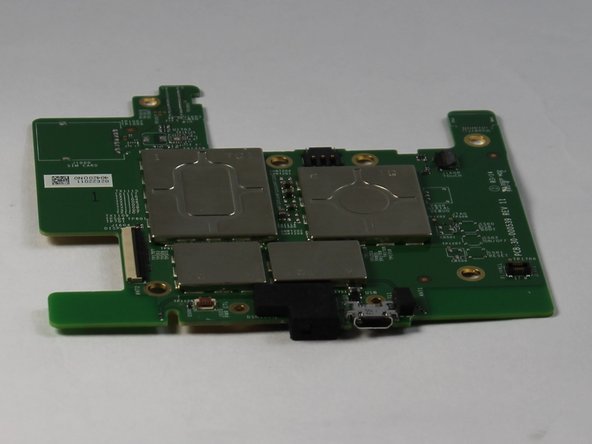
      • Gently remove the motherboard.

      FixBotに聞いてみる

      コメントを追加

終わりに

To reassemble your device, follow these instructions in reverse order.

キャンセル: このガイドを終了できませんでした。

3 の人々がこのガイドを完成させました。

作成者

4人の作成者と共同で作成されました。

Tyler Davis

メンバー登録日: 09/15/16

2,007 ポイント

5のガイドは作成済み

チーム

USF Tampa, Team 11-2, Blackwell Fall 2016 USF Tampa, Team 11-2, Blackwell Fall 2016人のメンバー

USFT-BLACKWELL-F16S11G2

4 メンバー

20のガイドは作成済み

0件のガイドコメント

コメントを追加

統計データ:

過去 24時間: 1

過去 7 日: 15

過去 30 日: 64

今までの合計 4,825