メインコンテンツにスキップ

JD Razor 2000 Fastening Button on Handle Bar Replacement

必要な工具と部品

  1. JD Razor 2000 Fastening Button on Handle Bar Replacement, Pulling Out the String: 手順 1、 3の画像 1 JD Razor 2000 Fastening Button on Handle Bar Replacement, Pulling Out the String: 手順 1、 3の画像 2 JD Razor 2000 Fastening Button on Handle Bar Replacement, Pulling Out the String: 手順 1、 3の画像 3
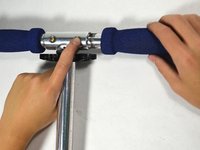
    • Firmly hold the handle bar in place.

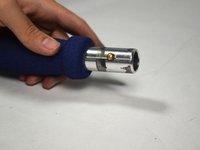
    • Grab with one hand the black removable tip of the handle bar and pull it out.

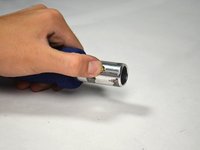
    • Pull out the end of the tied string through the removable tip.

  2. JD Razor 2000 Fastening Button on Handle Bar Replacement, Untying the Knot: 手順 2、 2の画像 1 JD Razor 2000 Fastening Button on Handle Bar Replacement, Untying the Knot: 手順 2、 2の画像 2
    • Untie the knot at the end of the string.

    • If you let go of the string while its in tension, it may recoil far into the other side of the handle bars. To avoid this, bring the end of the string inward towards the hollow section of the handle bar and then carefully let it go.

  3. JD Razor 2000 Fastening Button on Handle Bar Replacement, Pulling Out the Handlebar: 手順 3、 2の画像 1 JD Razor 2000 Fastening Button on Handle Bar Replacement, Pulling Out the Handlebar: 手順 3、 2の画像 2
    • Press down firmly on the golden fastening button located on the handle bar being replaced.

    • While still pressing down on the fastening button, slide the handle bar apart from the T Bar.

    • When re-installing the handlebar (after completion of the guide), you may need a pair of needle-nosed pliers to thread the string back through the handlebar.

  4. JD Razor 2000 Fastening Button on Handle Bar Replacement, Depressing the Button: 手順 4、 2の画像 1 JD Razor 2000 Fastening Button on Handle Bar Replacement, Depressing the Button: 手順 4、 2の画像 2
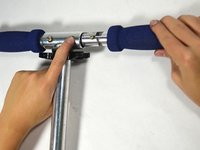
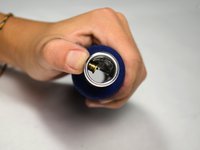
    • Press strongly down on the golden fastening button located on the loose handle bar.

  5. JD Razor 2000 Fastening Button on Handle Bar Replacement, Grasping the Button: 手順 5、 2の画像 1 JD Razor 2000 Fastening Button on Handle Bar Replacement, Grasping the Button: 手順 5、 2の画像 2
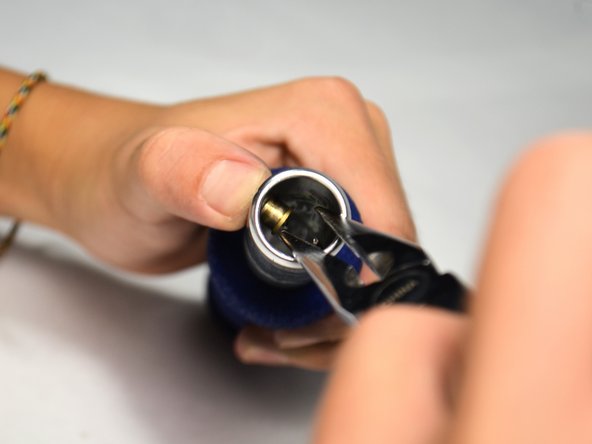
    • Tilt the opening of the handle towards you.

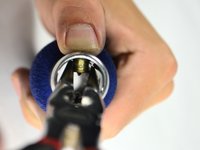
    • Reach in carefully with the small needle-nose pliers and firmly grab the golden fastening button.

  6. JD Razor 2000 Fastening Button on Handle Bar Replacement, Pulling out the Button: 手順 6、 2の画像 1 JD Razor 2000 Fastening Button on Handle Bar Replacement, Pulling out the Button: 手順 6、 2の画像 2
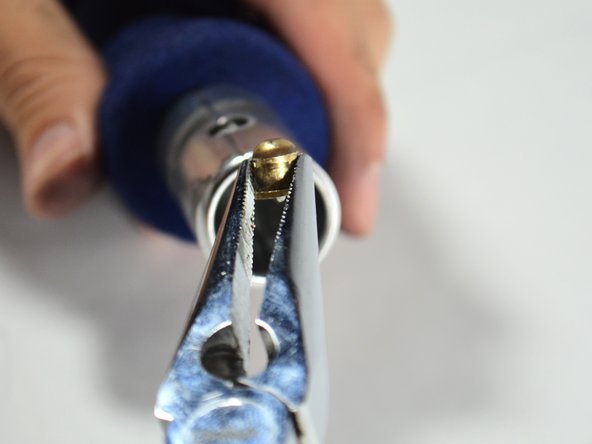
    • Once grasping the golden fastening button tightly with small needle-nosed pliers, carefully and slowly pull it out of the handle bar.

    • Do not pull out the fastening button rapidly. This may result in the button shooting across the room with great speed.

終わりに

To reassemble your device, follow these instructions in reverse order.

ある他の人がこのガイドを完成しました。

作成者

3人の作成者と共同で作成されました。

Kevin Church

メンバー登録日: 10/16/14

297 ポイント

2のガイドは作成済み

チーム

Cal Poly, Team 4-46, Amido Fall 2014 Cal Poly, Team 4-46, Amido Fall 2014人のメンバー

CPSU-AMIDO-F14S4G46

4 メンバー

16のガイドは作成済み

0 件のコメント

コメントを追加

統計データ:

過去 24時間: 0

過去 7 日: 0

過去 30 日: 7

今までの合計 630