メインコンテンツにスキップ

Huawei Mate 20 Rear Glass Replacement

必要な工具と部品

  1. Huawei Mate 20 Rear Glass Replacement, Rear Glass: 手順 1、 1の画像 1
    • Before you begin, switch off your phone.

    • Apply a heated iOpener to the back of the phone to loosen the adhesive beneath the back cover. Apply the iOpener for at least two minutes.

  2. Huawei Mate 20 Rear Glass Replacement: 手順 2、 3の画像 1 Huawei Mate 20 Rear Glass Replacement: 手順 2、 3の画像 2 Huawei Mate 20 Rear Glass Replacement: 手順 2、 3の画像 3
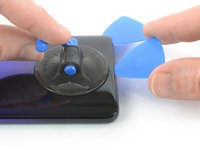
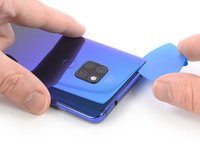
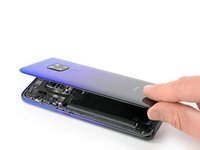
    • Secure a suction handle to the bottom of the back cover, as close to the edge as possible.

    • If the phone's rear glass is cracked, the suction handle may not stick. Try lifting it with strong tape, or superglue the suction handle in place and allow it to cure so you can proceed.

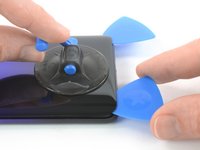
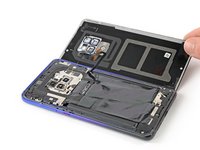
    • Lift the back cover with the suction handle to create a small gap between the cover and the frame.

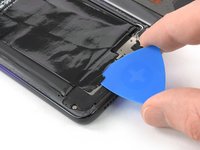
    • Insert an opening pick into the gap.

    • If you have trouble, apply more heat to further soften the adhesive. Follow the iOpener instructions to avoid overheating.

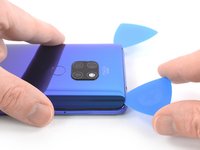
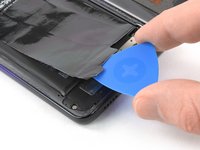
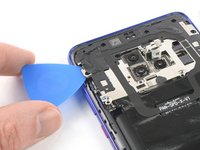
    • Slide the opening pick to the bottom right corner.

  3. Huawei Mate 20 Rear Glass Replacement: 手順 3、 2の画像 1 Huawei Mate 20 Rear Glass Replacement: 手順 3、 2の画像 2
    • Insert a second opening pick and slide it to the bottom left corner to cut the adhesive.

    • Leave the opening picks in place to prevent the adhesive from resealing.

  4. Huawei Mate 20 Rear Glass Replacement: 手順 4、 3の画像 1 Huawei Mate 20 Rear Glass Replacement: 手順 4、 3の画像 2 Huawei Mate 20 Rear Glass Replacement: 手順 4、 3の画像 3
    • Insert a third opening pick at the bottom left corner.

    • Slide the tip of the opening pick from the bottom left corner along the side of the phone to cut the adhesive.

    • Leave the opening pick in its place at the top left corner to prevent the adhesive from resealing.

  5. Huawei Mate 20 Rear Glass Replacement: 手順 5、 2の画像 1 Huawei Mate 20 Rear Glass Replacement: 手順 5、 2の画像 2
    • If the adhesive becomes hard to cut, it has most likely cooled down. Use your iOpener to reheat it.

    • Insert a fourth opening pick under the top left corner of the back cover.

    • Slide the opening pick along the top edge of the phone to cut the adhesive.

    • Leave the opening pick in the top right corner to prevent the adhesive from resealing.

  6. Huawei Mate 20 Rear Glass Replacement: 手順 6、 2の画像 1 Huawei Mate 20 Rear Glass Replacement: 手順 6、 2の画像 2
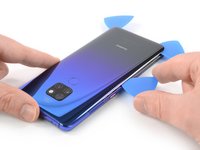
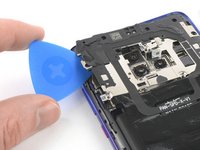
    • Insert a fifth opening pick at the top right corner of the phone.

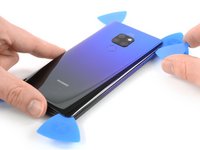
    • Slide the opening pick along the right side to cut the remaining adhesive.

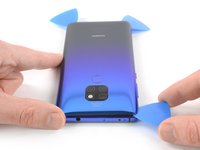
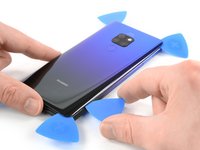
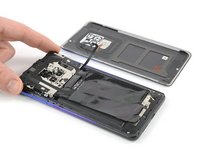
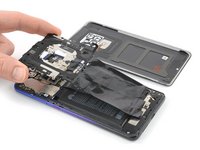
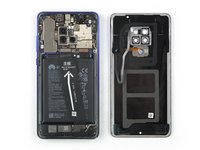
    • Try not to remove the rear glass all the way yet, the fingerprint cable is still connected to the motherboard and rips easily if not handled with care.

  7. Huawei Mate 20 Rear Glass Replacement: 手順 7、 2の画像 1 Huawei Mate 20 Rear Glass Replacement: 手順 7、 2の画像 2
    • Carefully fold the back cover to the right side of the phone assembly. Avoid tension to the fingerprint cable during this procedure.

  8. Huawei Mate 20 Rear Glass Replacement: 手順 8、 2の画像 1 Huawei Mate 20 Rear Glass Replacement: 手順 8、 2の画像 2
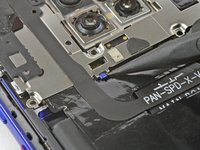
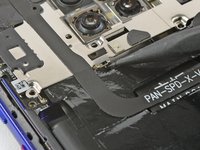
    • Slide an opening pick under the bottom end of the black protective foil that covers the battery. Use the opening pick to loosen the adhesive that attaches the foil to the loudspeaker.

  9. Huawei Mate 20 Rear Glass Replacement: 手順 9、 2の画像 1 Huawei Mate 20 Rear Glass Replacement: 手順 9、 2の画像 2
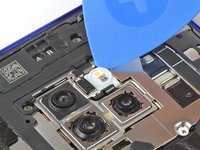
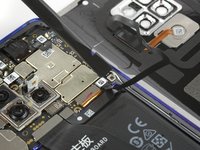
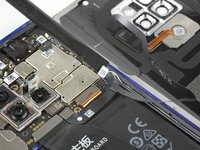
    • Use an opening pick to carefully pry the flash assembly off the motherboard cover and fold it into the direction of the battery. Avoid damaging the flash assembly flex cable.

  10. Huawei Mate 20 Rear Glass Replacement: 手順 10、 1の画像 1
    • Remove the eleven Phillips #00 screws (2.8 mm length).

  11. Huawei Mate 20 Rear Glass Replacement: 手順 11、 2の画像 1 Huawei Mate 20 Rear Glass Replacement: 手順 11、 2の画像 2
    • Use the pointed end of a spudger to unhinge the motherboard cover from the small hook above the left side of the battery.

  12. Huawei Mate 20 Rear Glass Replacement: 手順 12、 2の画像 1 Huawei Mate 20 Rear Glass Replacement: 手順 12、 2の画像 2
    • Slide an opening pick underneath the left side of the motherboard cover.

    • Use the opening pick to pry up the motherboard cover.

  13. Huawei Mate 20 Rear Glass Replacement: 手順 13、 2の画像 1 Huawei Mate 20 Rear Glass Replacement: 手順 13、 2の画像 2
    • Remove the motherboard cover including the NFC and the black protective foil. Avoid damaging the flash assembly during this procedure.

  14. Huawei Mate 20 Rear Glass Replacement: 手順 14、 3の画像 1 Huawei Mate 20 Rear Glass Replacement: 手順 14、 3の画像 2 Huawei Mate 20 Rear Glass Replacement: 手順 14、 3の画像 3
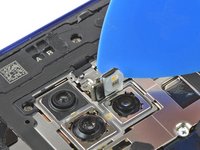
    • Use a spudger to pry up and disconnect the fingerprint flex cable.

    • Before installing fresh adhesive and reassembling, remove any remaining adhesive from the phone, and clean the glued areas with isopropyl alcohol (>90%) and a lint-free cloth.

    • During reassembly, this is a good point to power on your phone and test all functions before sealing it up. Be sure to power your phone back down completely before you continue working.

    • Secure the new back cover with pre-cut adhesive or double-sided adhesive tape. After installing the rear glass, apply pressure for several minutes to help the adhesive form a good bond, such as by placing it under a stack of heavy books.

終わりに

To reassemble your device, follow these instructions in reverse order.

Take your e-waste to an R2 or e-Stewards certified recycler.

Repair didn’t go as planned? Check out our Answers Community for troubleshooting help.

ある他の人がこのガイドを完成しました。

作成者

2人の作成者と共同で作成されました。

Dominik Schnabelrauch

メンバー登録日: 11/23/16

202,860 ポイント

682のガイドは作成済み

チーム

iFixit iFixit人のメンバー

Staff

135 メンバー

16,757のガイドは作成済み

0 件のコメント

コメントを追加

統計データ:

過去 24時間: 3

過去 7 日: 20

過去 30 日: 73

今までの合計 3,184