はじめに
The first step to replacing any internal component in the hoverboard is to remove the external plastic covers. You will need a Phillips #2 screwdriver with a long shaft for this guide.
必要な工具と部品
-
-
-
Flip the hoverboard over so the labels are facing upwards.
-
Remove the twenty 18mm screws using a Phillips #2 screwdriver and twisting counterclockwise.
 FixBotに聞いてみる
-
-
-
-
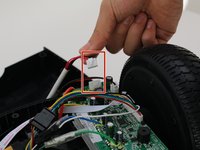
Remove one connector from the non-battery side circuit board.
-
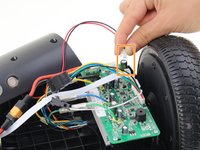
Remove the next connector from the non-battery side circuit board.
-
-


To reassemble your device, follow these instructions in reverse order.
3 の人々がこのガイドを完成させました。
チーム

Cal Poly, Team S13-G2, White Fall 2018 Cal Poly, Team S13-G2, White Fall 2018人のメンバー
CPSU-WHITE-F18S13G2
3 メンバー
4のガイドは作成済み
2件のガイドコメント
I'm gettin nothin at all.. Charger is green.. But absolutely nothing when press the on button.. All the cables are connected.. No lights or anythin.. Can anyone help.
I am getting the 5 red lights. I have followed all the instructions. Is there a site to buy the motherboards that are burned out? Is it financially worth buy both boards and replacing them?
-Christopher Fields, Network Engineer, PC Repair, Grantsville, UT