はじめに
This guide will help you replace the two motherboards inside your Hover-1 Eclipse. The motherboard serves as a unit that houses and connects all the different computer components. To replace the motherboard you must be cautious when navigating the internal wires that connect to it and be comfortable with disconnecting various wires.
必要な工具と部品
-
-
-
Using a Phillips #1 Screwdriver, remove the eight 11mm screws that surround the edge of each shell piece.
-
Using a Phillips #1 Screwdriver, remove the eight 13mm screws that surround the edge of both shell pieces.
-
Remove the right side bottom shell piece.
 FixBotに聞いてみる
-
-
-
On the bottom, left side, shell pieces, there are some white and pink wires connecting the shell and the motherboard.
-
On the circuit board by the speaker, carefully squeeze and unplug the small white headers that connect the shell piece to the hoverboard body.
-
Follow the wires that connect the lights to the motherboard. Disconnect these wires from the motherboard by squeezing and pulling the small white headers.
-
Now you can fully remove the bottom left shell piece.
-
-
-
-
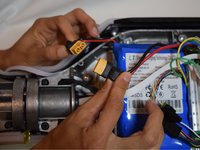
Unplug the yellow tipped plug, Xt60, attached to the red and black cord on the non-battery side.
-
-
-
Unplug the yellow tipped plug attached to the red and black cords.
-
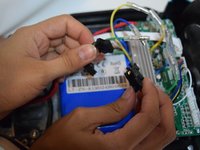
Unplug the black headers attached to the white, skinny cord.
-
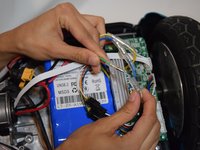
Unplug the green, blue and yellow plugs by pressing down the silver, under the clear plastic and pulling it apart.
-
-
-
Unplug the white header attached to the pink and white cord.
-
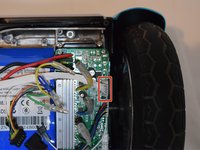
Using a Phillips #1 screwdriver, remove the four screws from each corner of the motherboard.
-
Repeat steps 3 and 4 on the other side.
-
-




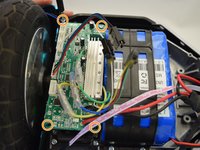

To reassemble your device, follow these instructions in reverse order.

チーム

Cal Poly, Team S12-G4, Regan Fall 2019 Cal Poly, Team S12-G4, Regan Fall 2019人のメンバー
CPSU-REGAN-F19S12G4
4 メンバー
5のガイドは作成済み
7件のガイドコメント
We’re do you get the boards at I really need them
We’re do get the boards?
Hector Ortiz - 返信 共有
Any idea where to buy parts and the price?
