メインコンテンツにスキップ
リペアコミュニティに参加 - アカウントの作成

Holmes Blizzard Fan Oscillation Button Replacement

必要な工具と部品

  1. Holmes Blizzard Fan Oscillation Button Replacement, Front Cage Removal: 手順 1、 3の画像 1 Holmes Blizzard Fan Oscillation Button Replacement, Front Cage Removal: 手順 1、 3の画像 2 Holmes Blizzard Fan Oscillation Button Replacement, Front Cage Removal: 手順 1、 3の画像 3
    • Using a Phillips #2 Screwdriver, remove the 3 screws located on the back of the fan cage.

    • Next, loosen the screw located on the bottom of the fan.

    • The bottom screw does not need to be removed, but only loosened about 3 or 4 turns.

    • The front of the fan's cage is now able to be removed by prying the front away from the back.

    FixBotに聞いてみる

    コメントを追加

  2. Holmes Blizzard Fan Oscillation Button Replacement: 手順 2、 3の画像 1 Holmes Blizzard Fan Oscillation Button Replacement: 手順 2、 3の画像 2 Holmes Blizzard Fan Oscillation Button Replacement: 手順 2、 3の画像 3
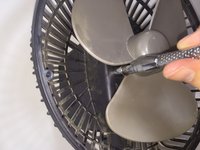
    • Using a 7 mm socket and wrench, remove the 2 nuts that are behind the fan blades.

    • There is a washer located behind each nut. Be sure not to lose these.

    FixBotに聞いてみる

    コメントを追加

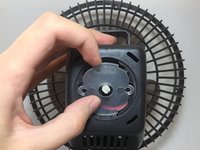
  3. Holmes Blizzard Fan Oscillation Button Replacement, Remove the Oscillation Button Screw: 手順 3、 2の画像 1 Holmes Blizzard Fan Oscillation Button Replacement, Remove the Oscillation Button Screw: 手順 3、 2の画像 2
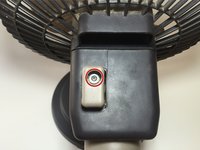
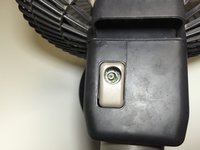
    • On the top of the fan, there is a screw fastening the oscillation button to the gear train within the housing. Remove this screw with the Phillips #0 Screwdriver.

    FixBotに聞いてみる

    コメントを追加

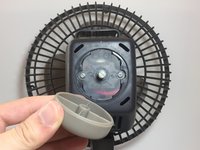
  4. Holmes Blizzard Fan Oscillation Button Replacement, Housing Assembly Removal: 手順 4、 2の画像 1 Holmes Blizzard Fan Oscillation Button Replacement, Housing Assembly Removal: 手順 4、 2の画像 2
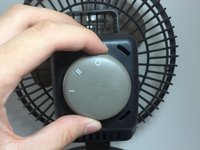
    • The on/off and fan speed nob can be removed by simply pulling it away from the main housing.

    FixBotに聞いてみる

    コメントを追加

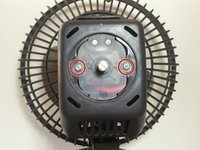
  5. Holmes Blizzard Fan Oscillation Button Replacement: 手順 5、 3の画像 1 Holmes Blizzard Fan Oscillation Button Replacement: 手順 5、 3の画像 2 Holmes Blizzard Fan Oscillation Button Replacement: 手順 5、 3の画像 3
    • Remove the 2 screws holding the clear plastic plate in place with a Phillips #2 Screwdriver.

    • The plate is now free and can be taken out by hand.

    FixBotに聞いてみる

    コメントを追加

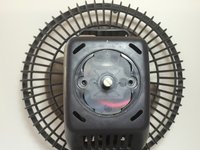
  6. Holmes Blizzard Fan Oscillation Button Replacement: 手順 6、 2の画像 1 Holmes Blizzard Fan Oscillation Button Replacement: 手順 6、 2の画像 2
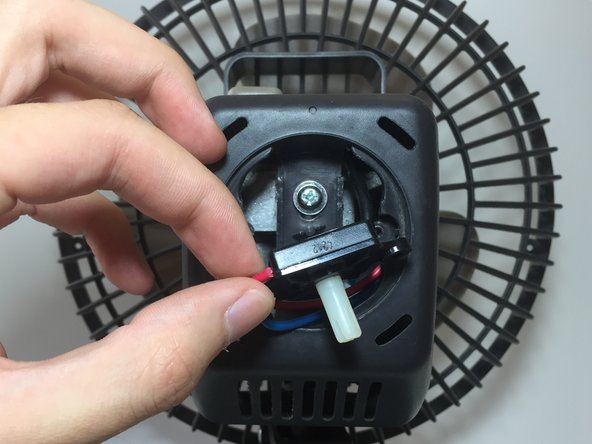
    • The motor switch is also free and can be removed by hand to reveal a screw holding the housing assembly in place.

    • Be sure not to damage the wires on the switch during removal. While you do not need to be overly gentle during this step, excessive force could cause the wires to be pulled out.

    FixBotに聞いてみる

    コメントを追加

  7. Holmes Blizzard Fan Oscillation Button Replacement: 手順 7、 2の画像 1 Holmes Blizzard Fan Oscillation Button Replacement: 手順 7、 2の画像 2
    • Remove the screw that holds the housing assembly in place by using a Phillips #2 Screwdriver.

    FixBotに聞いてみる

    コメントを追加

  8. Holmes Blizzard Fan Oscillation Button Replacement: 手順 8、 3の画像 1 Holmes Blizzard Fan Oscillation Button Replacement: 手順 8、 3の画像 2 Holmes Blizzard Fan Oscillation Button Replacement: 手順 8、 3の画像 3
    • The housing assembly can now be pulled off and pushed to the side to reveal the fan motor and gear train.

    • The oscillation button the was unscrewed earlier will fall out of the housing assembly.

    FixBotに聞いてみる

    コメントを追加

終わりに

To reassemble your device, follow these instructions in reverse order.

キャンセル: このガイドを終了できませんでした。

9 の人々がこのガイドを完成させました。

作成者

3人の作成者と共同で作成されました。

Mike Bolton

メンバー登録日: 07/17/16

570 ポイント

2のガイドは作成済み

4件のガイドコメント

I wanted to let you know how pleasantly surprised I was to find your post when looking for instructions on the oscillation feature of my fan that is just like this one. Thank you for posting.

nancysmyowner - 返信 共有
Thank you for this info. This made it so easy for me to take my fan apart and clean it.

Pamela Dacus - 返信 共有
I used this guide to fix a Holmes Air HAOF-7, which is virtually identical. It was seizing and clicking while oscillating. Oiling the gear assembly fixed it right up. Thanks for posting!

Soft Serve - 返信 共有

Thank you for this information, really helped me out a lot

Zane C. Waldon Sr - 返信 共有

コメントを追加

統計データ:

過去 24時間: 0

過去 7 日: 26

過去 30 日: 103

今までの合計 21,910