はじめに
この修理ガイドでは、HTC myTouch 3Gのトラックボールを安全かつ効果的に清掃または交換する方法を説明します。
必要な工具と部品
-
-
-
リアカバーを下にスライドさせて取り外します。
-
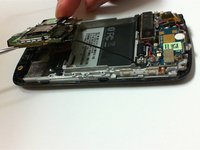
バッテリーを持ち上げて取り外します。次に、SIMカードをスロットからスライドさせて取り出します。
-
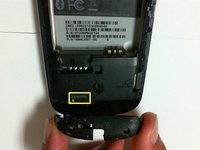
右下にあるSDカードを確認します。押し込んで取り出します。
 FixBotに聞いてみる
-
-
-
オープニングツールまたは指を使用して、携帯電話の底部からアンテナカバーとアンテナパーツを取り外します。
-
オープニングツールまたは爪を携帯電話の縁の隙間に差し込みます。縁に沿って持ち上げ、リアカバーを緩めて取り外します。
-
-
-
-
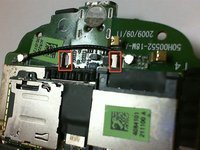
回路基板の下側にある2本の3 mmプラスネジを外す。
-
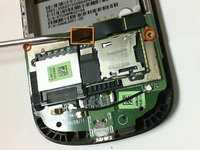
シリアルナンバーのバーコードのすぐ下にある小さなリボンケーブルを探す。安全な取り外し用ツールまたは精密マイナスドライバーを使用して、ケーブルを慎重に外す。
-
-
-
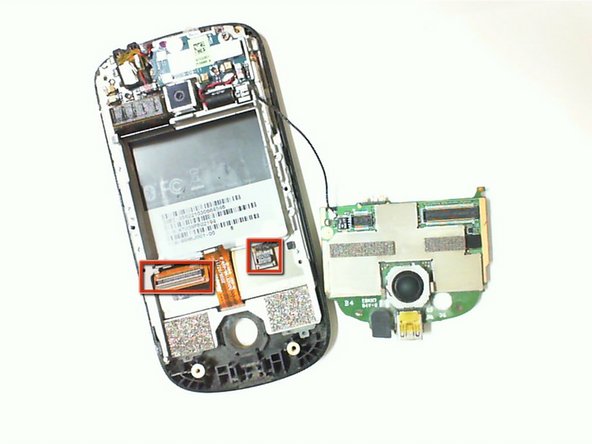
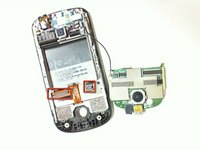
回路基板を右側からゆっくりと持ち上げます。回路基板の下に接続されている2本のリボンケーブルによる抵抗を感じます。ケーブルが外れて抵抗がなくなるまで、右側をゆっくりと持ち上げ続けます。
-
-
-
回路基板を裏返してトラックボールを出します。
-
トラックボールを掃除する場合は、エアダスターを使い、軽く吹き付けてください。エアダスターとトラックボールの間は5-10 cm離します。
-
-
-
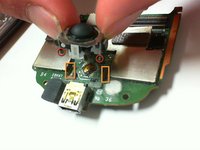
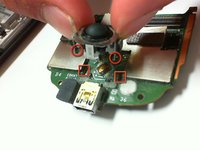
トラックボールを取り外すには、回路基板を裏返し、写真のように2つの突起を確認します。
-
精密マイナスドライバーを使用して回路基板から突起を外し、スロットを通して押し出します。これでトラックボールが回路基板から取り外せます。
-
-
-
新しいトラックボールを、プロングを回路基板のスロットに通すようにして挿入する。
-
トラックボールを配置したら、軽く押し込んでしっかりと固定する。
-
プロングが回路基板に固定されていることを確認する。
-
-


デバイスを再組み立てするには、これらのインストラクションを逆の順番に従って作業を進めてください。
ある他の人がこのガイドを完成しました。
以下の翻訳者の皆さんにお礼を申し上げます:
100%

Translation Botさんは世界中で修理する私たちを助けてくれています! あなたも貢献してみませんか?
翻訳を始める ›
チーム

Cal Poly, Team 2-9, Propen Fall 2012 Cal Poly, Team 2-9, Propen Fall 2012人のメンバー
CPSU-PROPEN-F12S2G9
3 メンバー
35のガイドは作成済み