はじめに
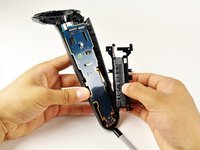
HTC Viveコントローラーのトリガーが故障している可能性があり、長時間の使用でクリックを検出できなくなることがあります。トリガーにアクセスするためには、マザーボードを取り外す必要があります。このガイドでは、トリガーの交換方法を説明します。
必要な工具と部品
-
-
ナイロン製のスパッジャーを使って、端周辺に沿ってスライドしながら、上下ソーサーのカバーを乖離します。
-
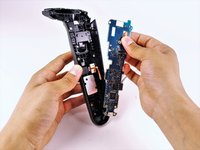
上部ソーサーカバーを手で引き上げて外します。
My top saucer was REALLY stubborn. Don’t force it with your hand, use the spudger to separate it at the seam. Try not to poke your spudger in too deep, there are internals just inside the seam.
The second time around, I learned why it was so stubborn. The picture suggests that you should start at the base of the saucer and work your way around, but that’s backwards.
Start separating with your spudger at the distal side of the saucer and work your way toward the handle. Then for the last part, pull the piece up and away, like peeling a banana. See the second picture for the bottom half of the saucer, below. Do the same on the top.
-
-
-
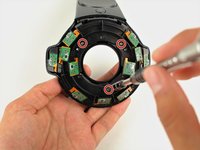
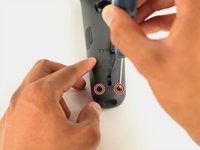
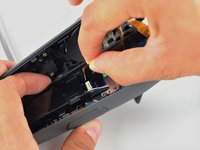
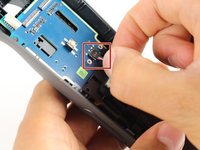
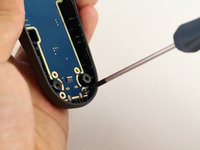
#00 プラスドライバーを使って、露出した上部センサーパネルからシルバーの12.8mmネジを3本外します。
It’s Phillips 0, not 00.
You do not need to remove these screws to remove the bottom saucer. They provide stability to the two halves of the donut.
I had the same experience. Putting the screws back in made the bottom shell easier to remove.
I concur, you don’t need to remove these screws to take the bottom shell off.
I found mine had ph#000 screws size, not ph#00.
please do not remove the Phillips-head screws it is not necessary to remove them.
-
-
-
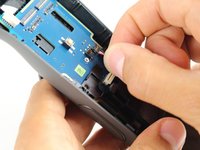
手で下部のソーサーカバーを引き離します。
From what I can tell, there are two clicks on each side? one is quite easy, then the other one seems to require considerable force pushing down and on the side, I had to do it one side at a time and found two YouTube videos performing this step to use as reference. I have the vive pro wands and not the originals, so this may explain the difference. This felt very wrong to me.
-
-
-
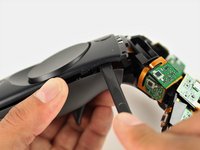
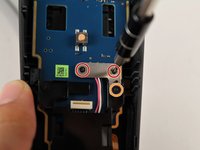
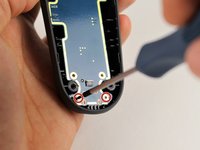
Viveコントローラーを裏返します。露出した下部のソーサーパネルが上向きになります。
-
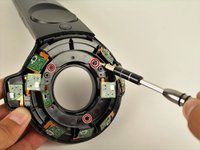
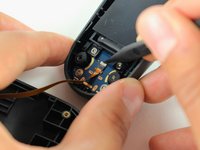
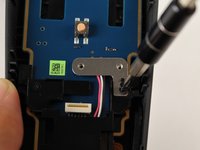
T5トルクスドライバーを使って、黒い5.2mmネジを3本外します。
Leave the middle screw where it is (the one being unscrewed in the picture). That screw holds the two halves of the photodiode assembly together, not the case.
five screws… two at bottom
I concur with trevosklar, don’t need to remove center screw to remove front panel (pad cover).
-
-
-
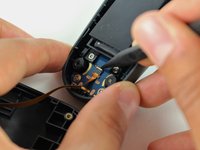
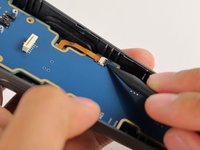
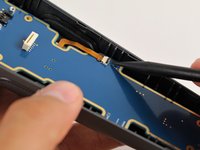
上側のリボンケーブルを2本の指でマザーボードから引き上げるようにして、ゆっくりと取り外します。
You do not have to remove the ribbon cables from the plugs…you can carefully work the battery holder around them and remove it…being very gentle. And the black part of the handle will stay attached to the cables and be in the way. But removing the cables does make it easier to access the area for the battery, just not completely necessary.
-
-
-
-
2本の指でリボンケーブルを上に引っ張り、マザーボードから離すようにして、中央のリボンケーブルを静かに外します。
-
-
-
ナイロンのスパッジャーを使って、白いタブを90度持ち上げます。
-
下部リボンケーブルを2本の指で下に引っ張って、ゆっくりと外します。
Hallo what is the name of this conector because i Broker it
Yeah I did as instructed only to realize after that my gen 1 vive controller does not do that, and i desoldered the power button ribbon. That cable, does NOT detach on my model. destroyed.
-
-
-
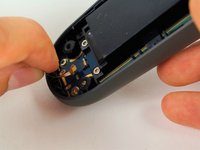
#00 プラスドライバーを使って、シルバープレートから黒い2.8mmネジを2本外します。
-
#00プラスドライバーを使って、シルバープレートの右下コーナーから黒い5.8mmネジを1本外します。
I don't have this metal piece in my first gen vive wand for some reason. Instead, there is just a piece of kapton tape covering the connector. It does not seem there are even screw holes for it.
You do not need to remove the top two screws circled in red, just the four around the battery case (as shown in Step 13 and 14). Skip Step 12 which involves removing the plate.
-
-
-
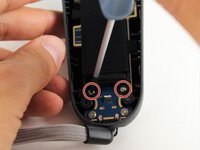
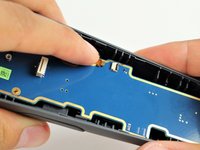
シルバープレートを、2本の指でつまんで持ち上げて外します。
There is no plate on mine, only tape covering it.
tamgoddess - 返信
Same with mine, also purchased 2018. It seems the silver plate part can be skipped for later models.
-
-
-
T5トルクスドライバーを使って、バッテリーフレーム下部からシルバーの4.2mmネジを2本外します。
On my controller these were Philips 000 5.8mm screws, the same as in the previous step.
Second the above with a slight correction. Phillips 00.
tamgoddess - 返信
-
-
-
3ピンケーブルを2本の指でつまんで上に引き上げるようにして、ゆっくりと外します。
As Rob said, don't pull it! The connector comes out vertically, not horizontally. The ridges along the side prevent the connector from sliding out horizontally. To remove it, insert a small screwdriver under the cables and gently push it to wedge the connector out. Connecting it is easier, just press it down over the top to snap it in place.
-
-
-
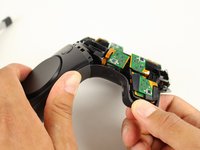
バッテリーフレームを持ち上げて、Viveコントローラーからバッテリーを取り出します。
Suddenly, here the electronics of the saucer are gone, but there’s no previous step mentioning its removal. This is kind of important because loosening the ribbon cables attaching it to the mainboard is a bit finicky.
-
-
-
#00 プラスドライバーを使って、マザーボードの上部から黒い5.8mmネジを2本外します。
These should be the silver screws not the black screws
Yeah, I think he switched the bottom battery screws with these in a previous disassembly. (see my comment at step 14) I’m opening mine for the first time since new purchase and the motherboard has 4 T5 screws.
-
-
-
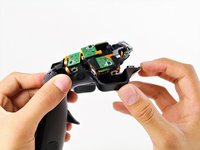
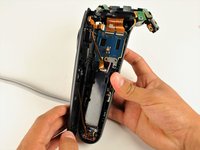
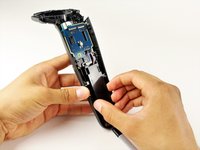
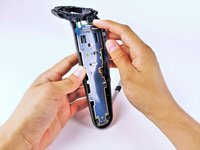
手でViveコントローラーからマザーボードを持ち上げて外します。
what is the benefit of the rectangular silver steel or ironic metal ,that iside the htc vive hand controller.?????
is it to solve some issus with the Mpu6500 sensor ??
or related to get rid of interferrences ??
the rectanguler metal piece is near to the mother board and the battery in the following image :-
https://d3nevzfk7ii3be.cloudfront.net/ig...
Thanks in advance!
I believe it’s just a weight to help balance the controller by shifting the center of gravity closer to the rear/bottom end. It doesn’t connect to anything, and the board has its own shield. So, just a slab of metal.
Awesome THANKS. … uh … where do I get another motherboard? DoH!
Anyone know of a good replacement button for the trackpad press button? (The one on the top side, tan or pinkish colored.)
-
-
-
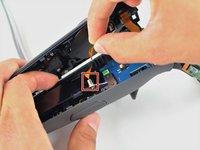
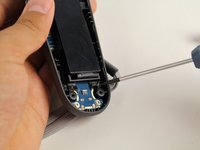
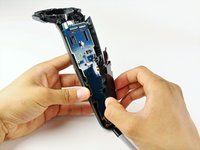
T5トルクスドライバーを使って、トリガーの内部パーツから黒い5.2mmネジを4本外します。
-
-
-
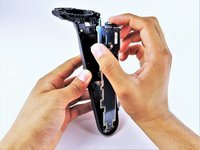
トリガーボタンがフロントパネルから外れるまで、指で押し込みます。
Thank you! This saved me a lot of money. I could fix the slightly pushed in trigger myself.
-


このデバイスを再組み立てするには、インストラクションを逆の順番に従って作業を進めてください。
このデバイスを再組み立てするには、インストラクションを逆の順番に従って作業を進めてください。
6 の人々がこのガイドを完成させました。
以下の翻訳者の皆さんにお礼を申し上げます:
100%

Midori Doiさんは世界中で修理する私たちを助けてくれています! あなたも貢献してみませんか?
翻訳を始める ›
チーム

Cal Poly, Team S15-G5, Livingston Fall 2017 Cal Poly, Team S15-G5, Livingston Fall 2017人のメンバー
CPSU-LIVINGSTON-F17S15G5
4 メンバー
51のガイドは作成済み
2 件のコメント
It is possible to access and replace the trigger without having to disconnect any of the cables. I have done this with 3 controllers already.
Just ignore the steps saying to disconnect the cable, move parts to the side and be careful.
Jurij Gera - 返信
No disassembly fix for a broken spring: Sling a rubber band under the trigger.
Where can I buy new t5 21 mm screws? Mine are getting stripped out!
jeremyvanwoerden - 返信
Where can you get replacement batteries?
Mike Justice - 返信
The middle bottom screw may have some form of warranty sticker on it if you have a Vive Pro wand (which is purple). Mine had this. Easy enough to remove and get on with it.
sodiboo - 返信