メインコンテンツにスキップ
リペアコミュニティに参加 - アカウントの作成

HTC Hero Touch Screen Digitizer Replacement

必要な工具と部品

  1. HTC Hero Touch Screen Digitizer Replacement, Back Case: 手順 1、 1の画像 1
    • Remove the back of the phone by pushing firmly with your thumbs up towards the camera.

    • Remove both the battery and the SD card (Press SD card in to release)

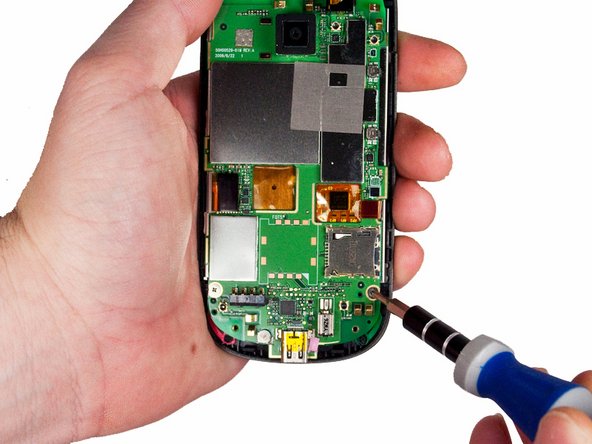
    • Locate and remove the four Torx screws highlighted in the photo, with the phone laying face down on your work space.

    FixBotに聞いてみる

    コメントを追加

  2. HTC Hero Touch Screen Digitizer Replacement: 手順 2、 1の画像 1
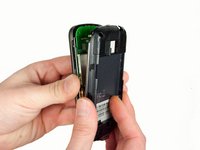
    • Carefully pry the inside back cover from the device using an appropriate size plastic opening tool or small flathead screwdriver.

    • Insert the flat end between the back and front enclosure, working your way around the rim.

    FixBotに聞いてみる

    コメントを追加

  3. HTC Hero Touch Screen Digitizer Replacement: 手順 3、 1の画像 1
    • Gently depress and release the small plastic tabs around the rim in the front enclosure, highlighted here.

    • It is best to start with the tab found on the top center of the phone, as it is easiest to locate.

    FixBotに聞いてみる

    コメントを追加

  4. HTC Hero Touch Screen Digitizer Replacement: 手順 4、 2の画像 1 HTC Hero Touch Screen Digitizer Replacement: 手順 4、 2の画像 2
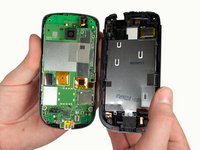
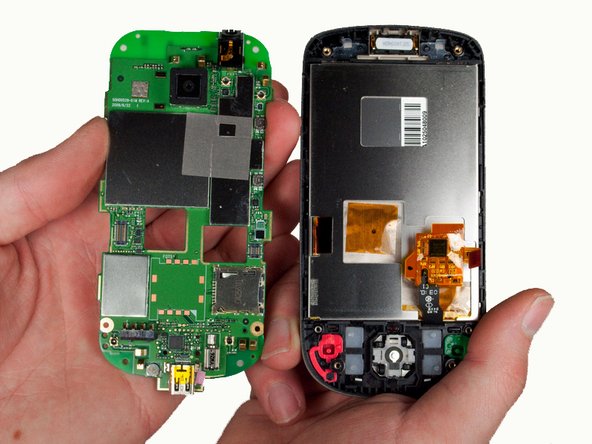
    • Carefully separate the front and back enclosures once all of the clips have been disengaged.

    • Be sure to not separate too quickly or you risk breaking an attached tab.

    FixBotに聞いてみる

    コメントを追加

  5. HTC Hero Touch Screen Digitizer Replacement, Touch Screen: 手順 5、 2の画像 1 HTC Hero Touch Screen Digitizer Replacement, Touch Screen: 手順 5、 2の画像 2
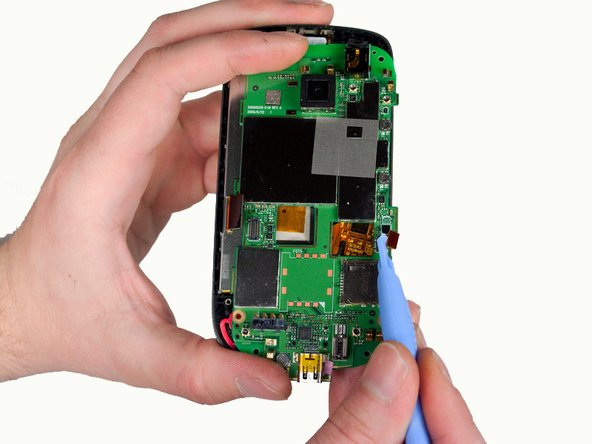
    • Gently release the two ribbon cables using a plastic opening tool by prying up the pop connectors used to attach the ribbon cables to the motherboard.

    FixBotに聞いてみる

    コメントを追加

  6. HTC Hero Touch Screen Digitizer Replacement: 手順 6、 2の画像 1 HTC Hero Touch Screen Digitizer Replacement: 手順 6、 2の画像 2
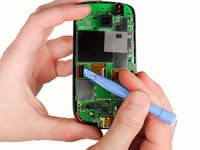
    • Remove the two screws located at the bottom left and right of the motherboard using a small Phillips screwdriver.

    FixBotに聞いてみる

    コメントを追加

  7. HTC Hero Touch Screen Digitizer Replacement: 手順 7、 2の画像 1 HTC Hero Touch Screen Digitizer Replacement: 手順 7、 2の画像 2
    • Gently lift the motherboard out of the front enclosure once the screws are removed.

    FixBotに聞いてみる

    コメントを追加

  8. HTC Hero Touch Screen Digitizer Replacement: 手順 8、 3の画像 1 HTC Hero Touch Screen Digitizer Replacement: 手順 8、 3の画像 2 HTC Hero Touch Screen Digitizer Replacement: 手順 8、 3の画像 3
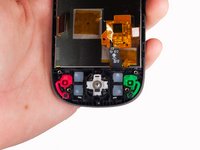
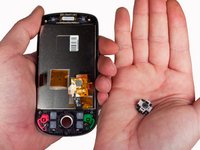
    • Remove the trackball and its enclosure by turning the phone over into your cupped hand and allowing the trackball and enclosure to fall out.

    FixBotに聞いてみる

    コメントを追加

  9. HTC Hero Touch Screen Digitizer Replacement: 手順 9、 3の画像 1 HTC Hero Touch Screen Digitizer Replacement: 手順 9、 3の画像 2 HTC Hero Touch Screen Digitizer Replacement: 手順 9、 3の画像 3
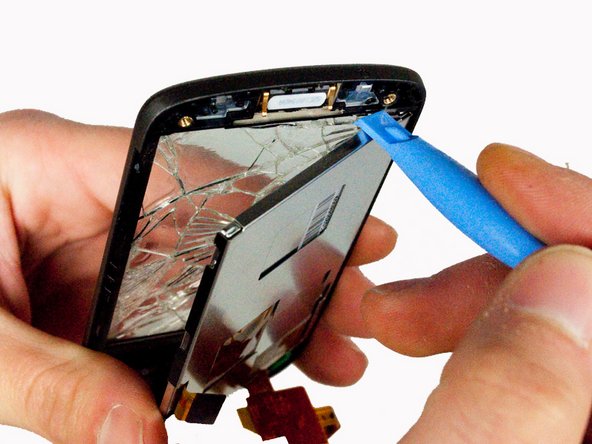
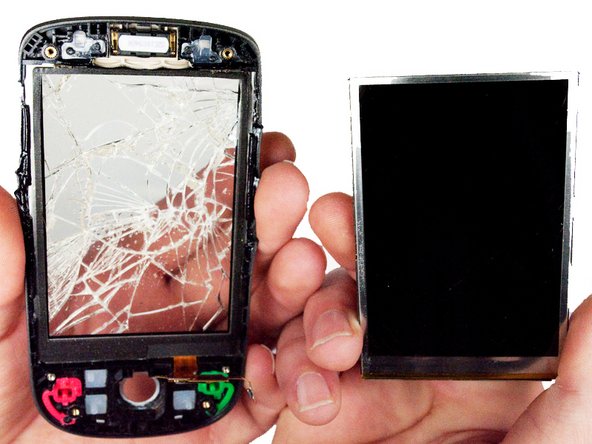
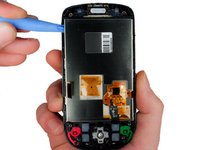
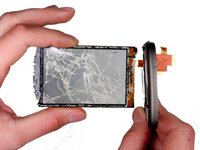
    • Gently pry out the LCD screen from the top left side of the enclosure using a plastic tool, as illustrated.

    FixBotに聞いてみる

    コメントを追加

  10. HTC Hero Touch Screen Digitizer Replacement: 手順 10、 2の画像 1 HTC Hero Touch Screen Digitizer Replacement: 手順 10、 2の画像 2
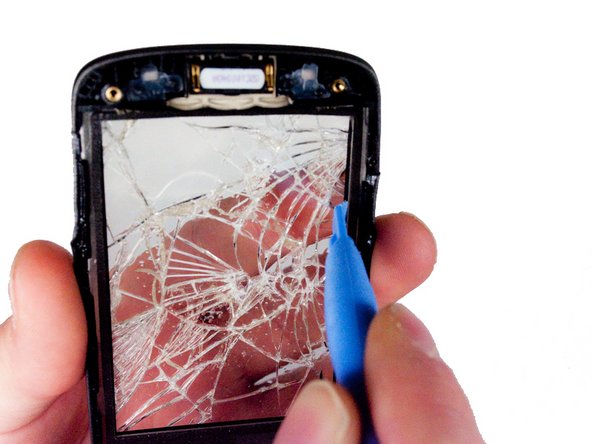
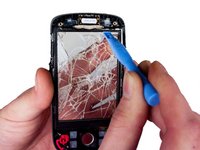
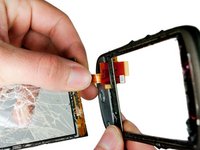
    • Using a plastic opening tool, gently pry the glass from the frame by inserting the flat end between the glass and the frame from the inside of the phone.

    • Follow the edges of the glass to ensure that all the adhesive has been released.

    FixBotに聞いてみる

    コメントを追加

  11. HTC Hero Touch Screen Digitizer Replacement: 手順 11、 1の画像 1
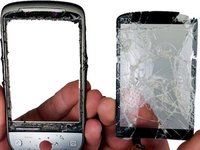
    • Using a heat lamp or gun, warm the glass to loosen the adhesive binding it to the frame.

    • Once the adhesive has been released, you should be able to remove the glass by pushing on it from the inside of the phone.

    • Be careful to remove the glass slowly. The ribbon cable that connects to the glass is routed through the plastic frame at the bottom.

    FixBotに聞いてみる

    コメントを追加

  12. HTC Hero Touch Screen Digitizer Replacement: 手順 12、 3の画像 1 HTC Hero Touch Screen Digitizer Replacement: 手順 12、 3の画像 2 HTC Hero Touch Screen Digitizer Replacement: 手順 12、 3の画像 3
    • Carefully feed the ribbon cable through the slot in the plastic frame.

    FixBotに聞いてみる

    コメントを追加

  13. HTC Hero Touch Screen Digitizer Replacement: 手順 13、 1の画像 1
    • Remove any excess adhesive from the plastic frame.

    FixBotに聞いてみる

    コメントを追加

終わりに

To reassemble your device, follow these instructions in reverse order.

キャンセル: このガイドを終了できませんでした。

作成者

9人の作成者と共同で作成されました。

Max Brown

メンバー登録日: 01/23/12

139 ポイント

4のガイドは作成済み

チーム

Cal Poly, Team 3-26, Amido Winter 2012 Cal Poly, Team 3-26, Amido Winter 2012人のメンバー

CPSU-AMIDO-W12S3G26

5 メンバー

12のガイドは作成済み

0件のガイドコメント

コメントを追加

統計データ:

過去 24時間: 1

過去 7 日: 9

過去 30 日: 41

今までの合計 3,779