はじめに
This guide is a helpful starting point for almost every hardware related replacement or installation. By exposing the internal components you will be able to repair, replace, or clean out the interior of your phone. While this process does require a few specific tools, they are widely available and do not require any previous experience to use them effectively.
必要な工具と部品
-
-
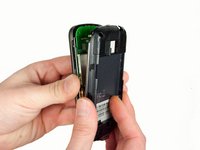
Remove the back of the phone by pushing firmly with your thumbs up towards the camera.
-
Remove both the battery and the SD card (Press SD card in to release)
-
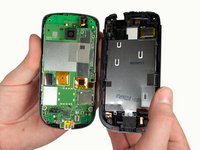
Locate and remove the four Torx screws highlighted in the photo, with the phone laying face down on your work space.
-
-


To reassemble your device, follow these instructions in reverse order.
チーム

Cal Poly, Team 3-26, Amido Winter 2012 Cal Poly, Team 3-26, Amido Winter 2012人のメンバー
CPSU-AMIDO-W12S3G26
5 メンバー
12のガイドは作成済み