Remove the rubber screw covers. If needed, use a thin object to help pry them off. There should be two of them on top of the phone. Skip this step if already removed.
Pry loose the metal cover near the camera lens, circled in the picture.
After removing the rubber stoppers on top, there should be six exposed screws. Remove these using the T6 screwdriver.
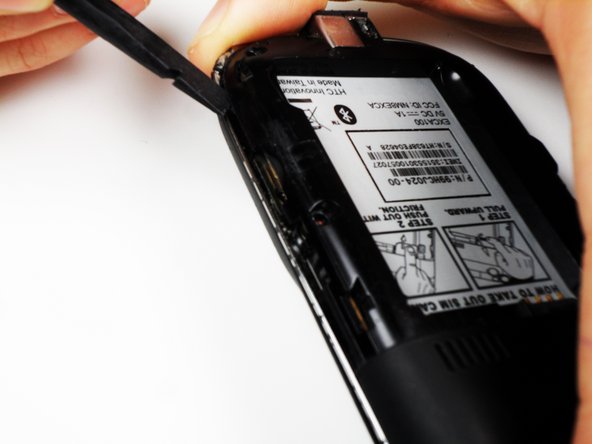
Next, use the spudger to loosen the case underneath the shiny metal edge. Go all the way around the phone until completely loosened.
The case is superglued on and will not permanently damage the phone when removed, but you should still use caution.
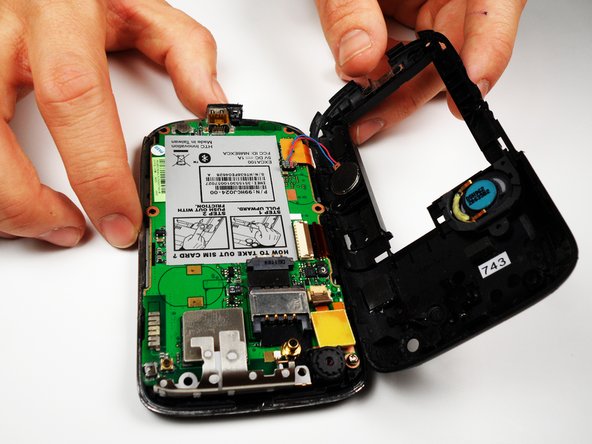
After loosening the case, remove it.
There is a wire that connects both the top and bottom of the case. If you are not careful when removing the case, you might snap the wire.
On the left side of the phone, there are three copper colored clips.
Unclip the bottom clip, thread the middle one through the logic board, and pull the top one out gently.
You can then lift the logic board out of the phone.
Do this at an angle, lifting the side to the right of the SIM card instructions.
One of the strips is attached to the front of the case, and goes through the logic board. Be careful not to break this piece.
Grab the screen by the bottom edge, and lift it out at an angle.
Replace the screen, and reassemble the phone.
このガイドを埋め込む
サイズを選択し、以下のコードをコピーして、このガイドを小さなウィジェットとしてサイト/フォーラムに埋め込みます。
1つの手順
全ガイド
小サイズ - 600px
中サイズ - 800px
大サイズ - 1200px
プレビュー