はじめに
Overtime the CMOS Battery may drain and need replacement. This can cause a reset in the System Clock and other features of the Mini 210-1199x. In order to fix this, a battery replacement is needed.
Replace the CMOS Battery with a 3-volt 2032-size coin battery.
必要な工具と部品
-
-
-
Unplug the netbook.
-
Secure the netbook in a upright position.
-
Slide the plastic battery latch that secures it into the netbook.
-
Keep thumb secure on the right tab as you begin to remove the battery.
 FixBotに聞いてみる
-
-
-
-
-
Press down on the two orange buttons to release.
-
If the case does not pop off, begin to use Spudger to pry the case off the back.
-
-
-
-
Place the spudger on corners and openings in order to begin removal of the back.
-
Continue this on all corner until the case comes fully off of the back.
-
-
-
-
この手順で使用する道具:Tweezers$4.99
-
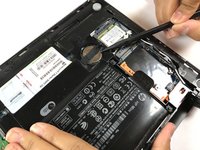
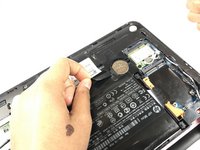
Simply pull the small black ribbon off of the battery with either your finger or a pair of tweezers.
-
-
-
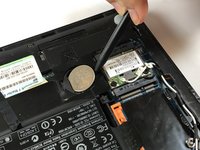
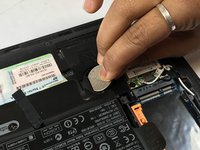
Using the spudger, carefully pop the battery out of the right side as seen in the picture.
-
-









To reassemble your device, follow these instructions in reverse order.

チーム

Texas Tech, Team S46-G3, Bennett Spring 2017 Texas Tech, Team S46-G3, Bennett Spring 2017人のメンバー
TTU-BENNETT-S17S46G3
3 メンバー
68のガイドは作成済み
