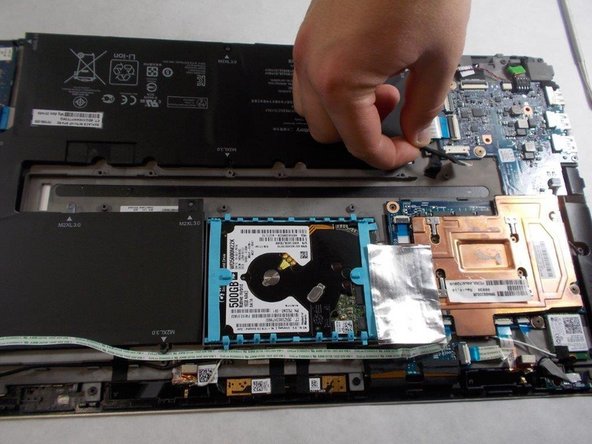
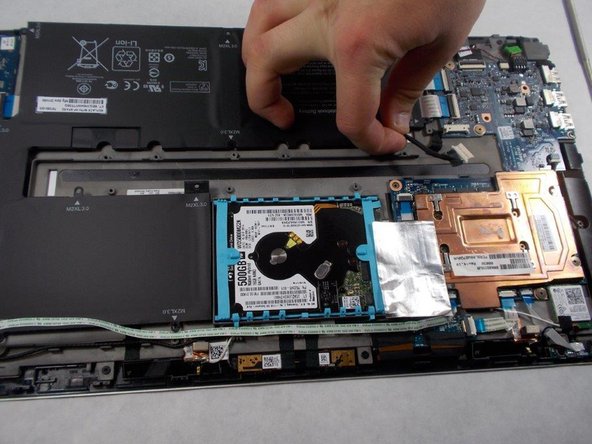
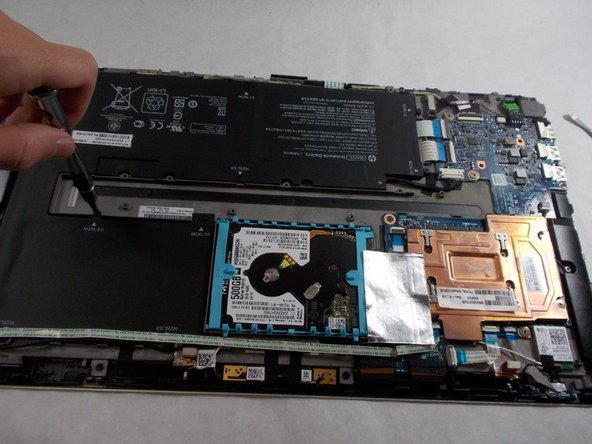
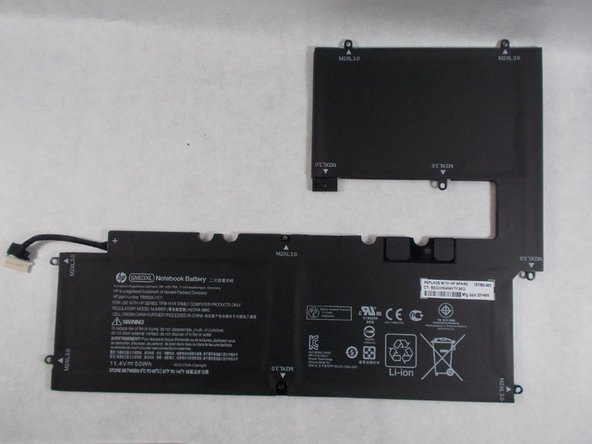
メインコンテンツにスキップ

HP Envy X2-15-C001Dx Battery Replacement

必要な工具と部品

  1. HP Envy X2-15-C001Dx Battery Replacement, Back Panel: 手順 1、 1の画像 1
    • Place the laptop face down on a table.

  2. HP Envy X2-15-C001Dx Battery Replacement: 手順 2、 2の画像 1 HP Envy X2-15-C001Dx Battery Replacement: 手順 2、 2の画像 2
    • Lift up the back stand.

  3. HP Envy X2-15-C001Dx Battery Replacement: 手順 3、 2の画像 1 HP Envy X2-15-C001Dx Battery Replacement: 手順 3、 2の画像 2
    • Remove the five screws from the bottom of the back plate using a Phillips #1 screwdriver.

  4. HP Envy X2-15-C001Dx Battery Replacement: 手順 4、 1の画像 1
    • Remove four screws from the back stand hinges using a Phillips #1 screwdriver.

  5. HP Envy X2-15-C001Dx Battery Replacement: 手順 5、 2の画像 1 HP Envy X2-15-C001Dx Battery Replacement: 手順 5、 2の画像 2
    • Remove the hinges and the back stand from the laptop.

  6. HP Envy X2-15-C001Dx Battery Replacement: 手順 6、 1の画像 1
    • Use a spudger to remove the thin panel where the back stand was.

  7. HP Envy X2-15-C001Dx Battery Replacement: 手順 7、 1の画像 1
    • Remove the screws from the back panel using a Phillips #1 screwdriver.

  8. HP Envy X2-15-C001Dx Battery Replacement: 手順 8、 2の画像 1 HP Envy X2-15-C001Dx Battery Replacement: 手順 8、 2の画像 2
    • Remove two side screws using a Phillips #1 screwdriver.

  9. HP Envy X2-15-C001Dx Battery Replacement: 手順 9、 2の画像 1 HP Envy X2-15-C001Dx Battery Replacement: 手順 9、 2の画像 2
    • Pry apart the base from the screen by going around the entire perimeter with an opening tool.

  10. HP Envy X2-15-C001Dx Battery Replacement: 手順 10、 2の画像 1 HP Envy X2-15-C001Dx Battery Replacement: 手順 10、 2の画像 2
    • Remove the back panel from the laptop.

  11. HP Envy X2-15-C001Dx Battery Replacement, Battery: 手順 11、 3の画像 1 HP Envy X2-15-C001Dx Battery Replacement, Battery: 手順 11、 3の画像 2 HP Envy X2-15-C001Dx Battery Replacement, Battery: 手順 11、 3の画像 3
    • Unplug the battery connector from the motherboard.

  12. HP Envy X2-15-C001Dx Battery Replacement: 手順 12、 2の画像 1 HP Envy X2-15-C001Dx Battery Replacement: 手順 12、 2の画像 2
    • Remove the eight screws holding the battery in place using a Phillips #1 screwdriver.

  13. HP Envy X2-15-C001Dx Battery Replacement: 手順 13、 2の画像 1 HP Envy X2-15-C001Dx Battery Replacement: 手順 13、 2の画像 2
    • Remove the battery by simply lifting it out of the device.

終わりに

To reassemble your device, follow these instructions in reverse order.

For optimal performance, after completing this guide, calibrate your newly installed battery.
Take your e-waste to an R2 or e-Stewards certified recycler.

4 の人々がこのガイドを完成させました。

作成者

2人の作成者と共同で作成されました。

Cole Escobar

メンバー登録日: 10/25/21

187 ポイント

1ガイドが承認済み

チーム

UMass Dartmouth, Team 2-6, Sinclaire Fall 2021 UMass Dartmouth, Team 2-6, Sinclaire Fall 2021人のメンバー

UMASSD-SINCLAIRE-F21S2G6

3 メンバー

6のガイドは作成済み

0 件のコメント

コメントを追加

統計データ:

過去 24時間: 0

過去 7 日: 4

過去 30 日: 17

今までの合計 369