メインコンテンツにスキップ

Google Pixelbook Go Back Panel Replacement

必要な工具と部品

  1. Google Pixelbook Go Back Panel Replacement, Back Panel: 手順 1、 2の画像 1 Google Pixelbook Go Back Panel Replacement, Back Panel: 手順 1、 2の画像 2
    • Flip the device so that the back is facing up.

    • Peel the rubber stoppers off the top and bottom of the device.

  2. Google Pixelbook Go Back Panel Replacement: 手順 2、 2の画像 1 Google Pixelbook Go Back Panel Replacement: 手順 2、 2の画像 2
    • Remove ten 3 mm screws from around the edge of the back panel using a T5 Torx screwdriver.

  3. Google Pixelbook Go Back Panel Replacement: 手順 3、 3の画像 1 Google Pixelbook Go Back Panel Replacement: 手順 3、 3の画像 2 Google Pixelbook Go Back Panel Replacement: 手順 3、 3の画像 3
    • Use an iFixit opening tool to pry up the back panel cover.

    • There is an orange ribbon cable that connects the cover to the base, so don't separate the two pieces completely.

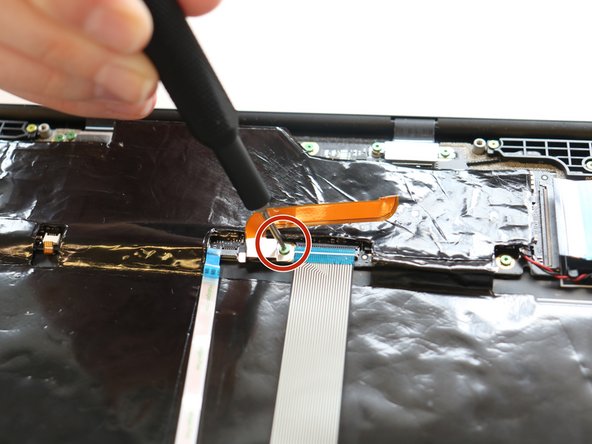
    • Remove the single 2 mm screw using a Torx T3 screwdriver.

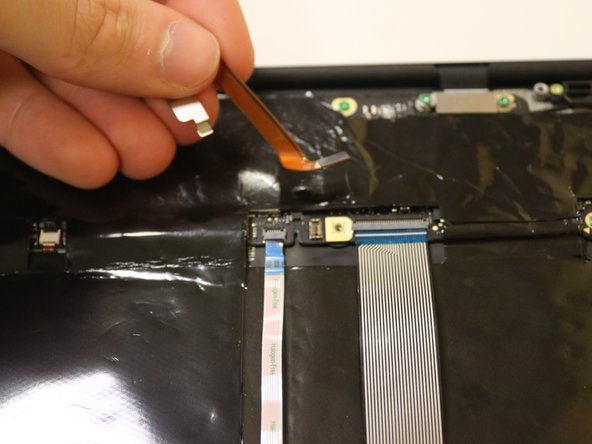
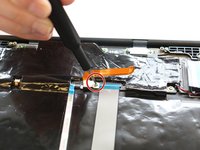
    • Disconnect the orange cable from the base of the device.

  4. Google Pixelbook Go Back Panel Replacement: 手順 4、 1の画像 1
    • Insert wisdom here.

終わりに

To reassemble your device, follow these instructions in reverse order.

Kristen Gismondi

メンバー登録日: 11/12/14

82,570 ポイント

201のガイドは作成済み

チーム

iFixit iFixit人のメンバー

Staff

136 メンバー

17,410のガイドは作成済み

0 件のコメント

コメントを追加

統計データ:

過去 24時間: 2

過去 7 日: 9

過去 30 日: 28

今までの合計 429