メインコンテンツにスキップ

Gateway SA1 Hard Drive Replacement

必要な工具と部品

  1. Gateway SA1 Hard Drive Replacement, Battery: 手順 1、 1の画像 1
    • Move the latch to the right of the battery to unlock.

  2. Gateway SA1 Hard Drive Replacement: 手順 2、 1の画像 1
    • Slide the latch on the left directly below the battery to unlock and pull out the battery as shown.

    • The latch must be held in position to remove the battery.

  3. Gateway SA1 Hard Drive Replacement, Hard Drive: 手順 3、 1の画像 1
    • Before you begin, it's recommended that you back up all your computer's information on the original hard drive. Also, verify the laptop is off and all cables are disconnected.

    • Turn the laptop over so the bottom is facing up.

  4. Gateway SA1 Hard Drive Replacement: 手順 4、 2の画像 1 Gateway SA1 Hard Drive Replacement: 手順 4、 2の画像 2
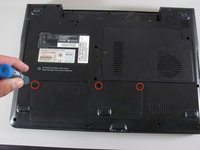
    • Loosen the three Philips cover screws that secure the hard drive.

    • These screws cannot be fully removed from the hard drive cover.

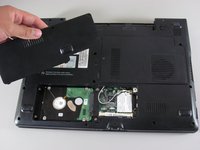
    • Use the spudger to lift and to remove the hard drive cover.

  5. Gateway SA1 Hard Drive Replacement: 手順 5、 2の画像 1 Gateway SA1 Hard Drive Replacement: 手順 5、 2の画像 2
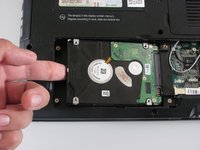
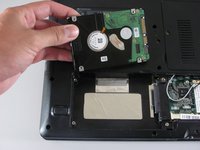
    • Slide the original hard drive to the left and lift it to remove.

    • Insert the new hard drive.

終わりに

To reassemble your device, follow these instructions in reverse order.

5 の人々がこのガイドを完成させました。

作成者

7人の作成者と共同で作成されました。

Diego Carteno

メンバー登録日: 04/15/10

258 ポイント

7のガイドは作成済み

チーム

Cal Poly, Team 24-20, Regan Spring 2010 Cal Poly, Team 24-20, Regan Spring 2010人のメンバー

CPSU-REGAN-S10S24G20

4 メンバー

14のガイドは作成済み

0 件のコメント

コメントを追加

統計データ:

過去 24時間: 3

過去 7 日: 5

過去 30 日: 9

今までの合計 13,884