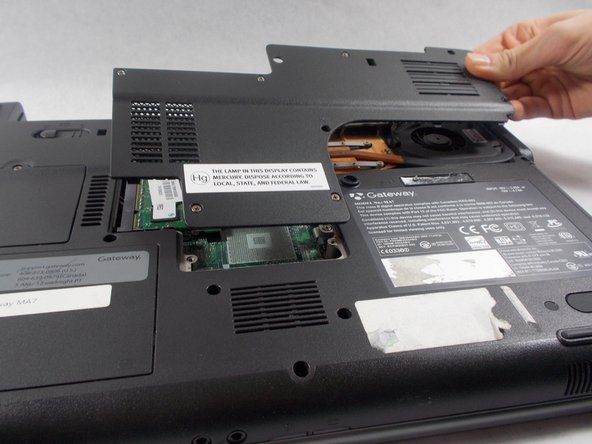
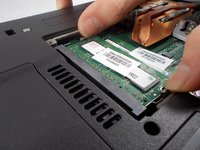
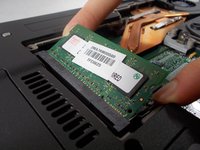
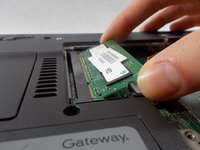
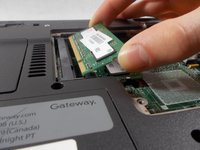
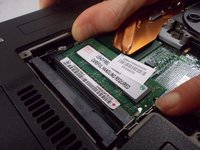
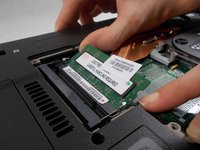
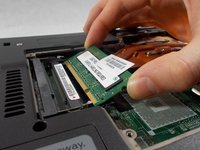
メインコンテンツにスキップ

Gateway MA7 RAM Replacement

必要な工具と部品

  1. Gateway MA7 RAM Replacement, RAM: 手順 1、 1の画像 1
    • To prevent injury, make sure the laptop is unplugged before removing the battery.

    • Push the locking tab over to the right away from the battery to unlock it from the laptop.

    • Hold the additional locking tab to the left while pulling out the battery.

  2. Gateway MA7 RAM Replacement: 手順 2、 2の画像 1 Gateway MA7 RAM Replacement: 手順 2、 2の画像 2
    • Remove the following screws securing the plastic panel from the bottom of the laptop:

    • Seven 6 mm Phillips #0

  3. Gateway MA7 RAM Replacement: 手順 3、 3の画像 1 Gateway MA7 RAM Replacement: 手順 3、 3の画像 2 Gateway MA7 RAM Replacement: 手順 3、 3の画像 3
    • Pull upwards on the top of the plastic panel to remove it.

    • With the exception of the screw marked "K", all of the screws will remain connected to the plastic piece.

  4. Gateway MA7 RAM Replacement: 手順 4、 2の画像 1 Gateway MA7 RAM Replacement: 手順 4、 2の画像 2
    • Push the two metal tabs (holding the module in place) apart in order to release it.

  5. Gateway MA7 RAM Replacement: 手順 5、 2の画像 1 Gateway MA7 RAM Replacement: 手順 5、 2の画像 2
    • Pull the ram out of the motherboard at a 45 degree angle.

  6. Gateway MA7 RAM Replacement: 手順 6、 3の画像 1 Gateway MA7 RAM Replacement: 手順 6、 3の画像 2 Gateway MA7 RAM Replacement: 手順 6、 3の画像 3
    • Repeat steps 4 & 5 for the other memory module.

終わりに

To reassemble your device, follow these instructions in reverse order.

2 の人々がこのガイドを完成させました。

作成者

2人の作成者と共同で作成されました。

Tim Rose

メンバー登録日: 03/05/18

392 ポイント

2のガイドは作成済み

チーム

UMass Dartmouth, Team S6-G2, Bernier Spring 2018 UMass Dartmouth, Team S6-G2, Bernier Spring 2018人のメンバー

UMASSD-BERNIER-S18S6G2

3 メンバー

8のガイドは作成済み

0 件のコメント

コメントを追加

統計データ:

過去 24時間: 0

過去 7 日: 2

過去 30 日: 5

今までの合計 1,402