はじめに
This guide demonstrates how to replace the battery of a Garmin inReach Mini. This devices utilizes a rechargeable, lithium ion battery. The battery is located on the inside of the back hard case. When removing the battery, make sure all necessary cables and power sources are disconnected from the battery in order to prevent an electrical hazard. After replacing the battery, it is crucial to dispose of the old battery at a specialized e-waste collection site or battery-recycling location.
必要な工具と部品
-
-
Place the device on a level surface with the back hard case facing up.
 FixBotに聞いてみる
-
-
-
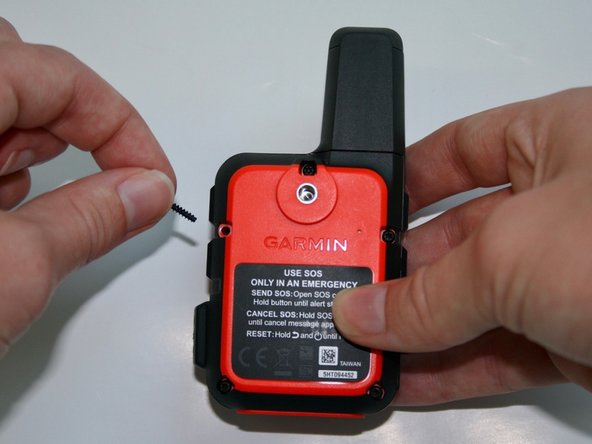
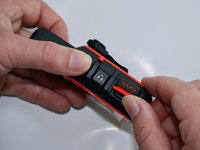
Use the T5 to remove the 1.9mm screw attached to the nylon strap.
-
Remove the nylon strap.
-
-
-
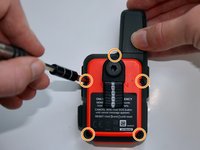
Remove the five 1.8 mm screws located on the top, sides, and bottom corners of the backside of the device.
-
-
-
-
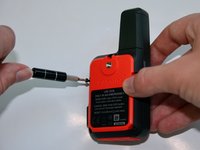
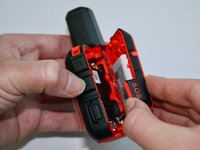
Lastly, lift the protective cap on the side of the device that states "SOS". Slowly pull it to the right in order to remove the back hard case.
-
-
この手順で使用する道具:Tweezers$4.99
-
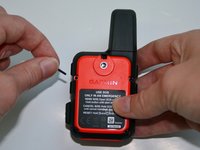
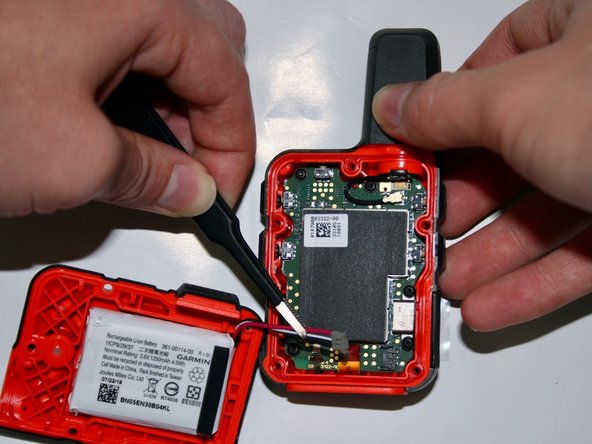
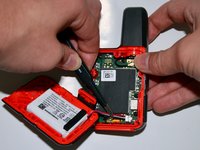
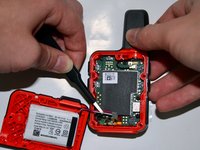
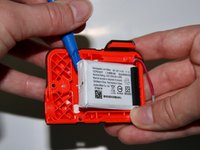
Using the precision tweezers with the round tips, detach the battery connector from the motherboard.
-
-
-
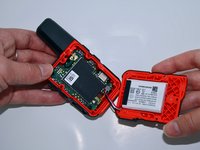
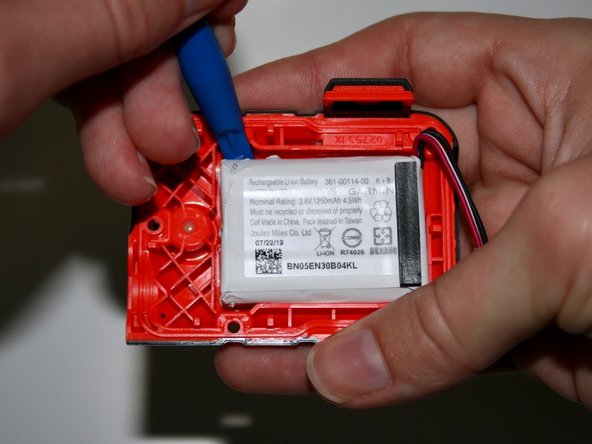
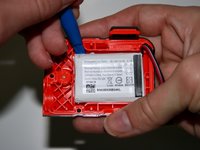
After removing the back hard case, users can access the battery on the inside of the back hard case.
-
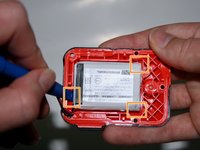
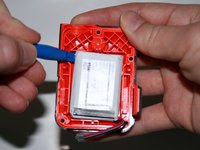
Take the iFixit opening tool and insert it into the small crevices on each side of the battery. Once inserted, apply pressure downward in order to lift the battery up. Repeat on all 3 corners.
-
-
-
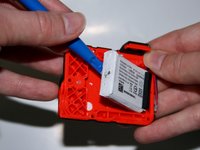
Create leverage by inserting the opening tool underneath the battery. Lift the battery up until it detaches from the case, then remove the battery entirely.
-
-
この手順で使用する道具:Tweezers$4.99
-
Then using the precision tweezers with the round tips, lightly pull the battery out from the case.
-


To reassemble your device, follow these instructions in reverse order.
6 の人々がこのガイドを完成させました。

チーム

University of Alabama, Team 2-2, Bedsole Fall 2021 University of Alabama, Team 2-2, Bedsole Fall 2021人のメンバー
UA-BEDSOLE-F21S2G2
4 メンバー
8のガイドは作成済み