はじめに
Use this guide to replace the battery of your Garmin Nuvi 2595LMT GPS.
必要な工具と部品
-
-
-
Place the device on the workspace so the screen is facing downward.
 FixBotに聞いてみる
-
-
-
Using the t5 screwdriver from the iFixit Pro Tool Kit, remove all four 5.6mm screws placing them safely on the table.
-
-
-
-
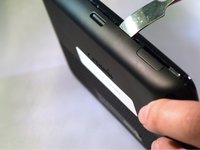
Grab a spudger from tool kit.
-
Pry open sides of Nuvi gently with spudger (do not rip apart).
-
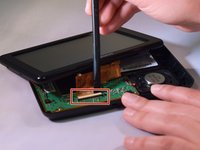
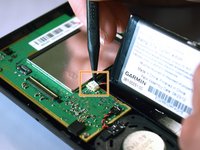
Use plastic opening tool to pry ribbon slowly from white plastic bar.
-
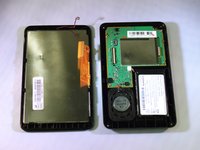
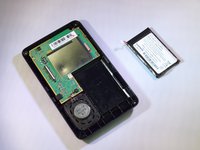
Separate the two pieces and place them on the table
-
-
-
-
-
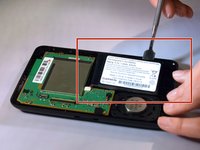
Use a nylon spudger to remove battery (do not yank out) (the battery may be glued down, if so pry around the sides of the battery gently and pop out).
-
Carefully pull wire connected to battery from circuit board.
-
Place the battery on table.
-
Replace old battery with a new one.
-
-




To reassemble your device, follow these instructions in reverse order.
5 の人々がこのガイドを完成させました。

チーム

Eastern Washington University, Team 2-2, Andersen Winter 2016 Eastern Washington University, Team 2-2, Andersen Winter 2016人のメンバー
EWU-ANDERSEN-W16S2G2
5 メンバー
18のガイドは作成済み
5件のガイドコメント
For connectors in battery and speaker wires to the Mobo, be sure its not the LIFT UP variety, just work a spudger or driver underneath the wires and gently lift up, do not pull the wires away from the connector as in the older design. If you are not sure which you have, try lifting up first,as if it works it works immediately.
The battery has a shelf life < 5 years, so if it dies and its not replaced, the unit is still usable but cannot be 'walkable'. USB works lose over 2-3 years to make the unit first unreliable then will break, the USB port needs to be resoldered to the Mobo, they did not design any good mechanical support for the port, its held mostly by solder, which is not solder's purpose. The touch screen can crack with sharp objects so be sure to use only your fingers and get a case to protect it. Its easy to replace, but hard to find the part, you have to buy a spares unit on eBay. Finally the 'lifetime' upgrades of maps and firmware increasingly use more CPU and memory than it becomes so slow to be unuseable, even if you skip years between upgrades. So you effectively cannot upgrade for a lifetime even if your unit is electromechanically sound. If you upgrade too much, just restore to factory and do not upgrade map or firmware thereafter.
The screws are so tight, and the materials so tough , that it is impossible to access the insides! They should be used to guard the crown jewels!
Beating frustration, I managed to get three screws off with CELLONIC kit screw driver O T5 (! note, not the smallest fitting OT3), and isolate the offending last screw, backside top right , probably glued in! by isolating it drilling out very crefully ,the plastic around its perimeter!
Unable to start opening the back cover with the CELLONIC tool, the guessed tight boundary nearest to the front, I had to use a scapel to start it, and follow with the blade of a large screw driver twist! ALLELUYA! Behold the innards!
