はじめに
This guide helps you replace the Fluke 77 Series III Multimeter Dial. The dial is used to turn the multimeter on and off, and to switch between measuring modes.
必要な工具と部品
-
-
-
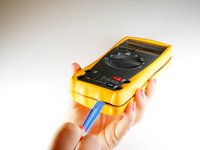
Turn the multimeter so it is display side down.
-
Lift up the back stand of the device by putting your thumb in the curved well at the bottom of the device, so you have access to the two covered screws below.
 FixBotに聞いてみる
-
-
-
Use your Phillips #2 Screwdriver to remove the four black 21 mm Phillips #2 screws.
-
-
-
-
Turn the Fluke 77 Series III Multimeter back over so that it is display side up.
-
Pry the front panel from the back panel at the seam.
-
If the front panel does not come off easily, move a plastic opening tool along the seam until the panels separate completely.
-
-
-
-
-
Hold front panel with both hands, with your thumbs on the dial axle. The dial axle is the metal rod that comes out from the middle of the white plastic rotating piece.
-
Firmly press down on the dial axle to separate the dial from the front panel.
-
If this is difficult to do with your hands, push the dial axle against something hard, like the edge of a table.
-
-
-
With the dial loosened, pull the white plastic rotating piece until it comes off the dial axle.
-
-
-
Finally, push again on the dial axle with your thumb while at the same time pulling the dial off the front panel with your other hand .
-
-


To reassemble your device, follow these instructions in reverse order.
3 の人々がこのガイドを完成させました。
チーム

Cal Poly, Team 2-10, Amido Winter 2014 Cal Poly, Team 2-10, Amido Winter 2014人のメンバー
CPSU-AMIDO-W14S2G10
4 メンバー
29のガイドは作成済み