メインコンテンツにスキップ
リペアコミュニティに参加 - アカウントの作成

Flip Video Ultra Circuit Board Replacement

必要な工具と部品

  1. Flip Video Ultra Circuit Board Replacement, Circuit Board: 手順 1、 1の画像 1
    • Unlock the battery cover by sliding the switch to the unlock position.

    FixBotに聞いてみる
  2. Flip Video Ultra Circuit Board Replacement: 手順 2、 1の画像 1
    • Remove the battery cover by sliding it down the camera.

    FixBotに聞いてみる
  3. Flip Video Ultra Circuit Board Replacement: 手順 3、 1の画像 1
    • Remove the batteries

    FixBotに聞いてみる
  4. Flip Video Ultra Circuit Board Replacement: 手順 4、 1の画像 1
    • Slide the black upper casing off from the device.

    FixBotに聞いてみる
  5. Flip Video Ultra Circuit Board Replacement: 手順 5、 2の画像 1 Flip Video Ultra Circuit Board Replacement: 手順 5、 2の画像 2
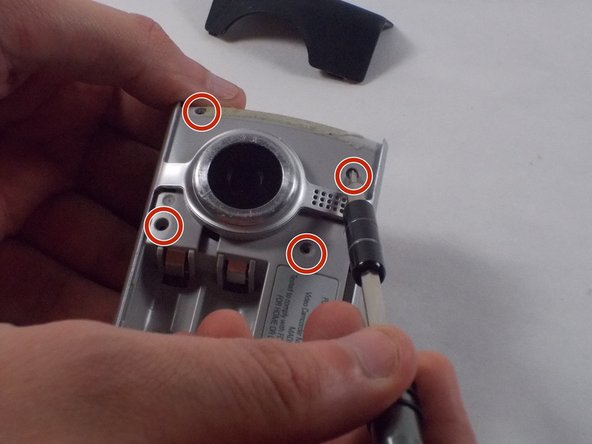
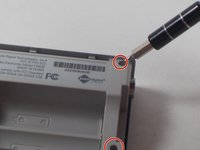
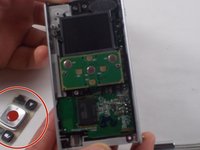
    • Remove the six 1mm screws from the back and upper casing with the Phillips Head screwdriver.

    FixBotに聞いてみる
  6. Flip Video Ultra Circuit Board Replacement: 手順 6、 1の画像 1
    • Remove the top casing from the bottom to reveal the inner circuit board.

    FixBotに聞いてみる
  7. Flip Video Ultra Circuit Board Replacement: 手順 7、 2の画像 1 Flip Video Ultra Circuit Board Replacement: 手順 7、 2の画像 2
    • When removing the back panel, the rubber buttons will become loose and likely fall off the board. This is normal and can easily placed back on the board once finished.

    • Remove the six 1mm screws with the 1 Phillips head screwdriver.

    FixBotに聞いてみる
  8. Flip Video Ultra Circuit Board Replacement: 手順 8、 1の画像 1
    • Gently separate the circuit board from the casing.

    FixBotに聞いてみる
  9. Flip Video Ultra Circuit Board Replacement: 手順 9、 2の画像 1 Flip Video Ultra Circuit Board Replacement: 手順 9、 2の画像 2
    • Unscrew the single 1mm screw from USB housing unit.

    FixBotに聞いてみる
  10. Flip Video Ultra Circuit Board Replacement: 手順 10、 2の画像 1 Flip Video Ultra Circuit Board Replacement: 手順 10、 2の画像 2
    • Unscrew the 2 1mm screws and gently separate camera wires from plastic casing.

    FixBotに聞いてみる
  11. Flip Video Ultra Circuit Board Replacement: 手順 11、 1の画像 1
    • Gently pry out the USB housing unit with the Ifxit Opening Tool.

    FixBotに聞いてみる
  12. Flip Video Ultra Circuit Board Replacement: 手順 12、 3の画像 1 Flip Video Ultra Circuit Board Replacement: 手順 12、 3の画像 2 Flip Video Ultra Circuit Board Replacement: 手順 12、 3の画像 3
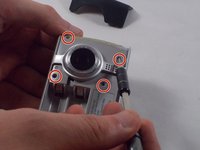
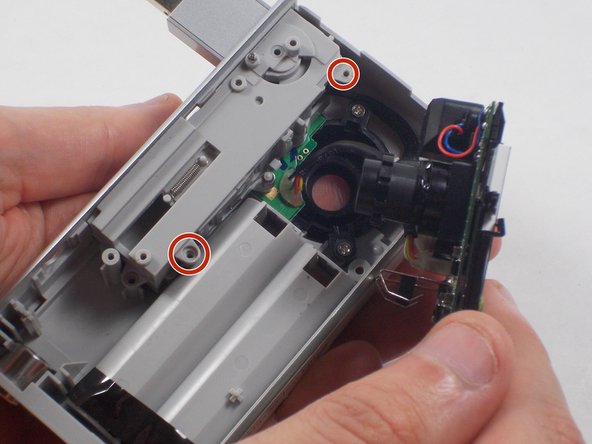
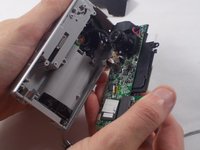
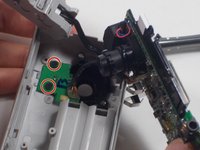
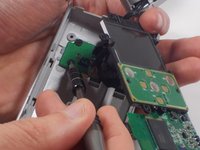
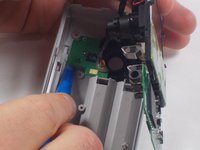
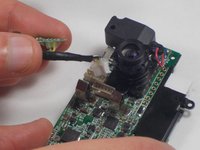
    • Remove the two 1mm screws and separate the circuit board and camera from the plastic casing.

    FixBotに聞いてみる
  13. Flip Video Ultra Circuit Board Replacement: 手順 13、 1の画像 1
    • Unscrew the camera housing unit from the plastic case.

    FixBotに聞いてみる
  14. Flip Video Ultra Circuit Board Replacement: 手順 14、 3の画像 1 Flip Video Ultra Circuit Board Replacement: 手順 14、 3の画像 2 Flip Video Ultra Circuit Board Replacement: 手順 14、 3の画像 3
    この手順で使用する道具:
    Tweezers
    $4.99
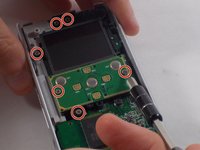
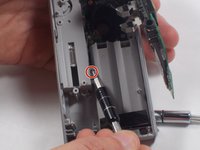
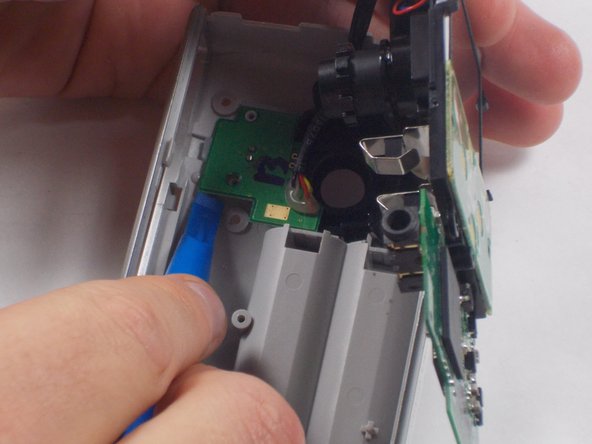
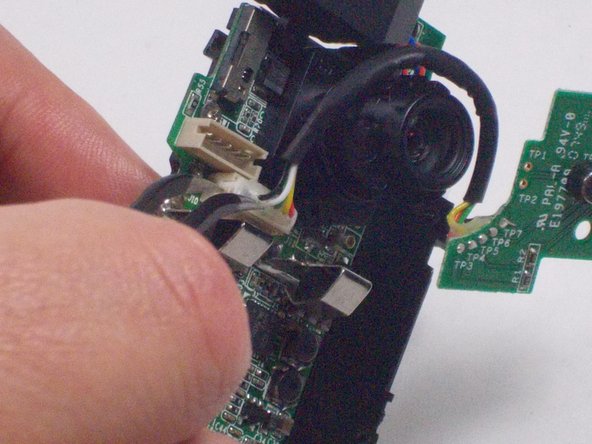
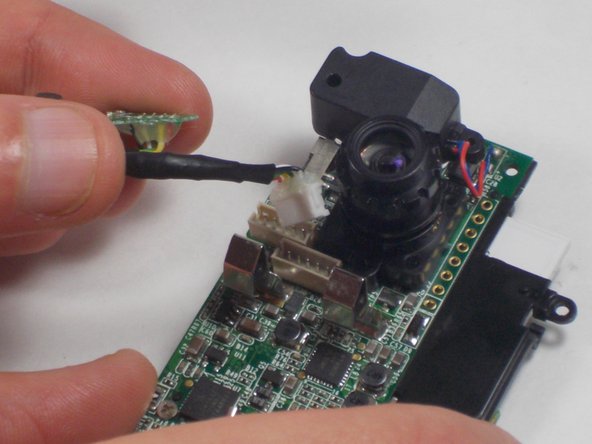
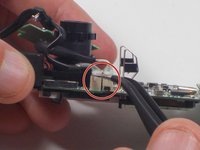
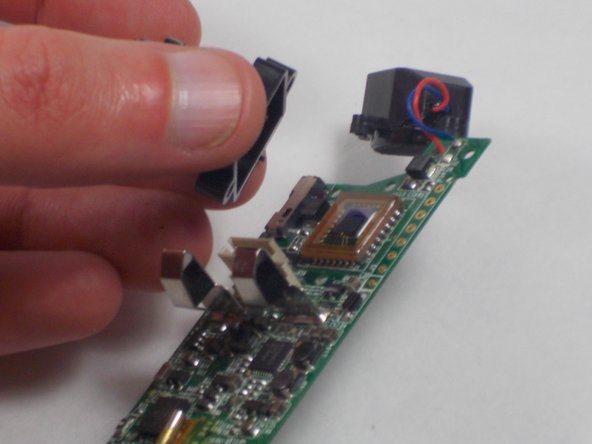
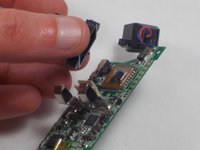
    • With tweezers, remove the microphone and USB connections.

    FixBotに聞いてみる
  15. Flip Video Ultra Circuit Board Replacement: 手順 15、 2の画像 1 Flip Video Ultra Circuit Board Replacement: 手順 15、 2の画像 2
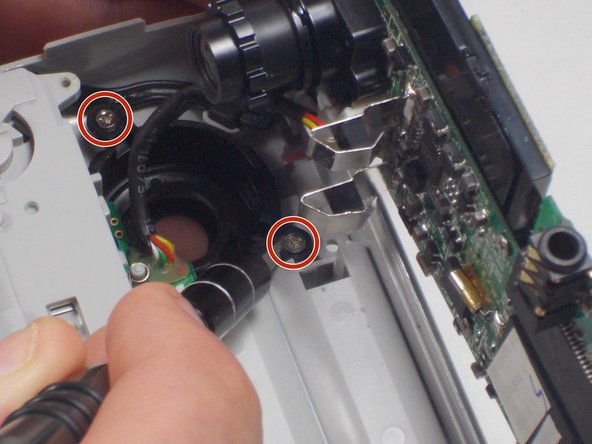
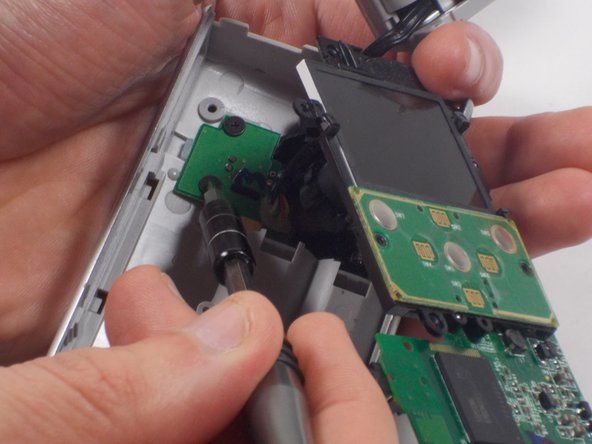
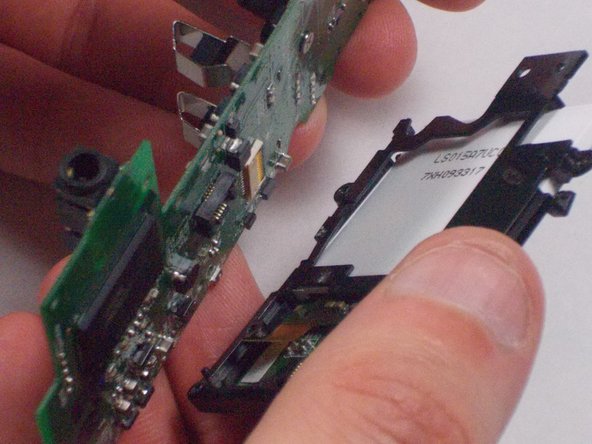
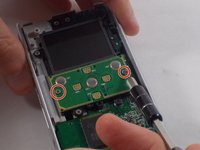
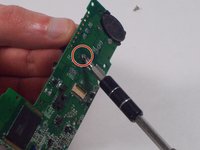
    • Unscrew the two 1mm screws from the board shown. Remove screen from circuit board.

    FixBotに聞いてみる
  16. Flip Video Ultra Circuit Board Replacement: 手順 16、 2の画像 1 Flip Video Ultra Circuit Board Replacement: 手順 16、 2の画像 2
    • Remove the single 2.1 mm screw and separate camera from the circuit board.

    FixBotに聞いてみる
終わりに

To reassemble your device, follow these instructions in reverse order.

ある他の人がこのガイドを完成しました。

作成者

4人の作成者と共同で作成されました。

Nathaniel Ruf

メンバー登録日: 10/18/16

514 ポイント

5のガイドは作成済み

チーム

UMass Dartmouth, Team 5-7, Martin Fall 2016 UMass Dartmouth, Team 5-7, Martin Fall 2016人のメンバー

UMASSD-MARTIN-F16S5G7

3 メンバー

10のガイドは作成済み

0件のガイドコメント

コメントを追加

統計データ:

過去 24時間: 0

過去 7 日: 4

過去 30 日: 43

今までの合計 1,001