メインコンテンツにスキップ
リペアコミュニティに参加 - アカウントの作成

Fairphone 6 Volume Button Replacement/Reseating

必要な工具と部品

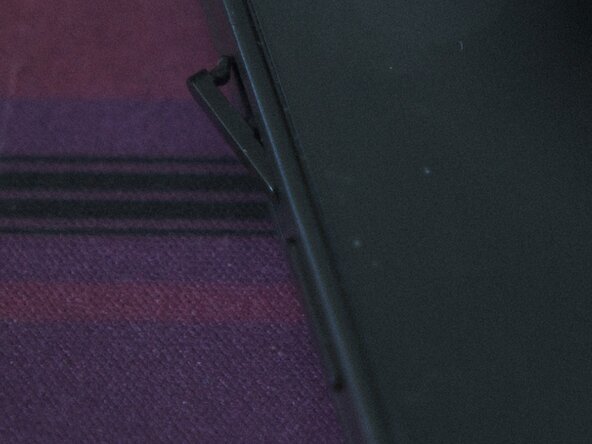
    1. Fairphone 6 Volume Button Replacement/Reseating, The Initial Situation/Problem: 手順 1、 3の画像 1 Fairphone 6 Volume Button Replacement/Reseating, The Initial Situation/Problem: 手順 1、 3の画像 2 Fairphone 6 Volume Button Replacement/Reseating, The Initial Situation/Problem: 手順 1、 3の画像 3
      • This is the initial scenario - the button got loose. Carefully pulling on it revealed the kinked plastic latch which partly detached from the button.

      FixBotに聞いてみる

      コメントを追加

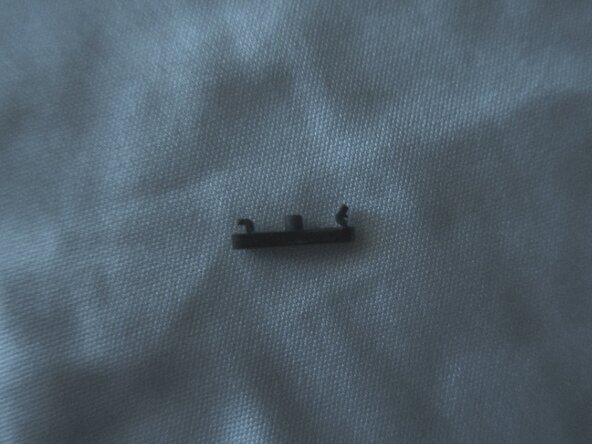
    2. Fairphone 6 Volume Button Replacement/Reseating, Get a working button: 手順 2、 3の画像 1 Fairphone 6 Volume Button Replacement/Reseating, Get a working button: 手順 2、 3の画像 2 Fairphone 6 Volume Button Replacement/Reseating, Get a working button: 手順 2、 3の画像 3
      • Either fix the old button by very carefully applying superglue (the way I fixed mine) or ask the Fairphone Support to provide you one.

      • If applying superglue, start on the tweezer as a transfer/portioning. Use some kind of paper to soak up any remains as the tolerances on the volume button insert are very small.

      • The holders of the button are not identical on both ends, one is slightly reaching outside of the buttons form while the other stops at the button's length.

      • Apply the superglue on the kinked part and set it in the correct 90° angle.

      • The images show only the defect button.

      • Removing the button leads to exposed PCB and could damage your phone if not protected from the elements.

      FixBotに聞いてみる

      コメントを追加

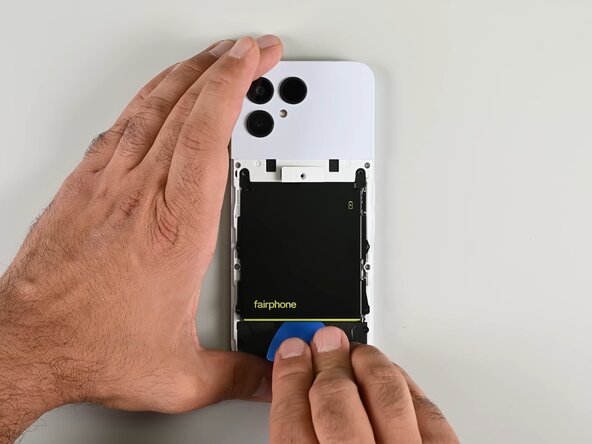
    3. Fairphone 6 Volume Button Replacement/Reseating, Open the Back of your Fairphone 6: 手順 3、 1の画像 1
      • Unscrew any accessories and the two main screws of the backplate. Open the backplate to reveal the battery and other insides.

      • These two crews are different to the screws inside of the Fairphone 6 (FP6), place them separate and do not mix them up as they can be of different lengths.

      • Never screw one of the inside screws of the FP6 into the outside holes as they are longer and could damage your phone.

      FixBotに聞いてみる

      コメントを追加

    4. Fairphone 6 Volume Button Replacement/Reseating, Remove the battery: 手順 4、 3の画像 1 Fairphone 6 Volume Button Replacement/Reseating, Remove the battery: 手順 4、 3の画像 2 Fairphone 6 Volume Button Replacement/Reseating, Remove the battery: 手順 4、 3の画像 3
      • Remove the five black screws holding the battery into place.

      • Carefully lift the protective cover on the top and disconnect the battery connector.

      • Lift the battery away, set it aside for re-assembly later.

      FixBotに聞いてみる

      コメントを追加

    5. Fairphone 6 Volume Button Replacement/Reseating, Remove the upper plate: 手順 5、 1の画像 1
      • Remove the upper back cover. There are no screws, only latches.

      • If this is your first time of uninstalling this item after owning your FP6 for a while, this can be quite hard to take off. Be careful and take your time so none of the latches break on disassembly.

      FixBotに聞いてみる

      コメントを追加

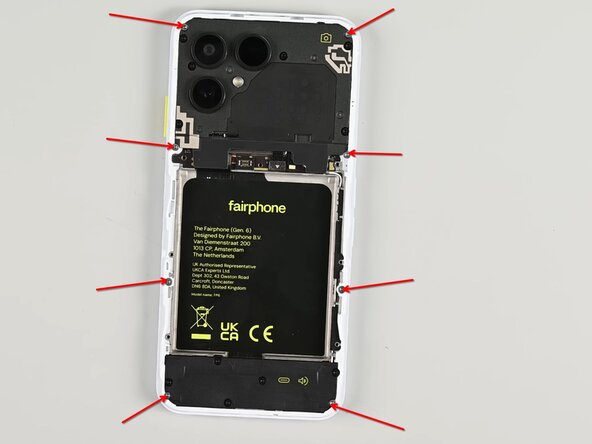
    6. Fairphone 6 Volume Button Replacement/Reseating, Unscrew/Remove the FP6 Screen: 手順 6、 3の画像 1 Fairphone 6 Volume Button Replacement/Reseating, Unscrew/Remove the FP6 Screen: 手順 6、 3の画像 2 Fairphone 6 Volume Button Replacement/Reseating, Unscrew/Remove the FP6 Screen: 手順 6、 3の画像 3
      • As we can not access the mechanism on this side, we are required to remove the screen as a next step.

      • To remove the screen first unscrew all 8 SILVER screws noted in the picture.

      • If your FP6 was never opened and cleaned like this it may be held in the frame by dust etc. building up between. I had the most success on the lower part of the screen when trying to get it out of the frame.

      • Do not let the screen fall out - there is a sensitive ribbon cable on the back which could tear.

      • Carefully wiggle the screen free.

      • Look behind the screen. The ribbon cable is held fast by a latch and a corresponding screw. Carefully unscrew the latch and remove the cable from the socket.

      • Set the screen and the latch with the corresponding screw aside.

      FixBotに聞いてみる

      コメントを追加

    7. Fairphone 6 Volume Button Replacement/Reseating, Prepare the Swap: 手順 7、 3の画像 1 Fairphone 6 Volume Button Replacement/Reseating, Prepare the Swap: 手順 7、 3の画像 2 Fairphone 6 Volume Button Replacement/Reseating, Prepare the Swap: 手順 7、 3の画像 3
      • On the now opened frame we focus on the marked area where the buttons are positioned.

      • Carefully remove the black tape protecting the mechanism and leave it on a surface where we can later pick it up to close the section again.

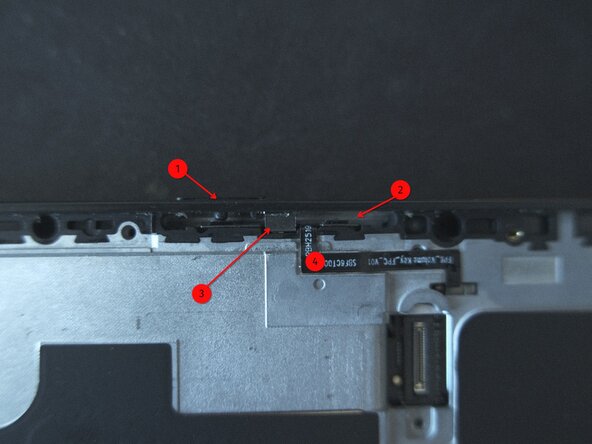
      • The last picture shows the mechanism beneath the black tape. The numbers are described in the next step.

      FixBotに聞いてみる

      コメントを追加

    8. Fairphone 6 Volume Button Replacement/Reseating, Fix the button: 手順 8、 2の画像 1 Fairphone 6 Volume Button Replacement/Reseating, Fix the button: 手順 8、 2の画像 2
      • (1) shows the still working button and how the mechanism is supposed to work.

      • (2) is the slot where our new/fixed button needs to be seated. It is currently blocked by the silver bracket in the middle, marked as (3).

      • (3) is the silver bracket holding both buttons seated.

      • (4) is the ribbon cable enabling the functionality of the buttons.

      • Careful while disassembling the mechanism - the ribbon cable is very close and could be damaged while seating/unseating the bracket or the button(s).

      • Lift the bracket (3) and seat the new button into the socket (4), the button can be placed from inside the frame after the bracket is removed.

      • Ensure that both buttons (1) and (2) are seated so that the LONGER part of the Bracket is holding the latches of the buttons.

      • The correct seating for the bracket from the orientation of the first picture top to bottom is: Phone Frame - Bracket - Latch(es)

      FixBotに聞いてみる

      コメントを追加

    9. Fairphone 6 Volume Button Replacement/Reseating, Revert all changes/Close up your FP6: 手順 9、 3の画像 1 Fairphone 6 Volume Button Replacement/Reseating, Revert all changes/Close up your FP6: 手順 9、 3の画像 2 Fairphone 6 Volume Button Replacement/Reseating, Revert all changes/Close up your FP6: 手順 9、 3の画像 3
      • Before re-assembly, do not forget to re-apply the black tape above your button section!

      • Be careful not to screw into the two outside screw holes of the lower backplate!

      • Attach the screen cable as well as the latch with its screw. Insert the screen into the frame and turn around the phone to the back. Screw down the screen with the 8 SILVER screws.

      • Re-attach the upper backplate to the frame.

      • Re-attach the battery with its black screws - be careful to now screw into the outside screw holes of the lower backplate!

      • Attach your backplate and accessories again.

      FixBotに聞いてみる

      コメントを追加

終わりに

Congratulations on your volume button fix!

I have partially used pictures from the official iFixit "Fairphone 6 Teardown: Proof Phones Don’t Have to Be Disposable" video.

キャンセル: このガイドを終了できませんでした。

ある他の人がこのガイドを完成しました。

Artymissi

メンバー登録日: 09/21/26

1 ポイント

1ガイドが承認済み

0件のガイドコメント

コメントを追加

統計データ:

過去 24時間: 11

過去 7 日: 11

過去 30 日: 11

今までの合計 11