はじめに
The buttons on the front of the printer initiate various functions such as turning the power on, cancelling an action, or adjusting settings. If the buttons get damaged and become unresponsive, then they may need to be cleaned or replaced.
必要な工具と部品
-
-
Locate the control panel, the part of the printer with the buttons on it.
-
Push the control panel away from the outside of the printer, taking the panel out of the holes that hold it in place.
-
Repeat the above step for the other side of the control panel.
-
-
-
The front control panel is attached to the printer on both sides by a grey piece of plastic that runs on a track. Remove the control panel from the track by pushing it away from the track on both sides.
-
-
-
-
Flip the detached control panel over so that the buttons are facing down.
-
Remove the two 3mm Phillips #2 screws from the back of the control panel.
-
-
-
Split the control panel in half by gently pulling on both sides of the seam that runs through the control panel.
-
-
-
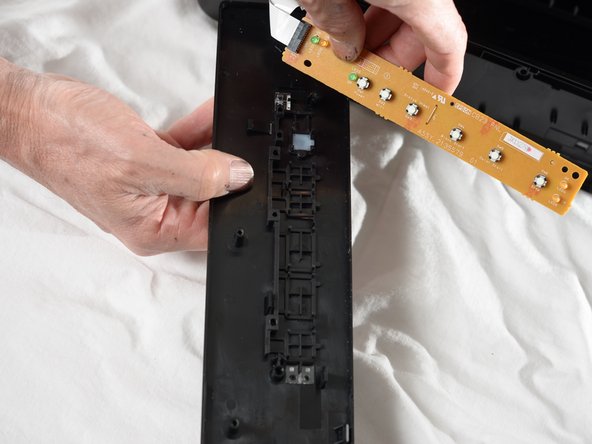
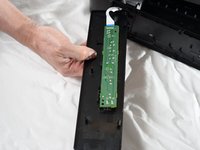
Separate the two pieces to reveal the green circuit board.
-
Remove the green circuit board by lifting it up gently with your hands.
-
-
-
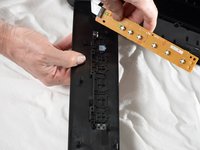
Remove the buttons with the plastic opening tool by pressing the front panel down and lifting the buttons up.
-


To reassemble your device, follow these instructions in the reverse order.
2 の人々がこのガイドを完成させました。
チーム

Cal Poly, Team 6-1, Forte Spring 2014 Cal Poly, Team 6-1, Forte Spring 2014人のメンバー
CPSU-FORTE-S14S6G1
4 メンバー
10のガイドは作成済み