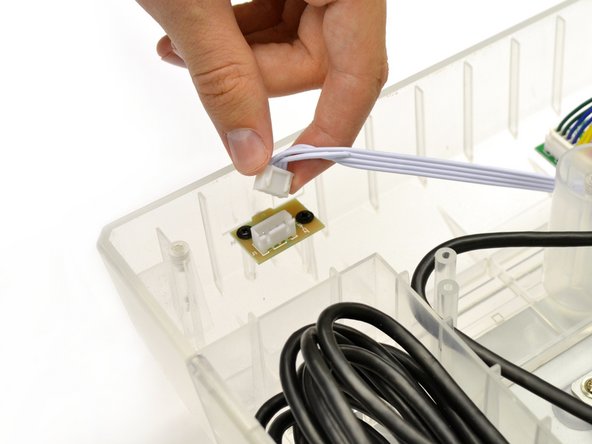
メインコンテンツにスキップ

Eightarc Fusion Headphone Jack Replacement

必要な工具と部品

  1. Eightarc Fusion Headphone Jack Replacement, Headphone Jack: 手順 1、 2の画像 1 Eightarc Fusion Headphone Jack Replacement, Headphone Jack: 手順 1、 2の画像 2
    • Because of the protruding joystick on the top of the controller, make sure to work on a soft surface or prop the controller up to avoid stress on the joystick.

    • Place the controller face down (buttons and joystick down).

    • Use a Phillips Head #1 screwdriver to remove the eight 9.65mm screws located on the felt and metal backplate.

    • Do not confuse the four screws in the rubber feet with the eight screws in the felt. The screws in the feet do not need to be removed.

  2. Eightarc Fusion Headphone Jack Replacement: 手順 2、 1の画像 1
    • Open the door for the cord storage compartment on the right side of the device.

    • Reach under the panel and push upwards on the back panel. Lift it up and remove it from the device.

  3. Eightarc Fusion Headphone Jack Replacement: 手順 3、 2の画像 1 Eightarc Fusion Headphone Jack Replacement: 手順 3、 2の画像 2
    • Grasp the white plug connecting the wires to the headphone jack, and pull gently upwards.

  4. Eightarc Fusion Headphone Jack Replacement: 手順 4、 1の画像 1
    • Using a Phillips head #1 screwdriver, remove the two washer head screws from the headphone jack.

  5. Eightarc Fusion Headphone Jack Replacement: 手順 5、 2の画像 1 Eightarc Fusion Headphone Jack Replacement: 手順 5、 2の画像 2
    • Gently wiggle the headphone jack left and right, pulling it towards you until it slides out of the hole in the enclosure.

終わりに

To reassemble your device, follow these instructions in reverse order.

作成者

1人の作成者と共同作成されました。

Christopher

メンバー登録日: 01/29/15

133 ポイント

1ガイドが承認済み

チーム

Cal Poly, Team 17-35, Amido Winter 2015 Cal Poly, Team 17-35, Amido Winter 2015人のメンバー

CPSU-AMIDO-W15S17G35

4 メンバー

5のガイドは作成済み

0 件のコメント

コメントを追加

統計データ:

過去 24時間: 0

過去 7 日: 0

過去 30 日: 0

今までの合計 235