この翻訳は機械によって生成されたものであり、まだ人間による校正は行われていません。 日本語を話せますか? レビューはこちらから。

Dyson V11のトリガー交換

Beicheng Zhu とその他 6 人の作成者
最終更新日: 2026年8月19日
閲覧: 13万
統計データ:
- 過去24時間:
- 98
- 過去7日:
- 680
- 過去30日:
- 3,163
- 今までの合計
- 129,910
コメント: 71
手順に関する45件のコメント, 26件のガイドコメント
修理ガイドのコメントへ完了済み: 62 63
62人のユーザーがこのガイドを「完了」させました。あなたも加わりませんか?
あなたを含む、63人のユーザーがこのガイドを使って修理を「完了」させました。素晴らしいです!
お気に入り: 9 10
9人のユーザーがこのガイドをお気に入りに登録しています。あなたもリストに入れませんか?
あなたを含む、10人のユーザーがこのガイドをお気に入りに登録しています。
コミュニティメンバーによる寄稿ガイド
iFixitコミュニティーの素晴らしいメンバーがこのガイドを作成しました。iFixitスタッフによって作成されたものではありません。
高画質の画像が必要
よりよい画像があればこのガイドが改善されます。よければ新しい写真を撮影し、編集し、アップロードしてお手伝いください。
多くの画像が必要
幾つかの画像があればこのガイドの手順がより明確になるでしょう。
はじめに
手順 1 に進む ↓この修理ガイドでは、Dyson V11 Torque Drive掃除機のトリガーを交換する方法を説明します。トリガーはプラスチック製のため、破損しやすくなっています。Dyson V11 Torque Driveのトリガーが破損していると、掃除を開始できません。バッテリーが満充電であっても、Dyson V11 Torque Driveが動作しない場合は、トリガーを交換することで再び使用できるようになります。
Dyson V11 Torque Drive掃除機のトリガー交換に必要なツールは、プラスドライバー #1、プラスドライバー #0、およびスパッジャーです。
必要な工具と部品


-
-
-
-
-
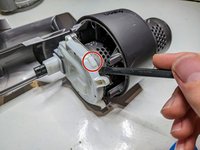
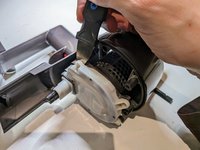
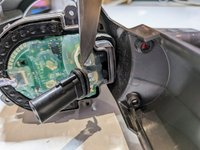
回路基板のカバーは非常に硬く、取り外しが難しい場合があります。長方形の突起付近をスパッジャーでこじ開けるのがコツです。ここにはプラスチック製のクリップが隠れているためです。
-
ネジを外した箇所からカバーの下にジミーを差し込み、そこからこじってその側面を緩めるのも有効です。
-
-
-
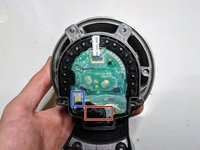
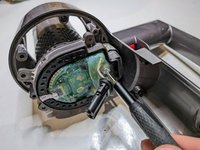
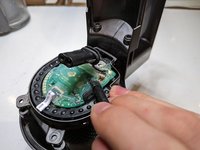
回路基板は、大量の半透明な接着剤で覆われている場合があります。このカバーの下にある、2つの電源接続部とスイッチケーブルにアクセスする必要があります。
-
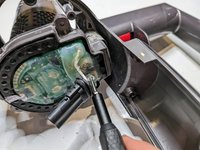
ネジ頭と電源ケーブルから接着剤を慎重に削り取るか、切り取ります。
-
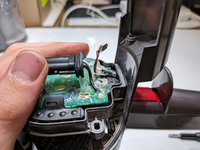
同様の手順で、スイッチケーブルとそのプラグを解放します。
-
-
-
-
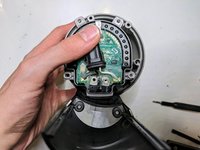
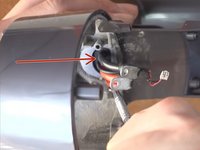
電源ケーブルの端を回転させ、下の回路基板ケースのスロットに通りやすくします。
-
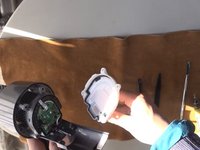
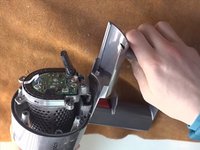
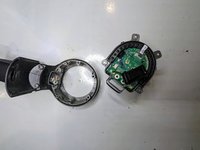
外側のシェルから中心部を取り外します。理想的にはケーブルをスロットから優しく押し出しますが、難しい場合は少し力を加えて中心部を引き抜く必要があるかもしれません。
-
-
この手順で使用する道具:Tweezers$4.99
-
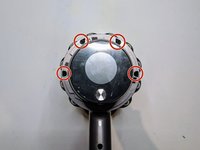
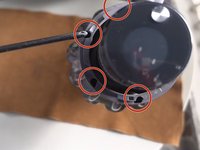
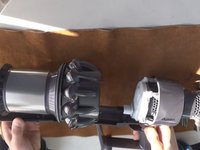
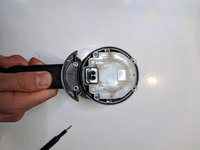
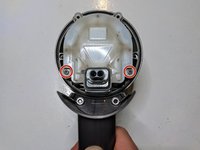
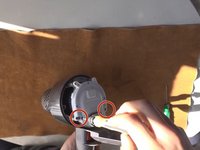
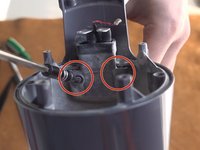
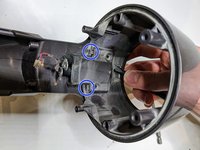
ケーブルケースから2本のネジを取り外す。
-
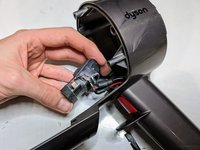
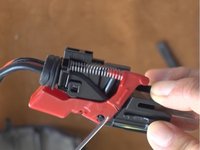
ケーブルケースを上にこじ開けてクリップを外す。クリップをドライバーやピンセットで押す必要がある場合がある。
-
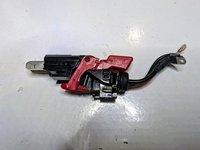
ケースをケーブルからスライドさせて取り外す。
-

 FixBotに聞いてみる






















デバイスを再組み立てするには、これらのインストラクションを逆の順番に従って作業を進めてください。
62 の人々がこのガイドを完成させました。

チーム

York University, Team 1-29, O'Regan Winter 2022 York University, Team 1-29, O'Regan Winter 2022人のメンバー
YORK-O'REGAN-W22S1G29
1 メンバー
12のガイドは作成済み
26件のガイドコメント
Some of the screws in this repair (step 8 and 9) require a T8 Torx bit instead of a Phillips. The Torx screwdriver should be at least 10 cm long and relatively thin to be able to fit into the base of the vacuum. The screwdriver I used from my iFixit essentials kit was too short and too wide to fit into the compartment. That should be added to the guide.
James Leung - 返信 共有
L'assemblage de cet appareil le rend assez compliqué à démonter... surtout la partie avec les câbles de puissance qui vont à la batterie.
Par expérience, en ce qui concerne la gâchette c'est faisable. La gâchette peut se trouver facilement sur internet, ça permet de réparer à pas cher et souvent certaines pièces génériques sont renforcées.
Also applicable to the v10. Some philips are T8 and as one comment already said, they need to be long and thin for some screws - but otherwise a good guide. Step 1 should be remove battery. My dust cover over the circuit board had little retaining clips which made it feel stuck. The small connector attaching the red/white wires lifts out vertically, with a little retaining clip. The final step, I needed a large screw driver to push the trigger part out. I couldn't get the leverage with the shorter spudger.
I chose to buy the full body and replace it after 6 years of use. I hadn't realized how the performance had degraded over time. My early release V11 animal with a screw on battery works better than new and now I have the upgraded display. I am going to deep clean the old body and replace the trigger as a backup but I didn't have a T8 long enough and skinny enough to remove all the screws.
Missing the punch line! This is a good review all until the last step, which is INCOMPLETE and incorrect. The switch assembly must be removed from the arm, and this is much easier to do with a pliers than by pushing on the top. Once the assembly is removed, you must be careful to note the orientation of the broken switch trigger, remove the old, and replace the new trigger, not forgetting to attach the spring.
