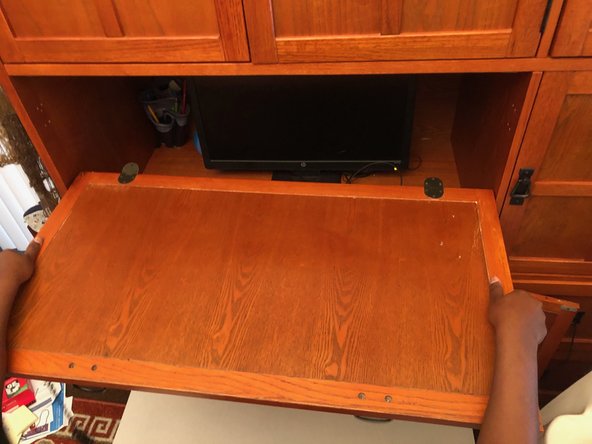
メインコンテンツにスキップ

Drop-Front Desk Panel Repair

必要な工具と部品

  1. Drop-Front Desk Panel Repair, Drop-Front Desk Panel: 手順 1、 3の画像 1 Drop-Front Desk Panel Repair, Drop-Front Desk Panel: 手順 1、 3の画像 2 Drop-Front Desk Panel Repair, Drop-Front Desk Panel: 手順 1、 3の画像 3
    • Place the drop front panel on a firm and flat surface.

    • A firm surface minimizes the risk of the panel injuring one’s body or experiencing further damages.

  2. Drop-Front Desk Panel Repair: 手順 2、 3の画像 1 Drop-Front Desk Panel Repair: 手順 2、 3の画像 2 Drop-Front Desk Panel Repair: 手順 2、 3の画像 3
    • Position the rectangular plate over the Phillips #5 wood screw holes (15mm) on the left width.

    • There are six Phillips #5 wooden screw holes in total (15mm). Four wooden screw holes (15mm) are on the left width of the panel and two other screw holes are on the width's side.

    • Repeat this step with the right width of the panel.

    • The rectangular plates that will later be fastened to the left and right width are connected to chains. The chains connect to another hinge piece that will later be connected to the main desk frame.

  3. Drop-Front Desk Panel Repair: 手順 3、 3の画像 1 Drop-Front Desk Panel Repair: 手順 3、 3の画像 2 Drop-Front Desk Panel Repair: 手順 3、 3の画像 3
    • Use the Phillips #2 screwdriver to turn the six Phillips #5 wood screws (15 mm) and secure the rectangular plates to the left width of the panel.

    • Repeat this step with the right width of the panel.

    • Turn the screwdriver to the right to tighten the screws. Turn the screwdriver to the left to loosen the screws.

  4. Drop-Front Desk Panel Repair: 手順 4、 3の画像 1 Drop-Front Desk Panel Repair: 手順 4、 3の画像 2 Drop-Front Desk Panel Repair: 手順 4、 3の画像 3
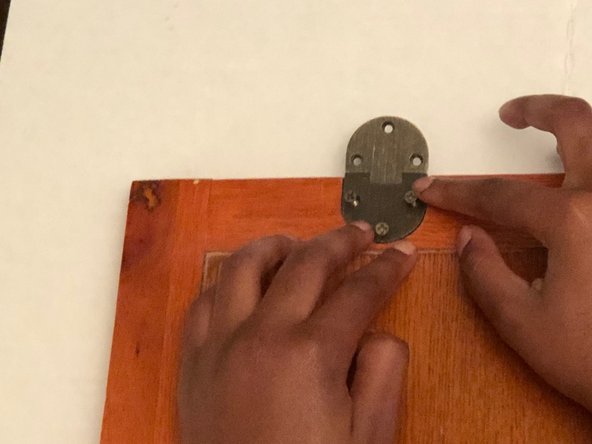
    • Position the hemispherical plates over the left hemispherical hole on the length of the panel.

    • Repeat this step with the right length of the panel.

    • A hemisphere is the half of a circle.

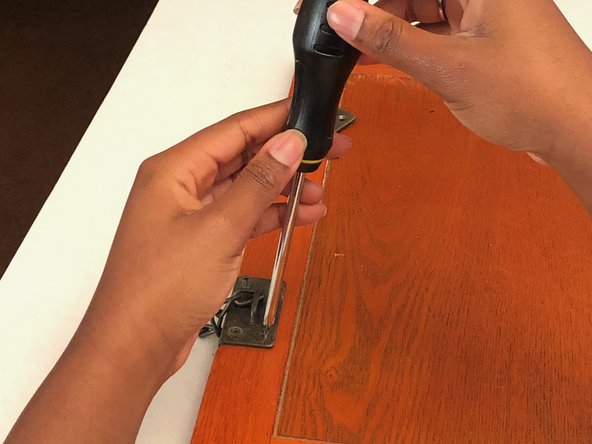
    • Use the Phillips #2 screwdriver to turn the three #5 wood screws (15mm) and tighten the hemispherical plates along the length of the drop-front panel.

  5. Drop-Front Desk Panel Repair: 手順 5、 3の画像 1 Drop-Front Desk Panel Repair: 手順 5、 3の画像 2 Drop-Front Desk Panel Repair: 手順 5、 3の画像 3
    • Prevent dropping the drop-front panel by carrying the panel with each hand grasping both sides of the panel's width.

    • Carry the panel from the flat surface to the main desk frame.

  6. Drop-Front Desk Panel Repair: 手順 6、 3の画像 1 Drop-Front Desk Panel Repair: 手順 6、 3の画像 2 Drop-Front Desk Panel Repair: 手順 6、 3の画像 3
    • Connect the panel to the bottom edge of the main desk frame.

  7. Drop-Front Desk Panel Repair: 手順 7、 2の画像 1 Drop-Front Desk Panel Repair: 手順 7、 2の画像 2
    • Position the panel's hemispherical plates over the hemispherical holes on the left and right side of the main desk frame.

  8. Drop-Front Desk Panel Repair: 手順 8、 3の画像 1 Drop-Front Desk Panel Repair: 手順 8、 3の画像 2 Drop-Front Desk Panel Repair: 手順 8、 3の画像 3
    • Have one person hold the drop-front panel in place and another person screw the hinges in place.

    • Use the Phillips #2 screwdriver to turn the three Phillips #5 wood screws (15mm) and tighten the hemispherical hinges on the main desk frame.

  9. Drop-Front Desk Panel Repair: 手順 9、 3の画像 1 Drop-Front Desk Panel Repair: 手順 9、 3の画像 2 Drop-Front Desk Panel Repair: 手順 9、 3の画像 3
    • Position the second half of the rectangular plate over the four wood screw holes (15mm) on the left side of the inner desk frame.

    • Repeat this step with the right side of the inner desk frame.

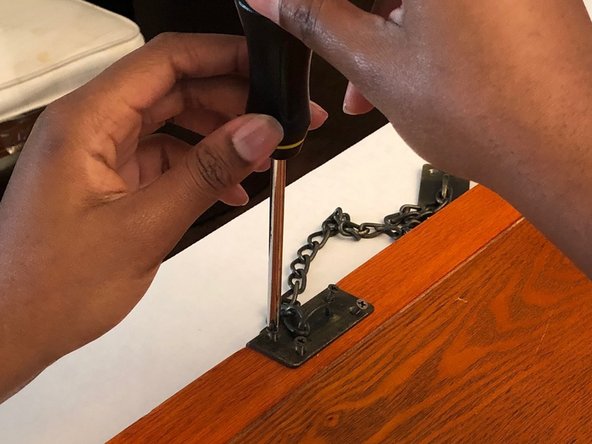
    • Use the Phillips #2 screwdriver to screw the four #5 wood screws (15mm) and tighten the rectangular plate.

    • Repeat this step with the right side of the inner desk frame.

  10. Drop-Front Desk Panel Repair: 手順 10、 3の画像 1 Drop-Front Desk Panel Repair: 手順 10、 3の画像 2 Drop-Front Desk Panel Repair: 手順 10、 3の画像 3
    • Test the connection between the main desk frame and the drop-front panel by raising the panel towards the inner desk frame and away from it.

    • If the connection is unsteady or makes noise as you raise and lower the panel, tighten all the screws on the panel and the main desk frame.

終わりに

To disassemble your device, follow these instructions in reverse order.

作成者

1人の作成者と共同作成されました。

Kiarra

メンバー登録日: 01/14/19

181 ポイント

1ガイドが承認済み

チーム

USF Sarasota-Manatee, Team S1-G1, Stewart Spring 2019 USF Sarasota-Manatee, Team S1-G1, Stewart Spring 2019人のメンバー

USFSM-STEWART-S19S1G1

18 メンバー

27のガイドは作成済み

0 件のコメント

コメントを追加

統計データ:

過去 24時間: 2

過去 7 日: 8

過去 30 日: 41

今までの合計 3,339