メインコンテンツにスキップ
リペアコミュニティに参加 - アカウントの作成

Disassembling Compaq Mini 110 Wireless Module

必要な工具と部品

  1. Disassembling Compaq Mini 110 Wireless Module, Battery: 手順 1、 2の画像 1 Disassembling Compaq Mini 110 Wireless Module, Battery: 手順 1、 2の画像 2
    • Locate the battery and the battery tabs on the bottom of the Compaq Mini.

    FixBotに聞いてみる

    コメントを追加

  2. Disassembling Compaq Mini 110 Wireless Module: 手順 2、 3の画像 1 Disassembling Compaq Mini 110 Wireless Module: 手順 2、 3の画像 2 Disassembling Compaq Mini 110 Wireless Module: 手順 2、 3の画像 3
    • Push both tabs inward simultaneously and slide the battery out.

    FixBotに聞いてみる

    コメントを追加

  3. Disassembling Compaq Mini 110 Wireless Module, RAM: 手順 3、 2の画像 1 Disassembling Compaq Mini 110 Wireless Module, RAM: 手順 3、 2の画像 2
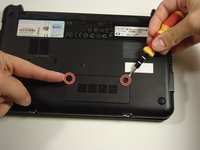
    • Use a Philips #0 screwdriver to unscrew the two screws covering the memory compartment on the bottom of the laptop and remove the cover.

    FixBotに聞いてみる

    コメントを追加

  4. Disassembling Compaq Mini 110 Wireless Module: 手順 4、 1の画像 1
    • Push out the side tabs simultaneously and pull out the old RAM module.

    • When inserting a new RAM stick, be sure to evenly insert the gold pins in the same orientation that the old module was removed. While sliding the module in, press the side tabs in place.

    FixBotに聞いてみる

    コメントを追加

  5. Disassembling Compaq Mini 110 Wireless Module, Keyboard: 手順 5、 2の画像 1 Disassembling Compaq Mini 110 Wireless Module, Keyboard: 手順 5、 2の画像 2
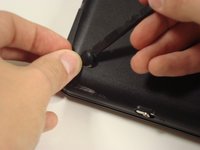
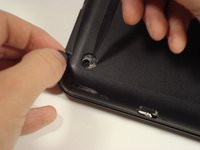
    • Remove the rubber pads located on the corners of your Compaq Mini.

    • There may be junk underneath it. This is residue left from the glue that held on the rubber pad. Just scrape it away to find the screw.

    FixBotに聞いてみる

    コメントを追加

  6. Disassembling Compaq Mini 110 Wireless Module: 手順 6、 2の画像 1 Disassembling Compaq Mini 110 Wireless Module: 手順 6、 2の画像 2
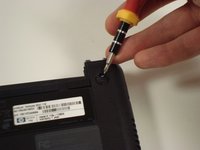
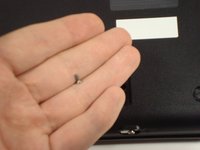
    • Unscrew all the corner screws. There are four total, one under each rubber pad.

    FixBotに聞いてみる

    コメントを追加

  7. Disassembling Compaq Mini 110 Wireless Module: 手順 7、 2の画像 1 Disassembling Compaq Mini 110 Wireless Module: 手順 7、 2の画像 2
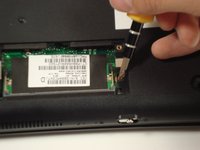
    • Unscrew the screw for the bottom case located in the RAM compartment.

    FixBotに聞いてみる

    コメントを追加

  8. Disassembling Compaq Mini 110 Wireless Module: 手順 8、 2の画像 1 Disassembling Compaq Mini 110 Wireless Module: 手順 8、 2の画像 2
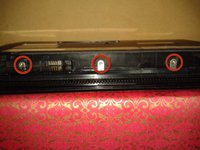
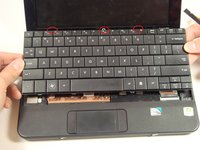
    • Remove the three screws in the silver tabs at the back of the keyboard.

    • These are located at the back of the base under the screen.

    • Lift the keyboard away from the laptop.

    FixBotに聞いてみる

    コメントを追加

  9. Disassembling Compaq Mini 110 Wireless Module, Hard Drive: 手順 9、 1の画像 1
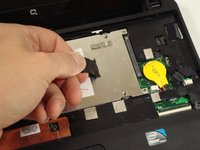
    • Remove the three screws holding the panel in place.

    FixBotに聞いてみる

    コメントを追加

  10. Disassembling Compaq Mini 110 Wireless Module: 手順 10、 2の画像 1 Disassembling Compaq Mini 110 Wireless Module: 手順 10、 2の画像 2
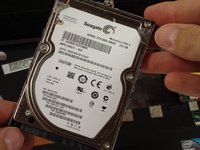
    • Pull up on the tab to remove the hard drive.

    FixBotに聞いてみる

    コメントを追加

  11. Disassembling Compaq Mini 110 Wireless Module, Top Cover: 手順 11、 1の画像 1
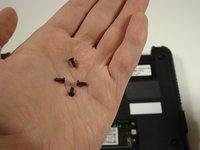
    • Remove the eight screws that are from the plastic top cover.

    FixBotに聞いてみる

    コメントを追加

  12. Disassembling Compaq Mini 110 Wireless Module: 手順 12、 3の画像 1 Disassembling Compaq Mini 110 Wireless Module: 手順 12、 3の画像 2 Disassembling Compaq Mini 110 Wireless Module: 手順 12、 3の画像 3
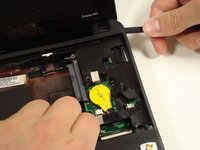
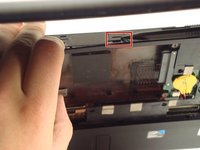
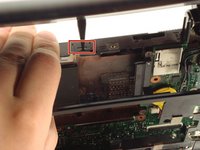
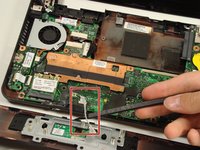
    • Pry up the top plastic cover using a spudger.

    • These two tabs under the screen need to be pushed in with a spudger.

    FixBotに聞いてみる

    コメントを追加

  13. Disassembling Compaq Mini 110 Wireless Module: 手順 13、 2の画像 1 Disassembling Compaq Mini 110 Wireless Module: 手順 13、 2の画像 2
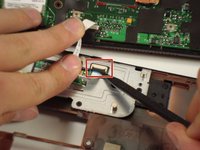
    • Remove the cable by carefully pulling it up.

    • Be careful when lifting up the cover because the track pad is still attached.

    FixBotに聞いてみる

    コメントを追加

  14. Disassembling Compaq Mini 110 Wireless Module, Wireless Module: 手順 14、 1の画像 1
    • Remove the two screws holding the module in place.

    FixBotに聞いてみる

    コメントを追加

  15. Disassembling Compaq Mini 110 Wireless Module: 手順 15、 1の画像 1
    • Detach the two wires.

    FixBotに聞いてみる

    コメントを追加

  16. Disassembling Compaq Mini 110 Wireless Module: 手順 16、 1の画像 1
    • Just pull it out.

    FixBotに聞いてみる

    コメントを追加

終わりに

To reassemble your device, follow these instructions in reverse order.

キャンセル: このガイドを終了できませんでした。

ある他の人がこのガイドを完成しました。

作成者

5人の作成者と共同で作成されました。

alea

メンバー登録日: 10/06/10

1,429 ポイント

14のガイドは作成済み

チーム

Cal Poly, Team 22-2, Maness Fall 2010 Cal Poly, Team 22-2, Maness Fall 2010人のメンバー

CPSU-MANESS-F10S22G2

6 メンバー

20のガイドは作成済み

0件のガイドコメント

コメントを追加

統計データ:

過去 24時間: 0

過去 7 日: 3

過去 30 日: 16

今までの合計 4,481