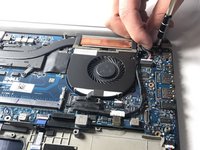
メインコンテンツにスキップ

Dell XPS 15 9530 Keyboard Replacement

必要な工具と部品

  1. Dell XPS 15 9530 Keyboard Replacement, Base Cover: 手順 1、 3の画像 1 Dell XPS 15 9530 Keyboard Replacement, Base Cover: 手順 1、 3の画像 2 Dell XPS 15 9530 Keyboard Replacement, Base Cover: 手順 1、 3の画像 3
    • Using a T5 Torx screwdriver, remove ten 3mm screws.

  2. Dell XPS 15 9530 Keyboard Replacement: 手順 2、 2の画像 1 Dell XPS 15 9530 Keyboard Replacement: 手順 2、 2の画像 2
    • Lift the plastic tab.

    • Remove two 3mm Phillips #0 screws under the plastic tab.

  3. Dell XPS 15 9530 Keyboard Replacement: 手順 3、 1の画像 1
    • Lift the lower case off.

  4. Dell XPS 15 9530 Keyboard Replacement, Battery: 手順 4、 2の画像 1 Dell XPS 15 9530 Keyboard Replacement, Battery: 手順 4、 2の画像 2
    • Using a Phillips #0 screwdriver, remove the seven 3.5mm screws that secure the battery to the palm rest assembly.

  5. Dell XPS 15 9530 Keyboard Replacement: 手順 5、 1の画像 1
    • Disconnect the battery cable from the system board.

    • Be sure to use a plastic tool, not a metal one.

  6. Dell XPS 15 9530 Keyboard Replacement: 手順 6、 1の画像 1
    • Lift the battery off the chassis.

  7. Dell XPS 15 9530 Keyboard Replacement, Keyboard: 手順 7、 3の画像 1 Dell XPS 15 9530 Keyboard Replacement, Keyboard: 手順 7、 3の画像 2 Dell XPS 15 9530 Keyboard Replacement, Keyboard: 手順 7、 3の画像 3
    • Remove the three 3.5mm Phillips #0 screws mounting the motherboard.

  8. Dell XPS 15 9530 Keyboard Replacement: 手順 8、 3の画像 1 Dell XPS 15 9530 Keyboard Replacement: 手順 8、 3の画像 2 Dell XPS 15 9530 Keyboard Replacement: 手順 8、 3の画像 3
    この手順で使用する道具:
    Tweezers
    $4.99
    購入する
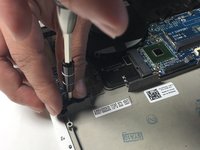
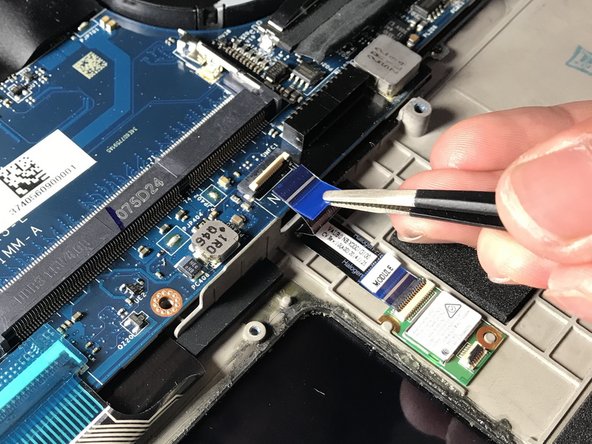
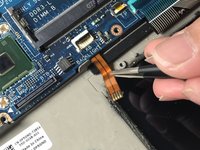
    • Disconnect ribbon cables above the touch pad using tweezers.

  9. Dell XPS 15 9530 Keyboard Replacement: 手順 9、 3の画像 1 Dell XPS 15 9530 Keyboard Replacement: 手順 9、 3の画像 2 Dell XPS 15 9530 Keyboard Replacement: 手順 9、 3の画像 3
    • Lift and remove the motherboard from the chassis.

  10. Dell XPS 15 9530 Keyboard Replacement: 手順 10、 3の画像 1 Dell XPS 15 9530 Keyboard Replacement: 手順 10、 3の画像 2 Dell XPS 15 9530 Keyboard Replacement: 手順 10、 3の画像 3
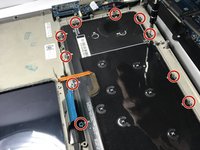
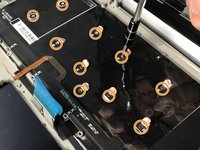
    • Remove the ten 3mm Phillips #0 screws on the perimeter of the keyboard assembly.

    • Remove the ten 2.5mm Phillips #0 screws underneath the plastic shielding of the keyboard.

終わりに

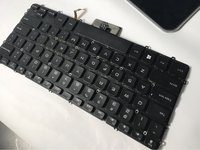
To reassemble your device, follow these instructions in reverse order.

作成者

3人の作成者と共同で作成されました。

Larissa Omura

メンバー登録日: 04/04/19

743 ポイント

6のガイドは作成済み

チーム

コメント 1 件

Thank you for this guide! Is there any way to obtain replacement screws for the outer perimeter of the keyboard? I’ve recently disassembled my XPS 9530 and found one of the screws is very stripped, I managed to get it out but it really shouldn’t be put back in due to the state of the head.

I’m struggling to find replacements for the size quoted. Are they Phillips M2 3mm silver screws?

James White - 返信

コメントを追加

統計データ:

過去 24時間: 3

過去 7 日: 14

過去 30 日: 43

今までの合計 6,586