メインコンテンツにスキップ

Dell XPS 15 9510 Touchpad Replacement

必要な工具と部品

  1. Dell XPS 15 9510 Touchpad Replacement, Lower Case: 手順 1、 1の画像 1
    • Make sure the laptop is powered off and unplug all cables before beginning any repair.

    • Remove eight 3 mm screws from the underside of the case using a T5 Torx screwdriver.

  2. Dell XPS 15 9510 Touchpad Replacement: 手順 2、 1の画像 1
    • The metal case of the XPS 15 9510 is extremely sharp, so be careful not to run your fingers along the edge when disassembling the laptop.

    • Wedge the case apart with a nylon spudger.

    • If the plastic one isn't possible to insert, use the metal spudger to carefully create a small gap first.

    • Slide spudger along each side of the laptop

  3. Dell XPS 15 9510 Touchpad Replacement: 手順 3、 1の画像 1
    • The metal case of the XPS 15 9510 is extremely sharp, so be careful not to run your fingers along the edge when disassembling the laptop.

    • Lift the back panel of the laptop off and set it aside.

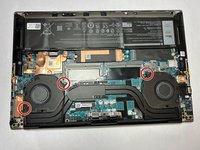
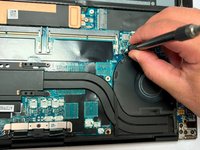
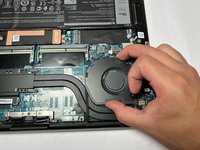
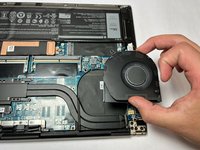
  4. Dell XPS 15 9510 Touchpad Replacement, Fan: 手順 4、 2の画像 1 Dell XPS 15 9510 Touchpad Replacement, Fan: 手順 4、 2の画像 2
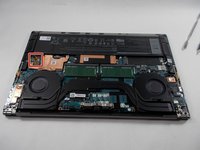
    • Remove two 4.3 mm screws from the left fan and one 4.3 mm screw from the right fan using a JIS #000 screwdriver.

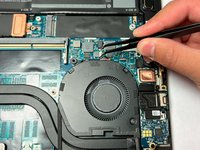
  5. Dell XPS 15 9510 Touchpad Replacement: 手順 5、 2の画像 1 Dell XPS 15 9510 Touchpad Replacement: 手順 5、 2の画像 2
    この手順で使用する道具:
    Tweezers
    $4.99
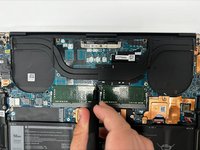
    • Gently unplug the motherboard fan connector using a pair of tweezers.

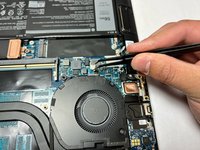
  6. Dell XPS 15 9510 Touchpad Replacement: 手順 6、 1の画像 1
    • Unplug the motherboard connector on the other fan using a pair of tweezers.

  7. Dell XPS 15 9510 Touchpad Replacement: 手順 7、 2の画像 1 Dell XPS 15 9510 Touchpad Replacement: 手順 7、 2の画像 2
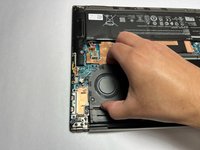
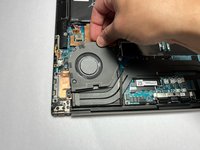
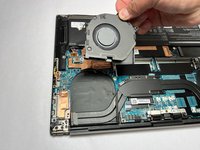
    • Gently slide and then lift the fans out of their positions.

  8. Dell XPS 15 9510 Touchpad Replacement: 手順 8、 3の画像 1 Dell XPS 15 9510 Touchpad Replacement: 手順 8、 3の画像 2 Dell XPS 15 9510 Touchpad Replacement: 手順 8、 3の画像 3
    • Repeat the previous step and remove the other fan.

  9. Dell XPS 15 9510 Touchpad Replacement, Battery: 手順 9、 2の画像 1 Dell XPS 15 9510 Touchpad Replacement, Battery: 手順 9、 2の画像 2
    • Using the small battery pull tab, disconnect the battery connector from the motherboard.

  10. Dell XPS 15 9510 Touchpad Replacement: 手順 10、 1の画像 1
    • Remove eight 2.5 mm from around the perimeter of the battery using a Phillips #0 screwdriver.

  11. Dell XPS 15 9510 Touchpad Replacement: 手順 11、 2の画像 1 Dell XPS 15 9510 Touchpad Replacement: 手順 11、 2の画像 2
    • There are many delicate components in the vicinity of the battery, so be extremely careful removing it

    • Remove the old battery from the laptop.

  12. Dell XPS 15 9510 Touchpad Replacement, Heat Sink: 手順 12、 2の画像 1 Dell XPS 15 9510 Touchpad Replacement, Heat Sink: 手順 12、 2の画像 2
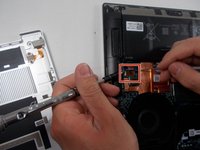
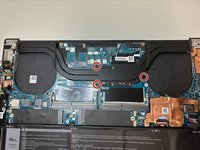
    • Remove the three 4.6 mm screws that secure the heat sink with a Phillips #00 screwdriver.

  13. Dell XPS 15 9510 Touchpad Replacement: 手順 13、 1の画像 1
  14. Dell XPS 15 9510 Touchpad Replacement, Touchpad: 手順 14、 1の画像 1
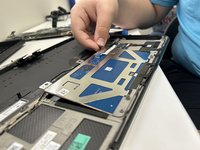
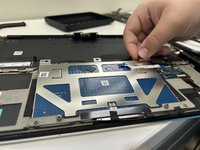
    • Remove the six 3 mm screws securing the touch pad with a Phillips #00 screw driver.

  15. Dell XPS 15 9510 Touchpad Replacement: 手順 15、 3の画像 1 Dell XPS 15 9510 Touchpad Replacement: 手順 15、 3の画像 2 Dell XPS 15 9510 Touchpad Replacement: 手順 15、 3の画像 3
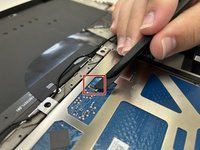
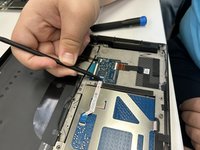
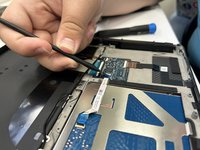
    • Flip up the black ZIF locking flap that secures the touchpad ribbon cable.

    • Disconnect the touch pad ribbon cable.

  16. Dell XPS 15 9510 Touchpad Replacement: 手順 16、 2の画像 1 Dell XPS 15 9510 Touchpad Replacement: 手順 16、 2の画像 2
    • Lift the touch pad up and out of the chassis.

終わりに

To reassemble your device, follow the above steps in reverse order.
Take your e-waste to an R2 or e-Stewards certified recycler.
Repair didn’t go as planned? Try some basic troubleshooting or ask our Answers community for help.

ある他の人がこのガイドを完成しました。

作成者

1人の作成者と共同作成されました。

Esmie

メンバー登録日: 09/23/24

121 ポイント

1ガイドが承認済み

チーム

University of North Texas, Team 3-5, Coppersmith Fall 2024 University of North Texas, Team 3-5, Coppersmith Fall 2024人のメンバー

UNT-COPPERSMITH-F24S3G5

4 メンバー

5のガイドは作成済み

1件のガイドコメント

This guide is incomplete. Step 13 shows removing the heatsink, then step 14 is removing the touchpad, but it's a missing a HUGE series of steps in between which is removing the motherboard to access the touchpad. As-is this guide is not usable.

Derek Selby - 返信

コメントを追加

統計データ:

過去 24時間: 4

過去 7 日: 18

過去 30 日: 95

今までの合計 248