はじめに
In this guide, we will show you how to remove the RAM from the laptop and replace it with a new 2GB RAM stick.
必要な工具と部品
-
-
Flip your device over so the bottom panel is facing up.
-
To remove the old battery from the laptop, first unscrew the eight screws (size M2.5x8) from the bottom with a Phillips #0 screwdriver, this will allow the removal of the keyboard and front panel.
 FixBotに聞いてみる
-
-
-
Flip the device over again and open the laptop so that you have access to the keyboard. There are hooks on the bottom of the keyboard, but gently pulling the keyboard towards the monitor will allow it to pull out easily. Be sure to unclamp the ribbon cable. Remove the three screws under the keyboard.
-
Remove the three plastic Keyboard and trackpad connectors (these are labeled with a blue circle on the second photograph).
-
-
-
-
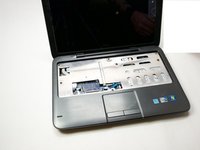
Next, remove the top cover from the device using the plastic opening tools. It snaps in on the sides, so don't worry if you hear it unsnapping; it's not breaking.
-
-
-
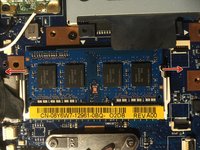
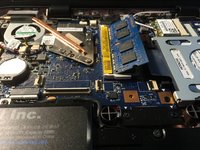
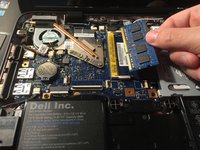
With the cover removed, locate the 2GB RAM stick. It will be in the upper-middle portion of the device. The RAM stick is the flat blue rectangular object that has four black squares running along it vertically (for convenience, the RAM stick has been outlined in red in the photo).
-
-
-
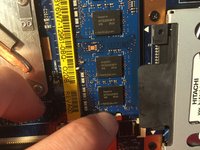
There are two white spring levers on either side of the RAM. Pull them out gently to release the RAM. This will cause the RAM to stick up at a forty-five degree angle.
-
With the RAM at a forty-five degree angle, gently pull it straight out of the device.
-


To reassemble your device, follow these instructions in reverse order.
2 の人々がこのガイドを完成させました。
チーム

UW Tacoma, Team 1-1, Liner SU 2015 UW Tacoma, Team 1-1, Liner SU 2015人のメンバー
UWT-LINER-SU15S1G1
3 メンバー
6のガイドは作成済み
2件のガイドコメント
Good effort, but incomplete. Laptop parts can be very easily damaged, so removing all the screws is important.
Good evening!!!
Is it possible to install a M.2 or NVME SSD in this netbook model?
Greetings and blessings from Venezuela!!!!