メインコンテンツにスキップ
リペアコミュニティに参加 - アカウントの作成

Dell Inspiron 8600 LCD Replacement

必要な工具と部品

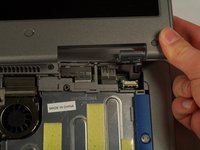
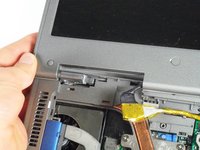
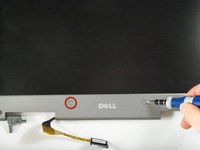
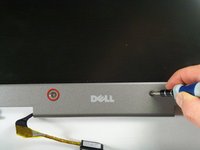
  1. Dell Inspiron 8600 LCD Replacement, Hinge Cover: 手順 1、 3の画像 1 Dell Inspiron 8600 LCD Replacement, Hinge Cover: 手順 1、 3の画像 2 Dell Inspiron 8600 LCD Replacement, Hinge Cover: 手順 1、 3の画像 3
    • Insert a spudger into the notch at the far left side of the top blue panel and pry the hinge cover off.

    • You may need to pry the other side off as well. You can do this by inserting the spudger between the hinge and the top cover.

    • Be careful of the wire attached to the underside of the hinge cover.

    FixBotに聞いてみる

    コメントを追加

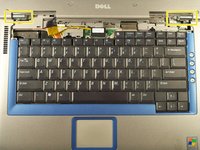
  2. Dell Inspiron 8600 LCD Replacement: 手順 2、 1の画像 1
    • Pull the small black tab on the right hand side of the laptop.

    • You have now removed the hinge cover.

    FixBotに聞いてみる

    コメントを追加

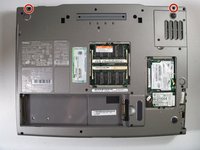
  3. Dell Inspiron 8600 LCD Replacement, Display Module: 手順 3、 2の画像 1 Dell Inspiron 8600 LCD Replacement, Display Module: 手順 3、 2の画像 2
    • Flip the laptop over and remove the indicated screws.

    • Flip the laptop back over.

    • Find the two places where the display module is attached to the base of the computer.

    FixBotに聞いてみる

    コメントを追加

  4. Dell Inspiron 8600 LCD Replacement: 手順 4、 1の画像 1
    • Disconnect the video card from the display module by gently lifting upwards on the black tab.

    FixBotに聞いてみる

    コメントを追加

  5. Dell Inspiron 8600 LCD Replacement: 手順 5、 2の画像 1 Dell Inspiron 8600 LCD Replacement: 手順 5、 2の画像 2
    • Lift the display module directly upwards from the base of the computer.

    FixBotに聞いてみる

    コメントを追加

  6. Dell Inspiron 8600 LCD Replacement: 手順 6、 1の画像 1
    • Now remove the display module.

    FixBotに聞いてみる

    コメントを追加

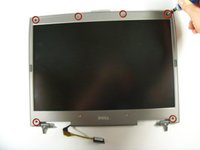
  7. Dell Inspiron 8600 LCD Replacement, LCD: 手順 7、 3の画像 1 Dell Inspiron 8600 LCD Replacement, LCD: 手順 7、 3の画像 2 Dell Inspiron 8600 LCD Replacement, LCD: 手順 7、 3の画像 3
    • First, remove the plastic tabs that are covering the interior screws.

    • After removing the tabs, remove the interior screws using a #1 Philips Screwdriver.

    • Note there are 8 tabs and 8 screws in total.

    FixBotに聞いてみる

    コメントを追加

  8. Dell Inspiron 8600 LCD Replacement: 手順 8、 1の画像 1
    • Now that the screws are removed, press the plastic casing inward to loosen the case. Then remove the plastic case from the monitor unit.

    FixBotに聞いてみる

    コメントを追加

  9. Dell Inspiron 8600 LCD Replacement: 手順 9、 1の画像 1
    • Using a Philips #1 screwdriver remove the screws holding the LCD in place.

    • Note there are 8 screws in total for this step, 4 on each side of the unit.

    FixBotに聞いてみる

    コメントを追加

  10. Dell Inspiron 8600 LCD Replacement: 手順 10、 1の画像 1
    • Remove the broken LCD unit, and replace with new unit.

    FixBotに聞いてみる

    コメントを追加

終わりに

To reassemble your device, follow these instructions in reverse order.

キャンセル: このガイドを終了できませんでした。

2 の人々がこのガイドを完成させました。

作成者

5人の作成者と共同で作成されました。

Perry

メンバー登録日: 04/12/11

251 ポイント

4のガイドは作成済み

チーム

Cal Poly, Team 18-22, Garner Spring 2011 Cal Poly, Team 18-22, Garner Spring 2011人のメンバー

CPSU-GARNER-S11S18G22

4 メンバー

16のガイドは作成済み

1件のガイドコメント

which controller board do i have to use for this model ?

bcdoor - 返信 共有

コメントを追加

統計データ:

過去 24時間: 0

過去 7 日: 2

過去 30 日: 24

今までの合計 5,011