メインコンテンツにスキップ
リペアコミュニティに参加 - アカウントの作成

Dell E193FPc Screen Replacement

必要な工具と部品

  1. Dell E193FPc Screen Replacement, Stand: 手順 1、 1の画像 1
    • Lay the monitor screen-down so the back screws are exposed.

    • Remove the four 11.9 mm Phillips #2 screws securing the stand to the back of the monitor.

    FixBotに聞いてみる

    コメントを追加

  2. Dell E193FPc Screen Replacement: 手順 2、 1の画像 1
    • Gently lift and pull away the stand at a slight angle away from the monitor.

    FixBotに聞いてみる

    コメントを追加

  3. Dell E193FPc Screen Replacement, Display Bezel: 手順 3、 2の画像 1 Dell E193FPc Screen Replacement, Display Bezel: 手順 3、 2の画像 2
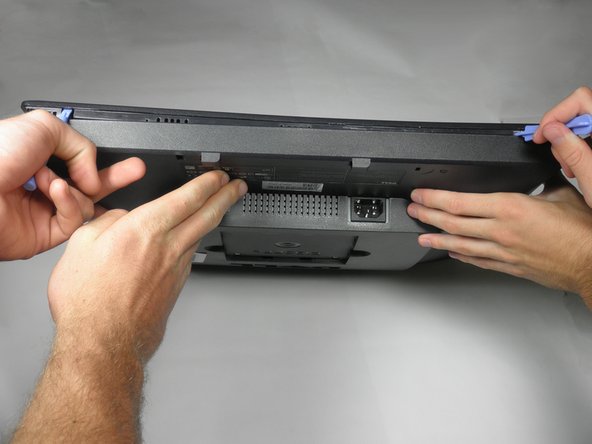
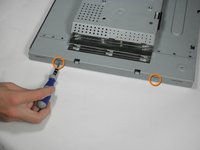
    • Locate the two holes on the bottom of the monitor.

    • Insert a plastic opening tool or spudger into the holes and gently pry the plastic apart along the groove.

    • This task is much easier if two people pry simultaneously at each hole.

    • Continue prying along the entire edge of the monitor.

    FixBotに聞いてみる

    コメントを追加

  4. Dell E193FPc Screen Replacement: 手順 4、 2の画像 1 Dell E193FPc Screen Replacement: 手順 4、 2の画像 2
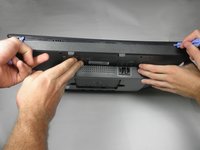
    • When finished prying, the plastic will partially fall away from the rest of the monitor.

    • Do not try to fully remove the front frame yet. The frame is still attached to the buttons.

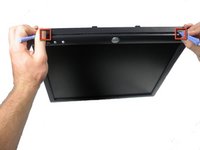
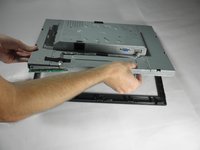
    • While holding the frames together, carefully flip the monitor over so it faces screen down.

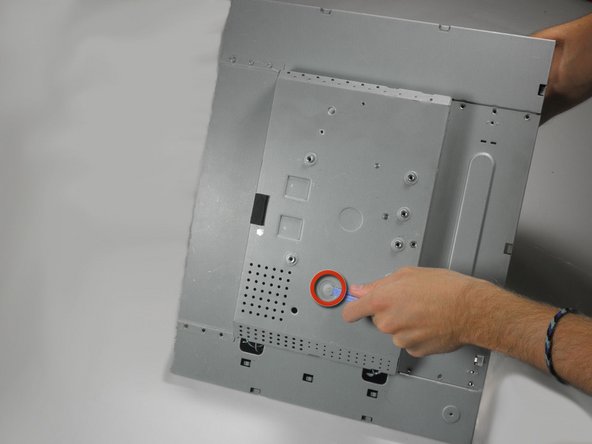
    • Gently lift and remove remove the rear case from the monitor.

    FixBotに聞いてみる

    コメントを追加

  5. Dell E193FPc Screen Replacement: 手順 5、 3の画像 1 Dell E193FPc Screen Replacement: 手順 5、 3の画像 2 Dell E193FPc Screen Replacement: 手順 5、 3の画像 3
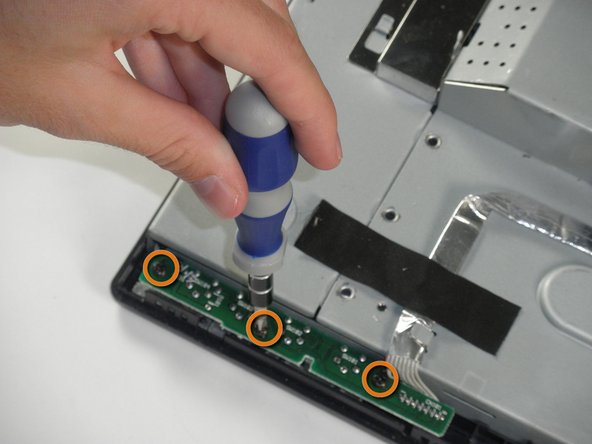
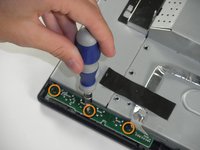
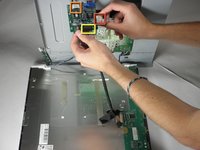
    • Locate the green interface button board.

    • Remove the three 9.71 mm Phillips #2 screws holding the interface button board to the display bezel.

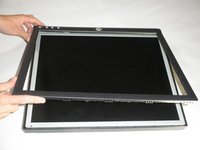
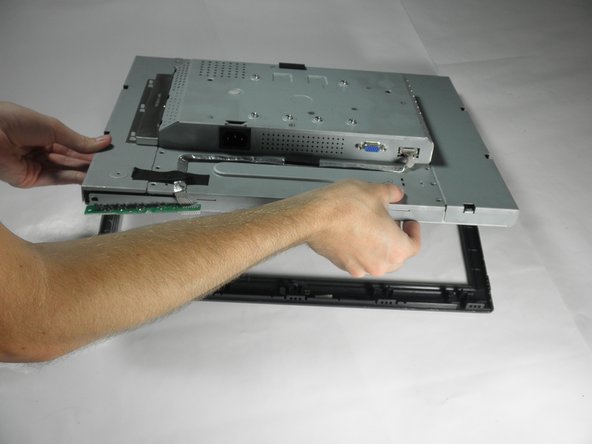
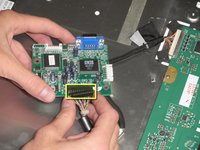
    • Lift the monitor interior away from the front cover.

    FixBotに聞いてみる

    コメントを追加

  6. Dell E193FPc Screen Replacement, Inverter Board: 手順 6、 3の画像 1 Dell E193FPc Screen Replacement, Inverter Board: 手順 6、 3の画像 2 Dell E193FPc Screen Replacement, Inverter Board: 手順 6、 3の画像 3
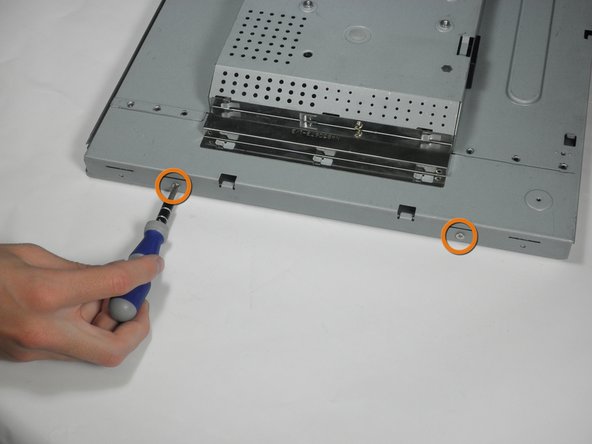
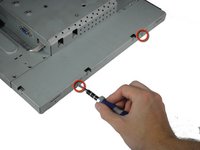
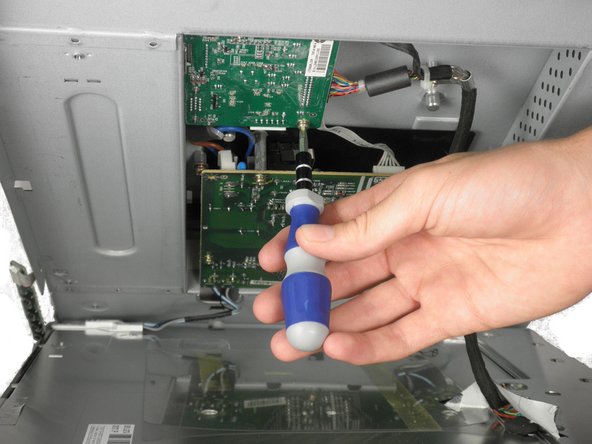
    • With the monitor facing down, remove the two 5.81 mm Phillips #2 screws on the right side of the metal casing.

    • With the monitor still facing down, remove the two 5.81 mm Phillips #2 screws on the left side of the casing.

    • Do attempt to pull apart the casing. There are still wires holding the front and back together.

    FixBotに聞いてみる

    コメントを追加

  7. Dell E193FPc Screen Replacement: 手順 7、 1の画像 1
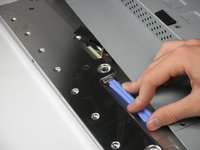
    • Using a 5 mm nut driver, unscrew the VGA port's mounting screws from the metal casing.

    FixBotに聞いてみる

    コメントを追加

  8. Dell E193FPc Screen Replacement: 手順 8、 1の画像 1
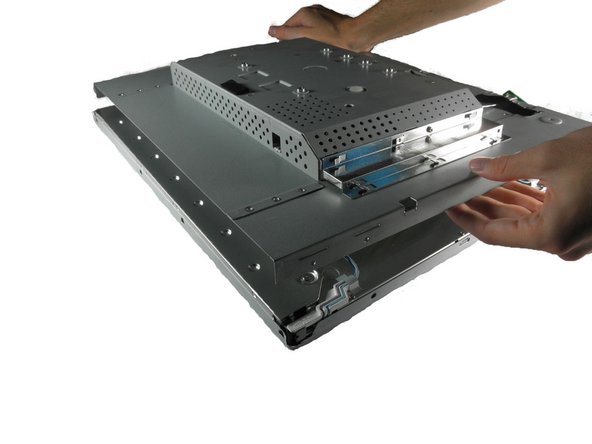
    • With the monitor facing down, gently lift the back case away from the rest of the monitor to expose the inverter board and mother board.

    • Recall that the casing is still held together by several wires. Do not attempt to fully remove the back casing.

    FixBotに聞いてみる

    コメントを追加

  9. Dell E193FPc Screen Replacement: 手順 9、 2の画像 1 Dell E193FPc Screen Replacement: 手順 9、 2の画像 2
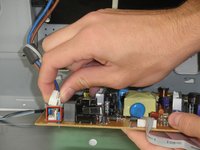
    • The inverter board is the smaller board in the corner.

    • Remove the three 7.69 mm Phillips #2 screws from the inverter board.

    • Remove the two 7.69 mm Phillips #2 grounding screws from the wire with the black connector.

    • Gently pull the inverter board away from the case. Note that the board is still connected to several components by wires.

    FixBotに聞いてみる

    コメントを追加

  10. Dell E193FPc Screen Replacement: 手順 10、 2の画像 1 Dell E193FPc Screen Replacement: 手順 10、 2の画像 2
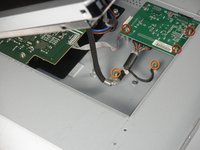
    • There is a wire connecting the motherboard to the inverter board. Squeeze both sides of the connector and pull to remove it from the socket.

    • There is another wire connecting the button board to the inverter board. Remove the second white wire connector.

    • A third wire connects the inverter board to the screen circuit board. Remove the black wire connector.

    • The inverter board can now be fully removed.

    FixBotに聞いてみる

    コメントを追加

  11. Dell E193FPc Screen Replacement, Motherboard: 手順 11、 1の画像 1
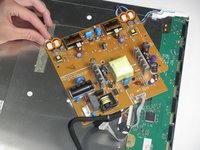
    • With the monitor facing down, remove the 5.84 mm Phillips #2 screw from the metal sheet.

    • You can now open the device up. Be careful, there are still wires attached to the motherboard.

    FixBotに聞いてみる

    コメントを追加

  12. Dell E193FPc Screen Replacement: 手順 12、 1の画像 1
    • With the monitor facing down, lift the back cover up and lay it face up, exposing the motherboard.

    • Remove the five 7.7 mm Phillips #2 screws from the motherboard.

    FixBotに聞いてみる

    コメントを追加

  13. Dell E193FPc Screen Replacement: 手順 13、 2の画像 1 Dell E193FPc Screen Replacement: 手順 13、 2の画像 2
    この手順で使用する道具:
    Tweezers
    $4.99
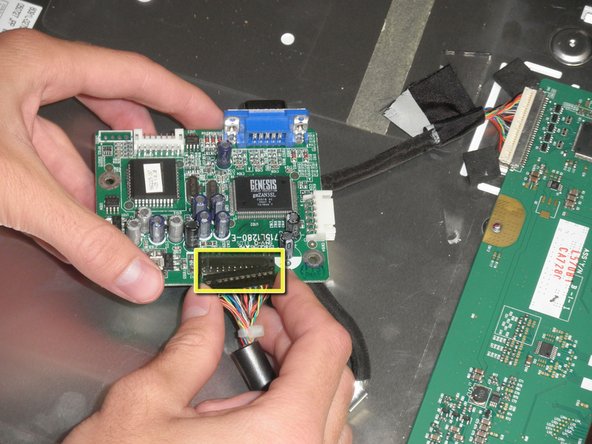
    • Squeeze the plastic prong in the middle of the motherboard with a metal tweezer, while gently prying the other side with the plastic prying tool.

    • Be careful when using the metal tweezers. Make sure you do not make contact with any part that contains metal, for it may still have a charge. Discharge all capacitors.

    • This is easiest when the monitor is positioned such that motherboard is beneath the metal casing.

    FixBotに聞いてみる

    コメントを追加

  14. Dell E193FPc Screen Replacement: 手順 14、 2の画像 1 Dell E193FPc Screen Replacement: 手順 14、 2の画像 2
    • Remove the connector to the power outlet from the motherboard.

    • Remove the 4 connectors to the metal casing from the motherboard.

    • The motherboard can now be fully removed from the casing.

    FixBotに聞いてみる

    コメントを追加

  15. Dell E193FPc Screen Replacement, Screen: 手順 15、 1の画像 1
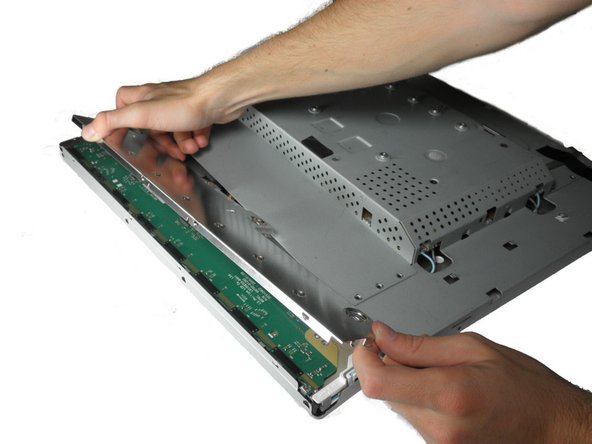
    • Remove the three 5.44 mm Phillips #00 screws on each side of the front of the metal casing.

    FixBotに聞いてみる

    コメントを追加

  16. Dell E193FPc Screen Replacement: 手順 16、 3の画像 1 Dell E193FPc Screen Replacement: 手順 16、 3の画像 2 Dell E193FPc Screen Replacement: 手順 16、 3の画像 3
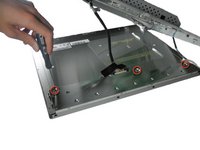
    • Remove the three 3.94 mm Phillips #00 screws from the metal sheet along the front metal casing.

    • Gently pry the metal sheet away from the metal casing and lift off the metal piece.

    FixBotに聞いてみる

    コメントを追加

  17. Dell E193FPc Screen Replacement: 手順 17、 1の画像 1
    • Use a spudger to pry the screen casing away from the metal casing.

    FixBotに聞いてみる

    コメントを追加

  18. Dell E193FPc Screen Replacement: 手順 18、 1の画像 1
    • Gently pry the screen away from the metal casing.

    • The circuit board will still be connected to the metal casing. Do not rip out the screen to avoid damage to the board.

    FixBotに聞いてみる

    コメントを追加

  19. Dell E193FPc Screen Replacement: 手順 19、 1の画像 1
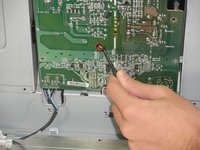
    • Squeeze the connector and remove the circuit board from the metal casing connector.

    • Use both hands to remove the circuit board. The screen is attached to the circuit board, so do not pull by the screen.

    FixBotに聞いてみる

    コメントを追加

終わりに

To reassemble your device, follow these instructions in reverse order.

キャンセル: このガイドを終了できませんでした。

5 の人々がこのガイドを完成させました。

作成者

7人の作成者と共同で作成されました。

Mackenzie Keane

メンバー登録日: 10/04/11

523 ポイント

5のガイドは作成済み

チーム

Cal Poly, Team 5-36, Amido Fall 2011 Cal Poly, Team 5-36, Amido Fall 2011人のメンバー

CPSU-AMIDO-F11S5G36

4 メンバー

12のガイドは作成済み

0件のガイドコメント

コメントを追加

統計データ:

過去 24時間: 1

過去 7 日: 9

過去 30 日: 51

今までの合計 5,869