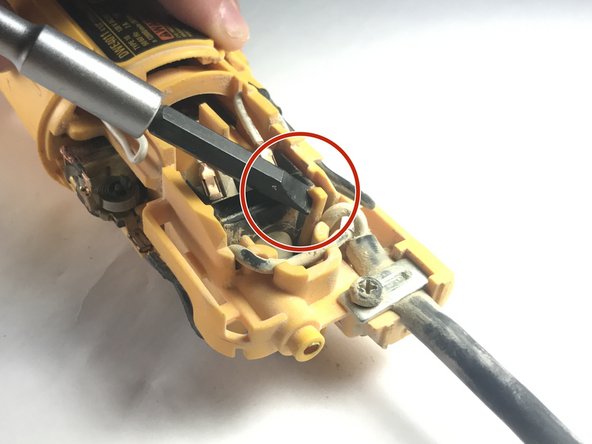
メインコンテンツにスキップ
リペアコミュニティに参加 - アカウントの作成

DeWalt DWE4011 Power Switch Replacement

必要な工具と部品

  1. DeWalt DWE4011 Power Switch Replacement, Power Switch: 手順 1、 1の画像 1
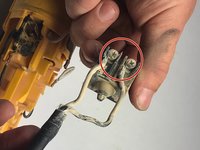
    • Turn to the bottom of the device and remove the 1 1/4" screw shown using a T15 Torx Screwdriver.

  2. DeWalt DWE4011 Power Switch Replacement: 手順 2、 1の画像 1
    • Remove the outer casing by pulling the end handle away from the field case.

  3. DeWalt DWE4011 Power Switch Replacement: 手順 3、 1の画像 1
    • Unscrew the pin that is holding the main power cord in place and remove the cord.

  4. DeWalt DWE4011 Power Switch Replacement: 手順 4、 2の画像 1 DeWalt DWE4011 Power Switch Replacement: 手順 4、 2の画像 2
    • Pull back the tab holding the switch box in place using a nylon spudger. There is one on top and bottom shown in the image.

  5. DeWalt DWE4011 Power Switch Replacement: 手順 5、 1の画像 1
    • Remove the switch box entirely from its normal position. Gently pull off the connections from the switch box to the motor.

  6. DeWalt DWE4011 Power Switch Replacement: 手順 6、 2の画像 1 DeWalt DWE4011 Power Switch Replacement: 手順 6、 2の画像 2
    • Using a small Phillips head screwdriver, remove the screws that hold the white colored wires from the power cord in place.

終わりに

To reassemble your device, follow these instructions in reverse order.

2 の人々がこのガイドを完成させました。

作成者

2人の作成者と共同で作成されました。

Kory Dalesky

メンバー登録日: 04/04/19

406 ポイント

2のガイドは作成済み

チーム

0件のガイドコメント

コメントを追加

統計データ:

過去 24時間: 2

過去 7 日: 16

過去 30 日: 67

今までの合計 1,917