はじめに
In this guide you will remove the crank arms and replace them with new ones.
必要な工具と部品
-
-
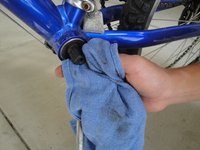
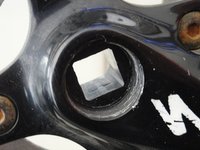
Take cap off the crank arm with flat head screw driver. It should just pop off.
 FixBotに聞いてみる
-
-
-
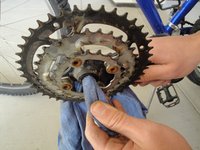
Attach the crank puller to the threads on the crank arm, hand tighten it in until it bottoms out.
-
-
-
-
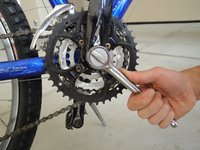
Use wrench to tighten the free end of the crank arm, pulling the crank arm off the bike.
-


5 の人々がこのガイドを完成させました。
チーム

Cal Poly, Team 5-13, Maness Fall 2010 Cal Poly, Team 5-13, Maness Fall 2010人のメンバー
CPSU-MANESS-F10S5G13
4 メンバー
21のガイドは作成済み
4件のガイドコメント
Hello, hope you can help
The resistance on my bike when going up hills is crazy I have take to a bike shop and had a full service which they did number of things changed BB along with other stuff.
Just checked it out on a ride and it still feels harder than usual on hills, on the flats it seems fine. I'm a serious triathlete and looking at going sub 9hr in Ironman Austria next week but seriously do not have the confidence in my bike now at all.
Example one week I was going up a hill doing 80 rpm and the next going up same hill and doing 50 rpm and that was a massive effort. Today went up a 10% hill and my wattage was 350+watts and my speed was 6 mph this is crazy. God if I would do go that high watts when climbing hills in Austria I would blow up.
This write up is pretty rushed as I'm pushed for time, hope you can help me on what it could be, my thoughts are now going have to get another service when out in Austria spending another £100+ and possibly still doesn't get fixed.
A short remark about how much force will then be needed to separate the old battery from the heated adhesive would be helpful. I found that even after I was able to begin the insertion of a plastic card between the battery and the case, it required a great deal of force to push the card further under the battery to complete the separation. Refer: free fnaf online
BMX cranksets are commonly sold independently to the base section (BB) and chainrings, instead of as a solitary unit 'chainset'. They comprise of the wrench arms, pivot (shaft) and any vital jolts and spacers. AssignmentGlobe
sallyjohn110 - 返信 共有