メインコンテンツにスキップ

ComNet Ericsson Panther 600P Motherboard Replacement

必要な工具と部品

  1. ComNet Ericsson Panther 600P Motherboard Replacement, Locate the release button.: 手順 1、 3の画像 1 ComNet Ericsson Panther 600P Motherboard Replacement, Locate the release button.: 手順 1、 3の画像 2 ComNet Ericsson Panther 600P Motherboard Replacement, Locate the release button.: 手順 1、 3の画像 3
    • Look for the release button on the back of the radio.

    • Press the button and pull down on the battery at the same time. The battery will come free.

  2. ComNet Ericsson Panther 600P Motherboard Replacement, Antenna: 手順 2、 1の画像 1
    • Twist the antenna counter-clockwise to unscrew it from the antenna jack.

  3. ComNet Ericsson Panther 600P Motherboard Replacement, Dials: 手順 3、 1の画像 1
    • Pull up on the dials to remove them from the underlying pegs.

  4. ComNet Ericsson Panther 600P Motherboard Replacement, Exterior Case: 手順 4、 3の画像 1 ComNet Ericsson Panther 600P Motherboard Replacement, Exterior Case: 手順 4、 3の画像 2 ComNet Ericsson Panther 600P Motherboard Replacement, Exterior Case: 手順 4、 3の画像 3
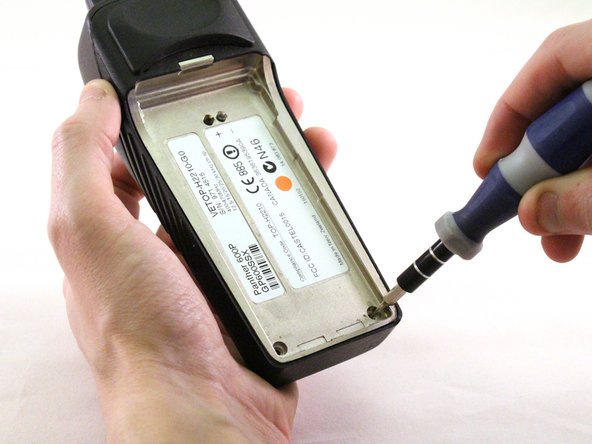
    • Using a T15 Torx screwdriver, unscrew the two screws.

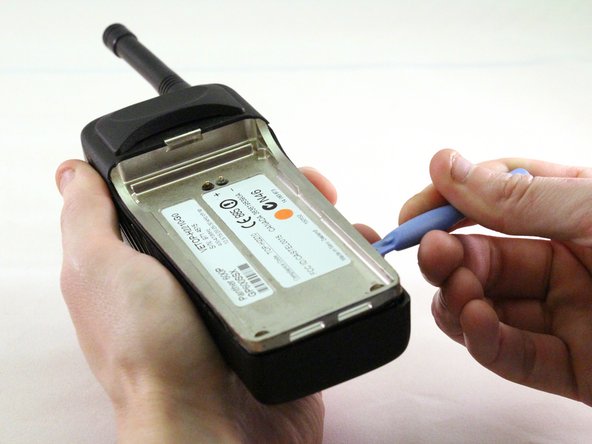
    • Using a plastic opening tool, pry the internal case from the external case.

  5. ComNet Ericsson Panther 600P Motherboard Replacement, Front Case - Internal: 手順 5、 3の画像 1 ComNet Ericsson Panther 600P Motherboard Replacement, Front Case - Internal: 手順 5、 3の画像 2 ComNet Ericsson Panther 600P Motherboard Replacement, Front Case - Internal: 手順 5、 3の画像 3
    • Using the plastic opening tool, pry the case apart.

  6. ComNet Ericsson Panther 600P Motherboard Replacement, Ribbon: 手順 6、 2の画像 1 ComNet Ericsson Panther 600P Motherboard Replacement, Ribbon: 手順 6、 2の画像 2
    • The keypad chip is attached to the motherboard by a ribbon.

    • Pull ribbon with tweezers to detach from back panel.

  7. ComNet Ericsson Panther 600P Motherboard Replacement, Screen: 手順 7、 3の画像 1 ComNet Ericsson Panther 600P Motherboard Replacement, Screen: 手順 7、 3の画像 2 ComNet Ericsson Panther 600P Motherboard Replacement, Screen: 手順 7、 3の画像 3
    • Screen will be attached by a ribbon.

    • Pull screen up and away from motherboard to detach.

  8. ComNet Ericsson Panther 600P Motherboard Replacement, Antenna, Volume, Channel Nuts: 手順 8、 3の画像 1 ComNet Ericsson Panther 600P Motherboard Replacement, Antenna, Volume, Channel Nuts: 手順 8、 3の画像 2 ComNet Ericsson Panther 600P Motherboard Replacement, Antenna, Volume, Channel Nuts: 手順 8、 3の画像 3
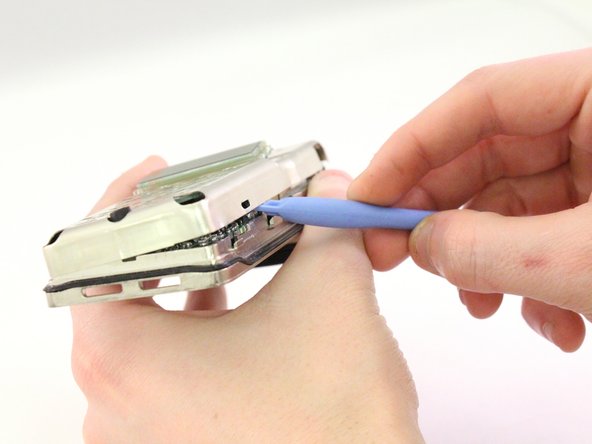
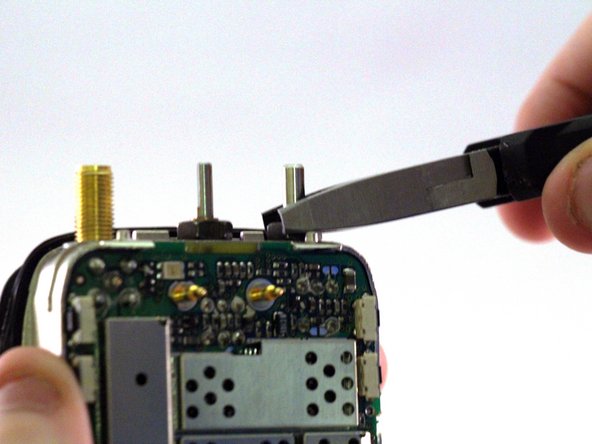
    • Remove the rubber O-rings from the antenna jack, volume switch, and channel switch.

    • Once the rubber O-rings have been removed, use small needle nose pliers to unscrew the nuts on the antenna jack, volume switch, and channel switch.

    • There are washers underneath the nuts on the antenna jack, volume switch, and channel switch. Set these washers aside.

  9. ComNet Ericsson Panther 600P Motherboard Replacement: 手順 9、 1の画像 1
    • Using a T15 Torx screwdriver, unscrew the 3.8mm screw from the case.

  10. ComNet Ericsson Panther 600P Motherboard Replacement, Internal Case - Back: 手順 10、 3の画像 1 ComNet Ericsson Panther 600P Motherboard Replacement, Internal Case - Back: 手順 10、 3の画像 2 ComNet Ericsson Panther 600P Motherboard Replacement, Internal Case - Back: 手順 10、 3の画像 3
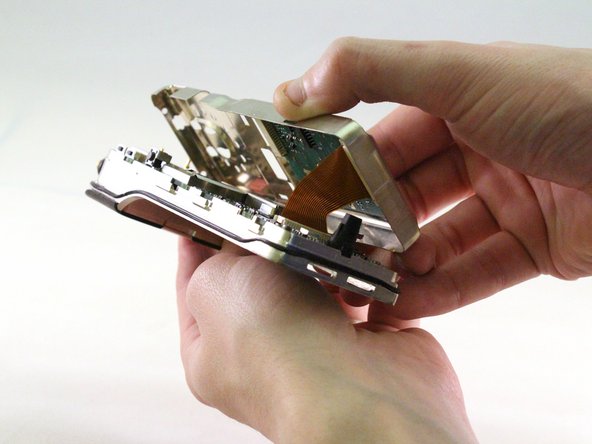
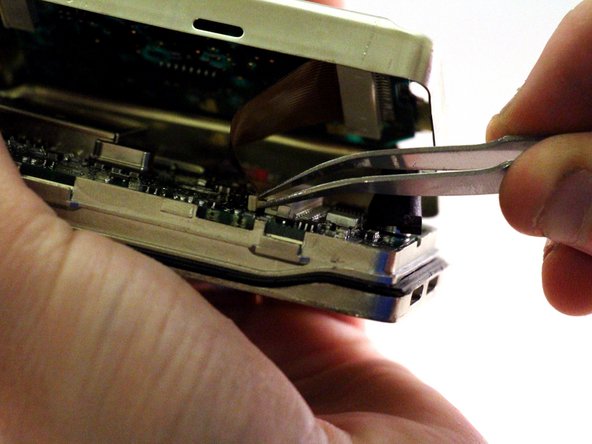
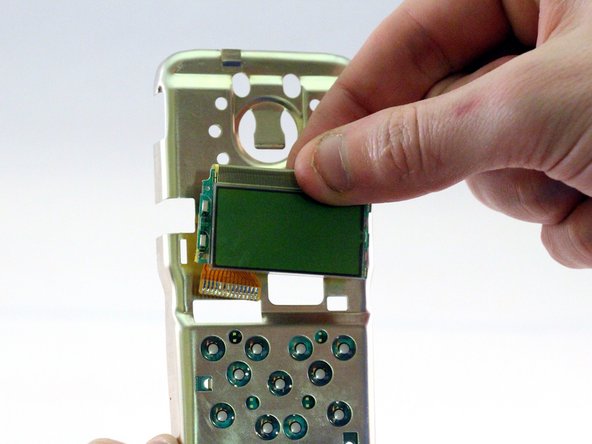
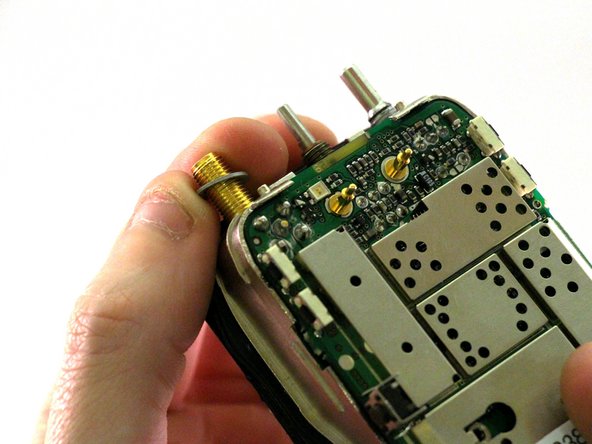
    • Using any convenient hand-placement, pull the motherboard away from the case.

    • The antenna jack, volume dial, and channel dial are attached to the motherboard. Be sure to pull the motherboard downward so they clear their respective slots in the case.

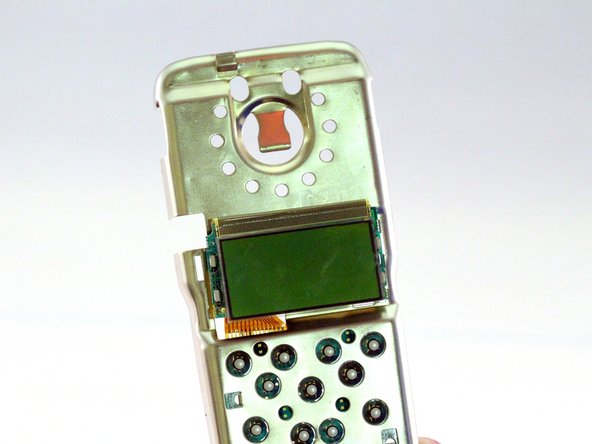
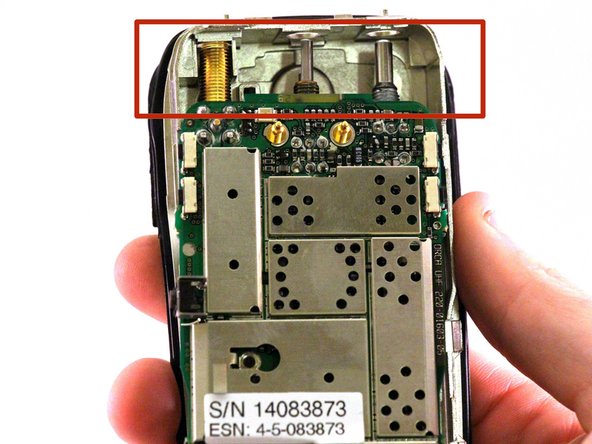
    • Lift the motherboard completely free of the case.

終わりに

To reassemble your device, follow these instructions in reverse order.

作成者

3人の作成者と共同で作成されました。

Tim Moreau

メンバー登録日: 01/13/15

126 ポイント

1ガイドが承認済み

チーム

0 件のコメント

コメントを追加

統計データ:

過去 24時間: 0

過去 7 日: 2

過去 30 日: 5

今までの合計 315