メインコンテンツにスキップ
リペアコミュニティに参加 - アカウントの作成

Cleaning Function Buttons

必要な工具と部品

    1. Cleaning Function Buttons, Front and Rear Cover: 手順 1、 2の画像 1 Cleaning Function Buttons, Front and Rear Cover: 手順 1、 2の画像 2
      • Remove wrist strap and battery.

      FixBotに聞いてみる

      コメントを追加

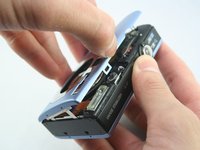
    2. Cleaning Function Buttons: 手順 2、 3の画像 1 Cleaning Function Buttons: 手順 2、 3の画像 2 Cleaning Function Buttons: 手順 2、 3の画像 3
      • Remove 2 screws from each side of the camera (4 total, 0.102 in).

      • Remove 2 screws from the bottom on the camera (0.138 in).

      • Do not mix the 4 side screws with the 2 bottoms ones; they are different sizes.

      FixBotに聞いてみる

      コメントを追加

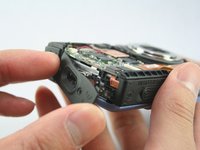
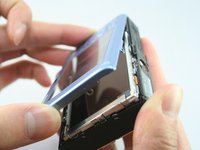
    3. Cleaning Function Buttons: 手順 3、 3の画像 1 Cleaning Function Buttons: 手順 3、 3の画像 2 Cleaning Function Buttons: 手順 3、 3の画像 3
      • Gently pull off the front cover.

      • The plate on the side should come off.

      • Gently pull off the back cover.

      FixBotに聞いてみる

      コメントを追加

    4. Cleaning Function Buttons: 手順 4、 1の画像 1
      • The cases should now be removed.

      FixBotに聞いてみる

      コメントを追加

    1. Cleaning Function Buttons, Cleaning Function Buttons: 手順 5、 1の画像 1
      • Clean around the function buttons with a cotton swab dipped in isopropyl alcohol.

      FixBotに聞いてみる

      コメントを追加

終わりに

To reassemble your device, follow these instructions in reverse order.

キャンセル: このガイドを終了できませんでした。

ある他の人がこのガイドを完成しました。

作成者

4人の作成者と共同で作成されました。

Tyler Grossheim

メンバー登録日: 01/25/11

1,623 ポイント

6のガイドは作成済み

チーム

Cal Poly, Team 3-32, Regan Winter 2011 Cal Poly, Team 3-32, Regan Winter 2011人のメンバー

CPSU-REGAN-W11S3G32

3 メンバー

24のガイドは作成済み

0件のガイドコメント

コメントを追加

統計データ:

過去 24時間: 5

過去 7 日: 9

過去 30 日: 30

今までの合計 2,314