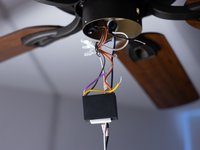
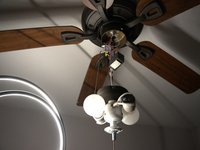
メインコンテンツにスキップ

Ceiling Fan Pull Chain Switch Replacement

必要な工具と部品

  1. Ceiling Fan Pull Chain Switch Replacement, Pull Chain Switch: 手順 1、 2の画像 1 Ceiling Fan Pull Chain Switch Replacement, Pull Chain Switch: 手順 1、 2の画像 2
    • Caution: Turn off the power from the circuit breaker and turn off any light switches that provide power to the ceiling fan.

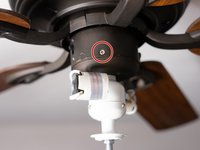
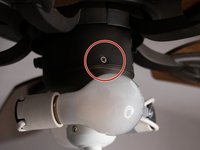
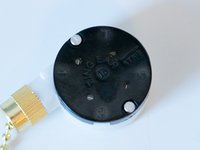
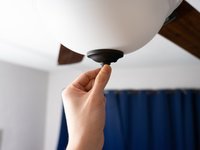
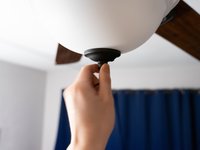
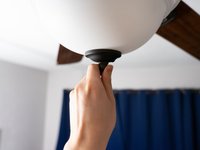
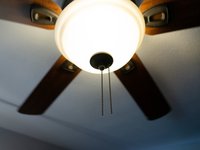
    • Remove the white cover by unscrewing the nut on the bottom from where the chain is hanging.

  2. Ceiling Fan Pull Chain Switch Replacement: 手順 2、 3の画像 1 Ceiling Fan Pull Chain Switch Replacement: 手順 2、 3の画像 2 Ceiling Fan Pull Chain Switch Replacement: 手順 2、 3の画像 3
    • Caution: Let the bulbs cool off before you remove them.

    • Remove the bulbs from their sockets.

  3. Ceiling Fan Pull Chain Switch Replacement: 手順 3、 2の画像 1 Ceiling Fan Pull Chain Switch Replacement: 手順 3、 2の画像 2
    • Remove the screws around the base.

    • Remove the fan housing.

  4. Ceiling Fan Pull Chain Switch Replacement: 手順 4、 1の画像 1
    • Pull the switch out of the fan housing, leaving the wires attached.

  5. Ceiling Fan Pull Chain Switch Replacement: 手順 5、 3の画像 1 Ceiling Fan Pull Chain Switch Replacement: 手順 5、 3の画像 2 Ceiling Fan Pull Chain Switch Replacement: 手順 5、 3の画像 3
    • Cut the colored wires from the switch using a pair of wire cutters.

    • On some switch models, the wires can be detached by pulling.

  6. Ceiling Fan Pull Chain Switch Replacement: 手順 6、 3の画像 1 Ceiling Fan Pull Chain Switch Replacement: 手順 6、 3の画像 2 Ceiling Fan Pull Chain Switch Replacement: 手順 6、 3の画像 3
    • Note the wire colors and the terminal they attach to on the old switch.

    • 1 - Red

    • 2 - Purple

    • 3 - Yellow

    • L - Black

  7. Ceiling Fan Pull Chain Switch Replacement: 手順 7、 1の画像 1
    • Attach the colored wires to the new switch's respective terminals.

  8. Ceiling Fan Pull Chain Switch Replacement: 手順 8、 2の画像 1 Ceiling Fan Pull Chain Switch Replacement: 手順 8、 2の画像 2
    • Put back the switch in the hole in the fan housing from the inside.

    • Tighten up the screws on the outside.

  9. Ceiling Fan Pull Chain Switch Replacement: 手順 9、 3の画像 1 Ceiling Fan Pull Chain Switch Replacement: 手順 9、 3の画像 2 Ceiling Fan Pull Chain Switch Replacement: 手順 9、 3の画像 3
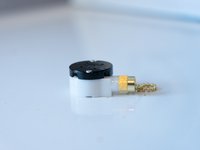
    • Put back the white cover and then tighten up the nut at the bottom of the cover from where the chain is hanging.

  10. Ceiling Fan Pull Chain Switch Replacement: 手順 10、 2の画像 1 Ceiling Fan Pull Chain Switch Replacement: 手順 10、 2の画像 2
    • Turn the power back on and test the switch to find if it is working or not.

ゴール

2 の人々がこのガイドを完成させました。

作成者

3人の作成者と共同で作成されました。

Berkeli Alashov

メンバー登録日: 02/25/21

226 ポイント

1ガイドが承認済み

チーム

University of North Texas, Team S1-G19, Raign Spring 2021 University of North Texas, Team S1-G19, Raign Spring 2021人のメンバー

UNT-RAIGN-S21S1G19

2 メンバー

2のガイドは作成済み

0 件のコメント

コメントを追加

統計データ:

過去 24時間: 13

過去 7 日: 118

過去 30 日: 299

今までの合計 10,847