メインコンテンツにスキップ

Caterpillar B15 Rear Facing Camera Replacement

必要な工具と部品

  1. Caterpillar B15 Rear Facing Camera Replacement, Caterpillar B15 Teardown: 手順 1、 1の画像 1
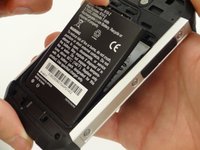
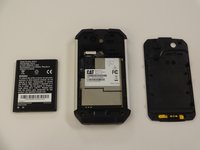
    • Place the phone screen-side down and place thumb on the yellow and black switch. Slide the switch to the right to unlock the back covering for removal.

  2. Caterpillar B15 Rear Facing Camera Replacement: 手順 2、 2の画像 1 Caterpillar B15 Rear Facing Camera Replacement: 手順 2、 2の画像 2
    • Remove the back covering by gently lifting upwards from the bottom of the back covering. The back will snap off and the battery is exposed.

  3. Caterpillar B15 Rear Facing Camera Replacement: 手順 3、 2の画像 1 Caterpillar B15 Rear Facing Camera Replacement: 手順 3、 2の画像 2
    • Place index finger at the top edge of the battery and gently lift upwards. The battery will slide cleanly out of the phone.

  4. Caterpillar B15 Rear Facing Camera Replacement: 手順 4、 2の画像 1 Caterpillar B15 Rear Facing Camera Replacement: 手順 4、 2の画像 2
    • With the back cover removed, locate and remove the Phillips screw pictured top-center, and the two torx screws above and to either side of the Phillips screw. A T-5 bit is required for removal of the torx screws.

    • WARNING: Proceeding beyond this point will void the warranty for this device.

  5. Caterpillar B15 Rear Facing Camera Replacement: 手順 5、 1の画像 1
    • Next, remove the two torx (star-shaped) screws below the battery. These screws help to secure the outer shell of the phone around the motherboard. A T-5 bit is required for removal.

  6. Caterpillar B15 Rear Facing Camera Replacement: 手順 6、 1の画像 1
    • There are three remaining screws on each long side of the phone. A small hex bit is required for removal.

  7. Caterpillar B15 Rear Facing Camera Replacement: 手順 7、 1の画像 1
    • There is one more Phillips screw remaining. It is located beneath the headphone cover.

  8. Caterpillar B15 Rear Facing Camera Replacement: 手順 8、 1の画像 1
    • With all screws removed, the back and side pieces should come off the front of the phone, exposing the motherboard and various components as shown.

  9. Caterpillar B15 Rear Facing Camera Replacement: 手順 9、 1の画像 1
    • With all screws removed, move around the motherboard, carefully prying it from the remaining shell.

  10. Caterpillar B15 Rear Facing Camera Replacement: 手順 10、 1の画像 1
    • Finally, disconnect the chip seen in the upper right, and the board should pull away from the rest of the phone.

  11. Caterpillar B15 Rear Facing Camera Replacement: 手順 11、 1の画像 1
    • Congratulations. You have successfully disassembled the Caterpillar B15.

  12. Caterpillar B15 Rear Facing Camera Replacement, Rear Facing Camera: 手順 12、 2の画像 1 Caterpillar B15 Rear Facing Camera Replacement, Rear Facing Camera: 手順 12、 2の画像 2
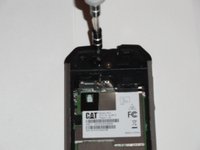
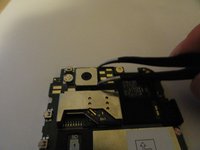
    • Locate the camera module (pictured). To access the component to be replaced, the protective metal casing must first be removed. There are small gaps at each corner in which tweezers will fit. Choose any two, and slide this piece off.

  13. Caterpillar B15 Rear Facing Camera Replacement: 手順 13、 1の画像 1
    • The module is also held in place by two small metal tabs to either side. To undo these, bend the bracket on both sides ever so slightly.

  14. Caterpillar B15 Rear Facing Camera Replacement: 手順 14、 1の画像 1
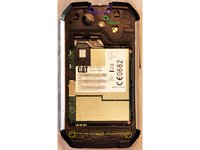
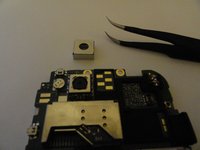
    • The camera module will now easily pull free.

    • When installing the new camera module, be sure to resecure the brackets on either side. A faint click should also be heard when pressing the new piece into its socket. These are the tabs hooking onto the brackets, and will signify it is in securely.

終わりに

To reassemble your device, follow these instructions in reverse order.

3 の人々がこのガイドを完成させました。

作成者

1人の作成者と共同作成されました。

Geoffrey Mosdell

メンバー登録日: 10/06/14

1,119 ポイント

5のガイドは作成済み

チーム

USF Tampa, Team 4-7, Brown Fall 2014 USF Tampa, Team 4-7, Brown Fall 2014人のメンバー

USFT-BROWN-F14S4G7

4 メンバー

10のガイドは作成済み

0 件のコメント

コメントを追加

統計データ:

過去 24時間: 0

過去 7 日: 0

過去 30 日: 5

今までの合計 2,342