はじめに
This guide will show you how to properly remove and replace the Casio Exilim EX-Z80 camera lens in the case that the lens has been broken or scratched. It will require the use of the Casio Exilim EX-Z80 Back and Front Cover Replacement Guide.
必要な工具と部品
-
-
-
Remove the four 3 mm black screws from the bottom of the camera using a Phillips #000 screwdriver.
-
Open the battery compartment with your thumb or index finger.
-
Remove the single 2 mm silver screw that is now exposed using a Phillips #000 screwdriver.
 FixBotに聞いてみる
-
-
-
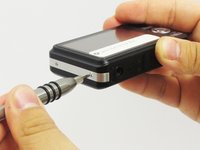
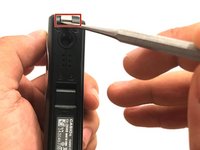
Open the USB port tab.
-
Remove the single 2 mm silver screw using a Phillips #000 screwdriver.
-
-
-
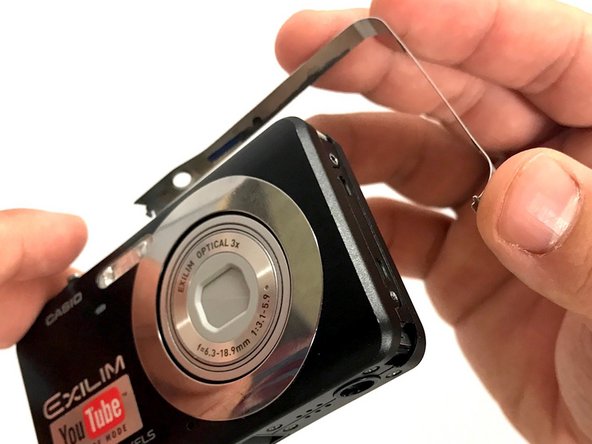
Carefully remove the silver strip from left side. Open the battery cover and remove the metal strip with fingers by sliding it to the left.
-
-
-
-
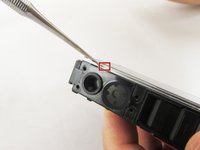
With the metal spudger, pry out the edge of the silver strip at the bottom right side of the camera.
-
Carefully remove the remaining part of the metal strip.
-
-
-
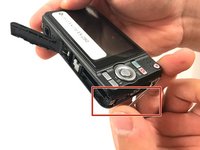
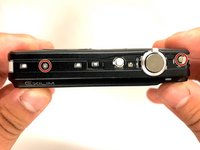
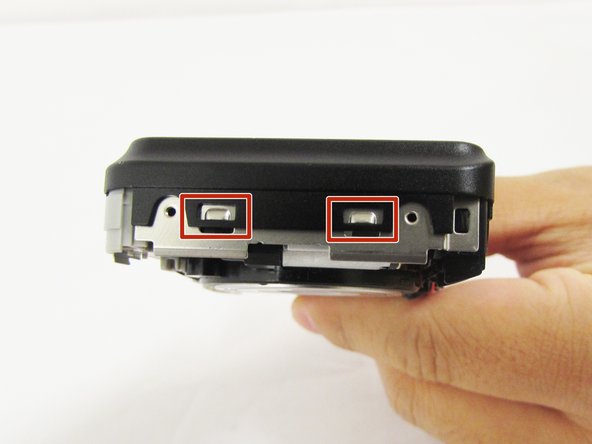
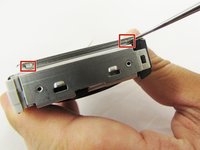
Remove the two 2 mm silver screws from the top corners of the camera using a Phillips #000 screwdriver.
-
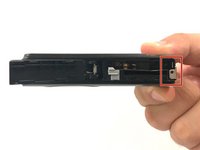
Remove the three 2 mm screws from the left side using a Phillips #000 screwdriver.
-
-
-
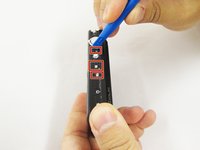
Using a small opening tool carefully release all lock tabs at the top and on the side of the camera from their locked position.
-
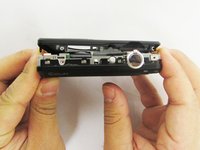
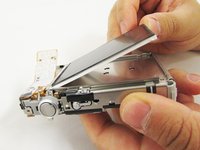
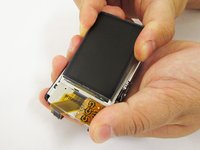
Using your hands, carefully separate the front and back panel from the camera.
-
-
-
-
この手順で使用する道具:Tweezers$4.99
-
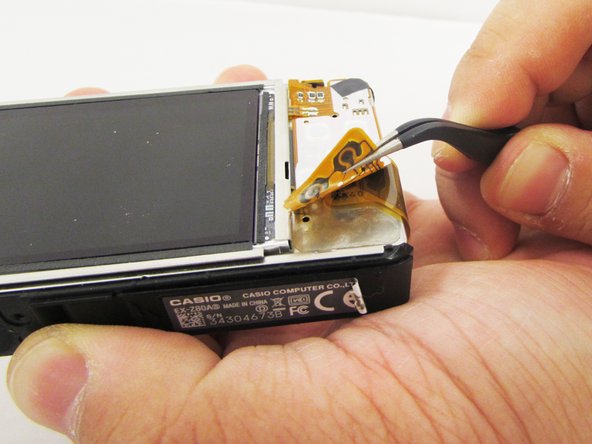
Gently flip the wide button cable up from the display cable.
-
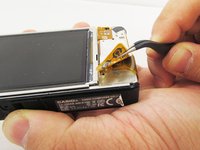
Lift the brown retention flap on the display cable ZIF connector with tweezers or an ESD-safe tool.
-
Carefully pull the display cable from its connector.
-
-
-
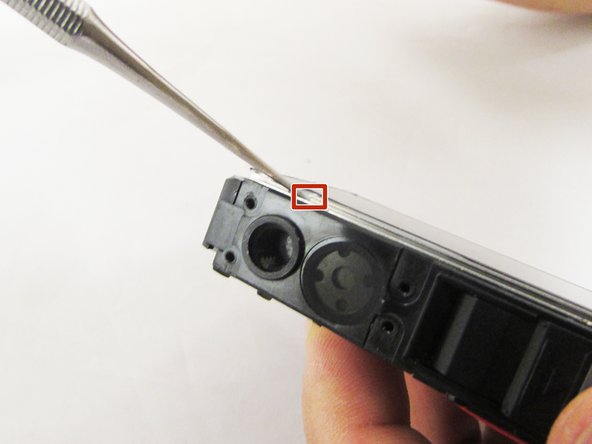
Pry the square holes that hold the LCD screen up with a metal spudger until you see the raised tabs in the metal holes.
-
Repeat the process with the holes around the four edges of the camera.
-
Insert the metal spudger into the gap of the metal case and pry up the LCD screen.
-
-
-
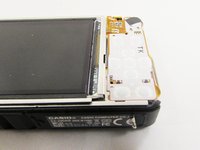
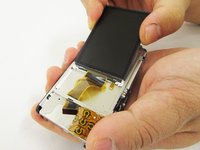
Hold up the LCD screen in one hand and hold back the button cable with the other.
-
Pull on the LCD screen until the yellow display cable is fully out of the metal case.
-
-
-
-
-
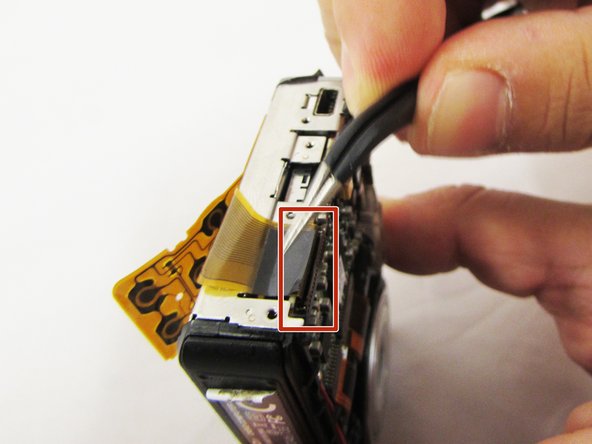
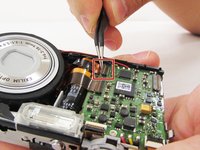
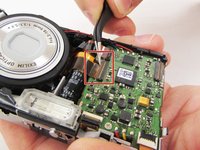
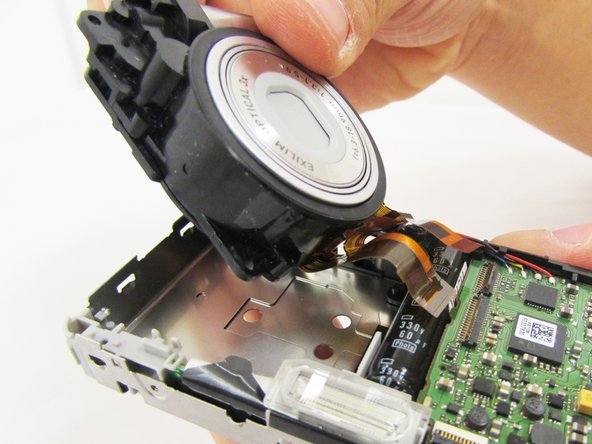
Lift the retaining flaps on the two ZIF connectors that secure the the lens ribbon cables to the motherboard.
-
Carefully pull the two ribbon cables from their sockets on the motherboard.
-
-
この手順で使用する道具:Heavy-Duty Spudger$4.99
-
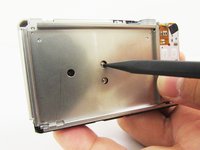
Turn the camera around and locate the holes on the metal panel.
-
With a heavy duty spudger, gently poke through the holes, releasing the lens from the main portion of the camera.
-
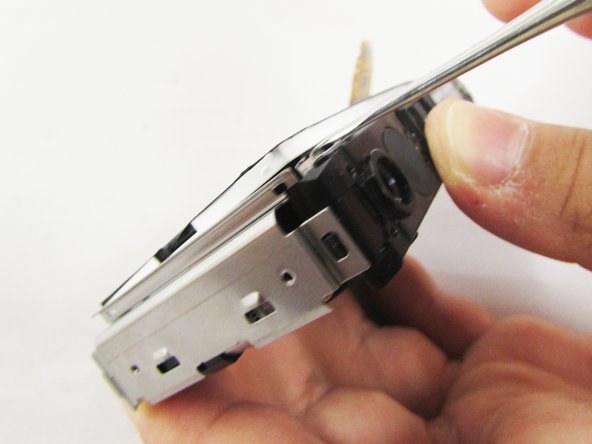
With your index finger and thumb gently pull the full lens out.
-
-


To reassemble your device, follow these instructions in reverse order.

チーム

Eastern Washington University, Team S1-G5, Crane Spring 2017 Eastern Washington University, Team S1-G5, Crane Spring 2017人のメンバー
EWU-CRANE-S17S1G5
3 メンバー
10のガイドは作成済み