メインコンテンツにスキップ
リペアコミュニティに参加 - アカウントの作成

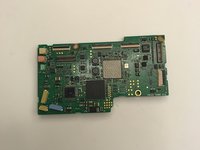
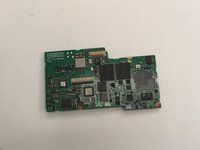
Canon Powershot Pro1 Motherboard Replacement

必要な工具と部品

    1. Canon Powershot Pro1 Motherboard  Replacement, Battery: 手順 1、 1の画像 1
      • Locate the battery compartment cover on the right hand side of the camera. The cover features the text: “CF/BATT.OPEN”.

      FixBotに聞いてみる

      コメントを追加

    2. Canon Powershot Pro1 Motherboard  Replacement: 手順 2、 1の画像 1
      • There is an arrow beside the text. Using your hands, slide the cover in the direction of this arrow.

      FixBotに聞いてみる

      コメントを追加

    3. Canon Powershot Pro1 Motherboard  Replacement: 手順 3、 1の画像 1
      • Pull the cover toward you. After doing so you will see the battery sitting inside the compartment.

      FixBotに聞いてみる

      コメントを追加

    4. Canon Powershot Pro1 Motherboard  Replacement: 手順 4、 1の画像 1
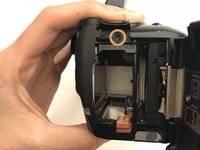
      • Press the orange battery lock inside the compartment.

      • Remove the battery.

      • This photo show the battery compartment after the battery has been removed.

      FixBotに聞いてみる

      コメントを追加

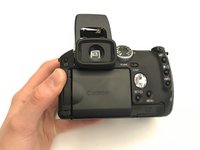
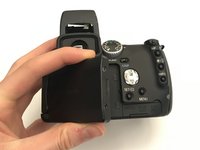
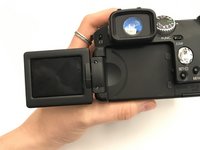
    1. Canon Powershot Pro1 Motherboard  Replacement, Motherboard: 手順 5、 3の画像 1 Canon Powershot Pro1 Motherboard  Replacement, Motherboard: 手順 5、 3の画像 2 Canon Powershot Pro1 Motherboard  Replacement, Motherboard: 手順 5、 3の画像 3
      • Open the screen to access the underside of the camera.

      FixBotに聞いてみる

      コメントを追加

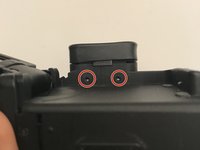
    2. Canon Powershot Pro1 Motherboard  Replacement: 手順 6、 3の画像 1 Canon Powershot Pro1 Motherboard  Replacement: 手順 6、 3の画像 2 Canon Powershot Pro1 Motherboard  Replacement: 手順 6、 3の画像 3
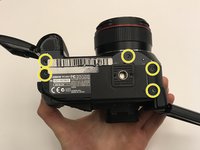
      • Using the Phillips #000 screwdriver:

      • Remove two 1.00 mm screws under the viewfinder.

      • Remove one screw in the battery compartment.

      • Remove five screws on the bottom of the camera.

      • Remove one screw on the left side of the camera (opposite the battery compartment).

      FixBotに聞いてみる

      コメントを追加

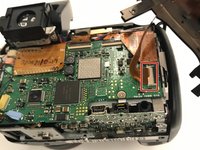
    3. Canon Powershot Pro1 Motherboard  Replacement: 手順 7、 3の画像 1 Canon Powershot Pro1 Motherboard  Replacement: 手順 7、 3の画像 2 Canon Powershot Pro1 Motherboard  Replacement: 手順 7、 3の画像 3
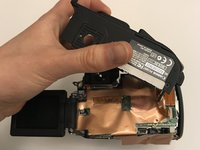
      • Completely detach the cover from the motherboard.

      • Lift the inside cover to reveal the motherboard.

      • Detach the bottom right ribbon cable from the motherboard.

      FixBotに聞いてみる

      コメントを追加

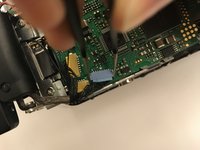
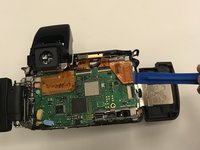
    4. Canon Powershot Pro1 Motherboard  Replacement: 手順 8、 2の画像 1 Canon Powershot Pro1 Motherboard  Replacement: 手順 8、 2の画像 2
      この手順で使用する道具:
      Tweezers
      $4.99
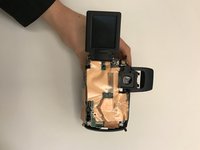
      • Lift up the gold insulation cover to reveal the motherboard.

      • Use tweezers and an iFixit opening tool, detach any wire connectors and ribbon cables from the motherboard.

      FixBotに聞いてみる

      コメントを追加

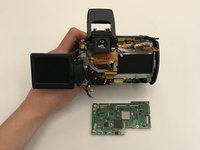
    5. Canon Powershot Pro1 Motherboard  Replacement: 手順 9、 3の画像 1 Canon Powershot Pro1 Motherboard  Replacement: 手順 9、 3の画像 2 Canon Powershot Pro1 Motherboard  Replacement: 手順 9、 3の画像 3
      • Once detached from all connectors and ribbon cables, remove the motherboard.

      FixBotに聞いてみる

      コメントを追加

終わりに

To reassemble your device, follow these instructions in reverse order.

キャンセル: このガイドを終了できませんでした。

2 の人々がこのガイドを完成させました。

作成者

4人の作成者と共同で作成されました。

Seana Meegan

メンバー登録日: 09/06/19

677 ポイント

5のガイドは作成済み

チーム

University of Alabama, Team S1-G1, Bedsole Fall 2019 University of Alabama, Team S1-G1, Bedsole Fall 2019人のメンバー

UA-BEDSOLE-F19S1G1

3 メンバー

10のガイドは作成済み

0件のガイドコメント

コメントを追加

統計データ:

過去 24時間: 3

過去 7 日: 11

過去 30 日: 38

今までの合計 1,537